Designing a Label
31
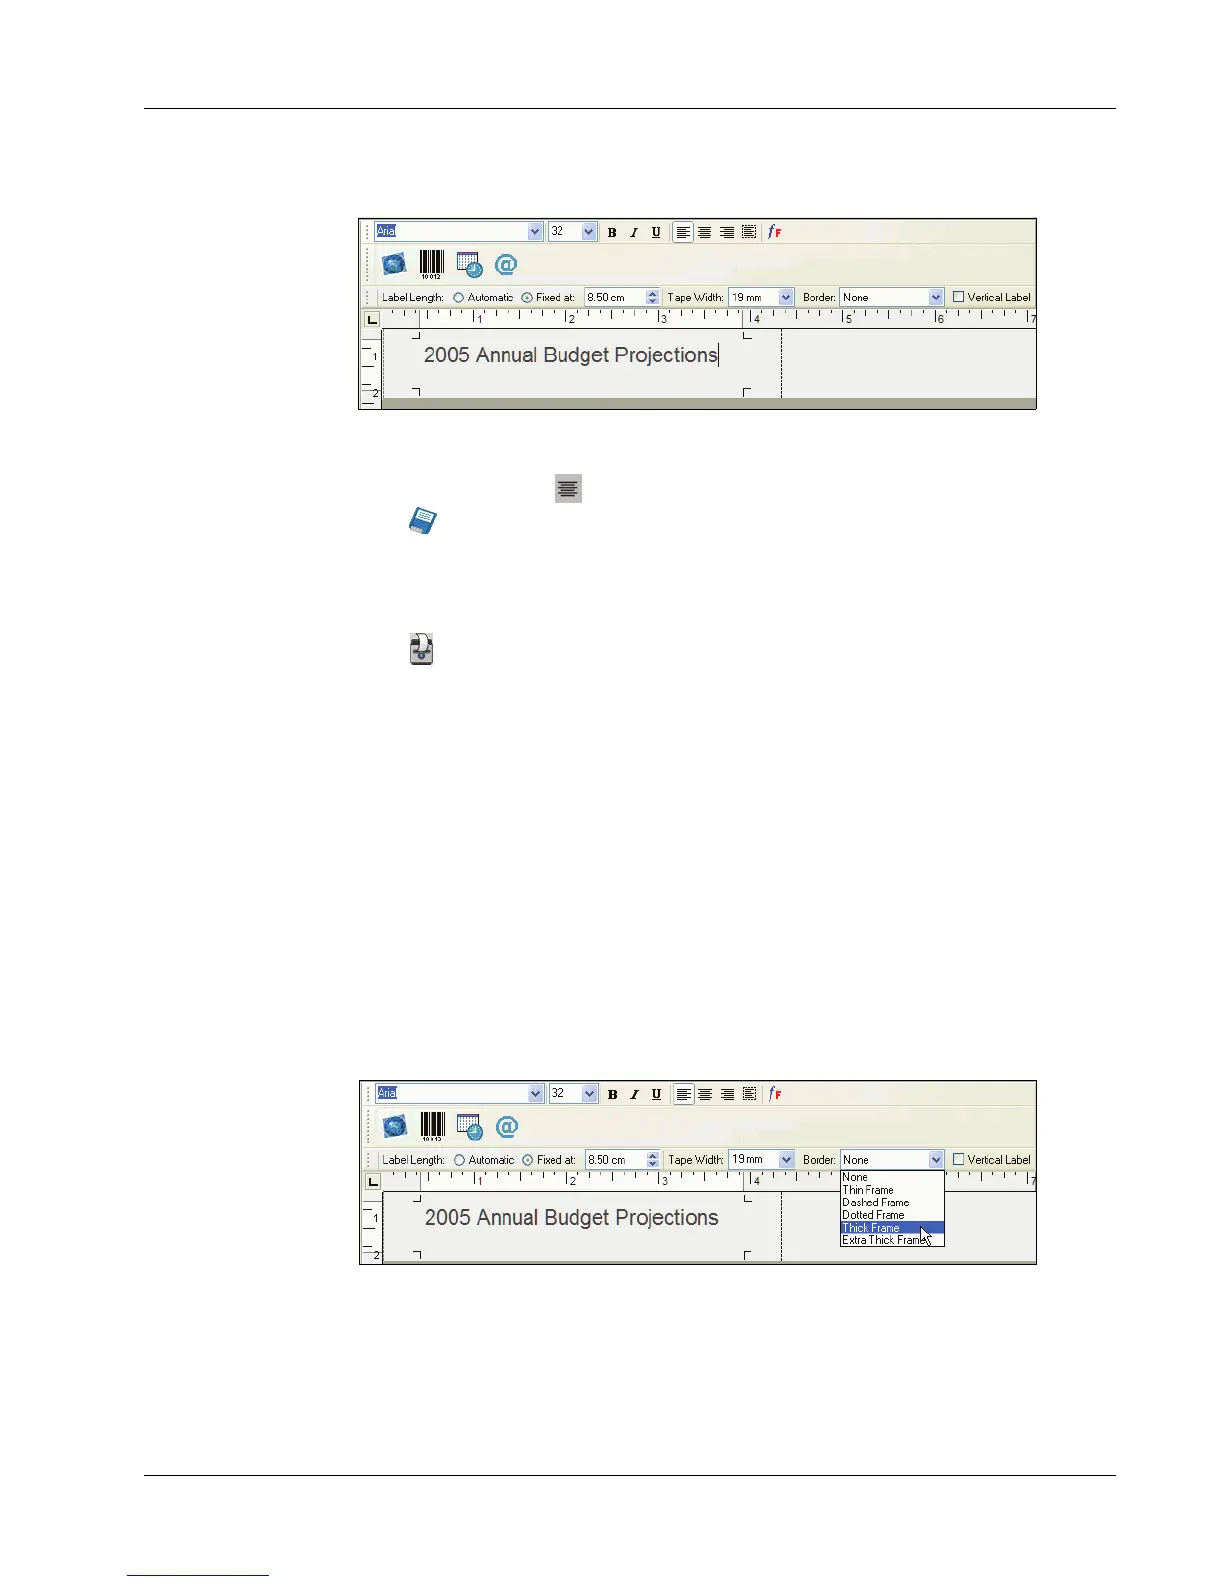
4 Type 2005 Annual Budget Projections in the main window.
As the line of text becomes too long for a fixed width label at the current font size, the font size
will automatically decrease to fit the text on one line.
5 To center the text, click .
6 Click or select Save from the File menu.
The Save File dialog box appears.
7 Type a name for the label and click Save.
Now let’s print the label.
8 Click or select Print from the File menu.
Now that you have created and saved your label, the following sections will introduce additional
features you can use to customize your labels.
Additional Formatting Features
To further customize your labels, you can add borders, symbols, graphics, barcodes, and even date
and time stamps. You can also choose to print the label vertically.
Adding Borders
You can choose to add one of several pre-defined borders to your label. When you add a border, it
surrounds the text and may cause the text to decrease in size.
To add a border
1 Place the cursor anywhere on the label.
2 Select a border style from the Borders drop-down menu.