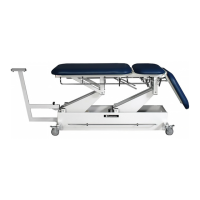
Dynatron® 850plus & 550plus
Installation & Features
18
Quick Reference of Special Key Presses
The following is a brief list of special key presses available with this device. These options are explained in
detail where they apply in the treatment instructions later in this manual. NOTE: Where two keys are
required (ie, FUNCTION-STOP) you must press both keys simultaneously to achieve the result.
KEY PRESS RESULT DESCRIPTION
FUNCTION-STOP
STOP TREATMENT Stop one treatment
FUNCTION-HI VOLT
CHANGE HIGH VOLT POLARITY Change high volt polarity. Repeat to change again.
FUNCTION-TIME CONDUCTANCE BAR GRAPH
Press during IFC, premod or mcrocurrent treatment to view
conductance bar graph. Press TIME to return to normal display.
FUNCTION-SOUND
HEAD WARMING ON/OFF
Set head warming feature to on (HD 1) or off (HD 0)
SOUND-TARGET
ULTRASOUND COUPLING BAR
GRAPH
During an ultrasound treatment only, press to view the ultrasound
coupling bar graph. Press TIME to return to normal display.
SOUND-HI/LO keys
SOUNDHEAD TEMPERATURE BAR
GRAPH
During an ultrasound treatment, press to view the ultrasound head
temperature bar graph. Press TIME to return to normal display.
FUNCTION DISPLAY WATTS or W/cm2
During ultrasound treatment hold for 2 seconds to change
ultrasound power display from w/cm
2
to Watts or reverse.
FUNCTION-
TARGET/SWEEP key
TEST LEADS
Enter the Lead Test Function. Then press START to begin lead
test, and press STOP to exit the lead test function. NEVER DO
THIS WHILE ELECTRODES ARE ATTACHED TO PATIENT.
FUNCTION-MICRO
CHANGE MICROCURRENT
POLARITY
Change microcurrent polarity. Repeat to change again.
MICRO AUDIO TONE ON/OFF
During a microcurrent treatment, turn audio tone on and off.
FUNCTION-INTENSITY
UP & DOWN ARROW
KEYS
CHANGE VOLUME
Change loudness of tone (during microcurrent treatment only)
START SAVE NEW DEFAULT SETTINGS
Hold for 2 seconds to save defaults for current treatment.
The following key presses are applied only when powering up the device:
AT POWER ON, HOLD DOWN THE FOLLOWING KEYS WHILE THE DEVICE STARTS UP:
TARGET/SWEEP LEAD TEST MODE
Press and hold on power up to enter Lead Test feature.
START RESTORE FACTORY SETTINGS
Press and hold on power up and wait for beep to restore factory
default settings.
FUNCTION ENTER CALIBRATION MODE
Press and hold on power up to enter soundhead calibration mode
(for technicians only)
ULTRASOUND DUTY
CYCLE KEY
ENTER SOUNDHEAD
PARAMETERS
Press and hold on power up to enter soundhead parameter entry
mode (for technicians only)
FUNCTION-TIME MODE
KEY
(Rev 1.02 and later)
DISABLE CONDUCTANCE BAR
GRAPH
Press and hold these keys at the same timeto disable the
conductance bar graph for treatment setup (the graph will still be
available for viewing after a treatment has started). After the
device starts up, select 1 (in the intensity screen) to turn the option
on and 0 to turn the option off.
FUNCTION-INTENSITY
DOWN ARROW
(Rev 1.02 and later)
DISABLE ULTRASOUND COUPLING
DETECTION
Press and hold these keys to disable the ultrasound coupling
detection feature. The Time display will show the current setting
briefly: CP1=feature on, CP0=feature off. Repeat this step to
revert to the prior setting.