Dynatron® 850plus & 550plus
MICROCURRENT - Treatment Instructions
42
Microcurrent Instructions
WARNING
• NEVER turn the power on or off while the unit is connected to the patient.
• Always STOP a treatment before removing or attaching electrodes or leads.
• Never use worn or damaged leads or electrodes as these may result in injury to the
patient.
• See “Contraindications, Warnings, and Precautions” in this manual before administering a
treatment to a patient.
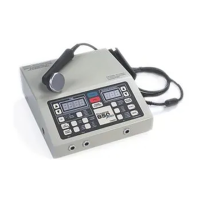
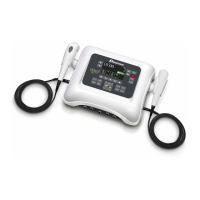
Microcurrent treatments may be delivered using either electrodes or optional probes. If you
are not familiar with the operation of the probes see “How to Use Microcurrent Probes” later
in this section. For treatment with electrodes, plug one lead into the Channel 1 jack, and
place the two electrodes on the patient before setting up the treatment. For treatment with
probes, plug the microcurrent probe into its own output jack on the left side of the device.
During the microcurrent treatment the current is delivered to both Channel 1 and to the probe
outputs simultaneously. Therefore, Channel 1 is unavailable for any other treatment while
any microcurrent treatment is in progress (including during probes treatments).
Basic Microcurrent Setup
1. Press the MICRO key.
2. Choose treatment channel, CH 1 for electrodes or MICRO for probes, and attach the
lead and electrodes or the probe cable to the selected output channel.
3. Choose the POLARITY (press FUNCTION-MICRO).
4. For electrode treatments only, change the TIME, if desired.
5. Change the FREQUENCY, if desired.
6. Change the INTENSITY setting, if desired.
7. Press START.
8. Press MICRO again to turn AUDIBLE TONE on/off, as desired.
9. Press STOP if you need to stop a treatment before its time has expired.