Eaton 93PM UPS 480V Three-Wire – 100 kW Frame Installation and Operation Manual 164000227—Rev 07 39
CChhaapptteerr 44 UUPPSS SSyysstteemm IInnssttaallllaattiioonn
44..11 PPrreelliimmiinnaarryy IInnssttaallllaattiioonn IInnffoorrmmaattiioonn
WARNING
Installation should be performed only by qualified personnel.
Refer to the following while installing the UPS system:
• Review Chapter 3 UPS Installation Plan and Unpacking for cabinet dimensions, equipment weight,
wiring and terminal data, and installation notes.
• Do not tilt the cabinets more than ±10° during installation.
• Remove conduit landing plates to add conduit landing holes as required.
• If perforated floor tiles are required for ventilation, place them in front of the UPS.
44..22 UUnnllooaaddiinngg tthhee UUPPSS CCaabbiinneett ffrroomm tthhee PPaalllleett
WARNING
• The UPS cabinet is heavy (see Table 2).
• Do not tilt cabinet more than 10° from vertical.
• Lift the cabinets only with a forklift or damage may occur.
• Ensure the forklift is rated to handle the weight of the cabinet.
Failure to follow these instructions may result in severe injury or death.
The UPS cabinet is bolted to a pallet consisting of four metal angle supports secured to two wood supports.
To remove the pallet:
1. If not already accomplished, use a forklift or pallet jack to move the UPS cabinet to the installation area, or
as close as possible, before unloading from the pallet. Insert the forklift or pallet jack forks between the
supports on the bottom of the pallet (see Figure 8 and Figure 9 for the UPS cabinet center of gravity
measurements).
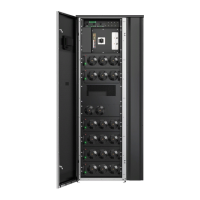
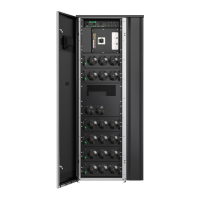
2. Open the front door by lifting the latch from the bottom and turning to the right (counterclockwise) and
swing the door open.
3. Locate the four 1/2" jacking bolts from the parts kit and install them in the threaded holes in the front and
rear supports as shown in Figure 14. Place a floor protector from the parts kit underneath each jacking bolt,
and screw the bolts down against them.
The floor protectors protect the floor from being marred by the jacking bolts.

 Loading...