Installation
Copyright © 2019 Eaton Corporation. All Rights Reserved.
IPN March 2019
67
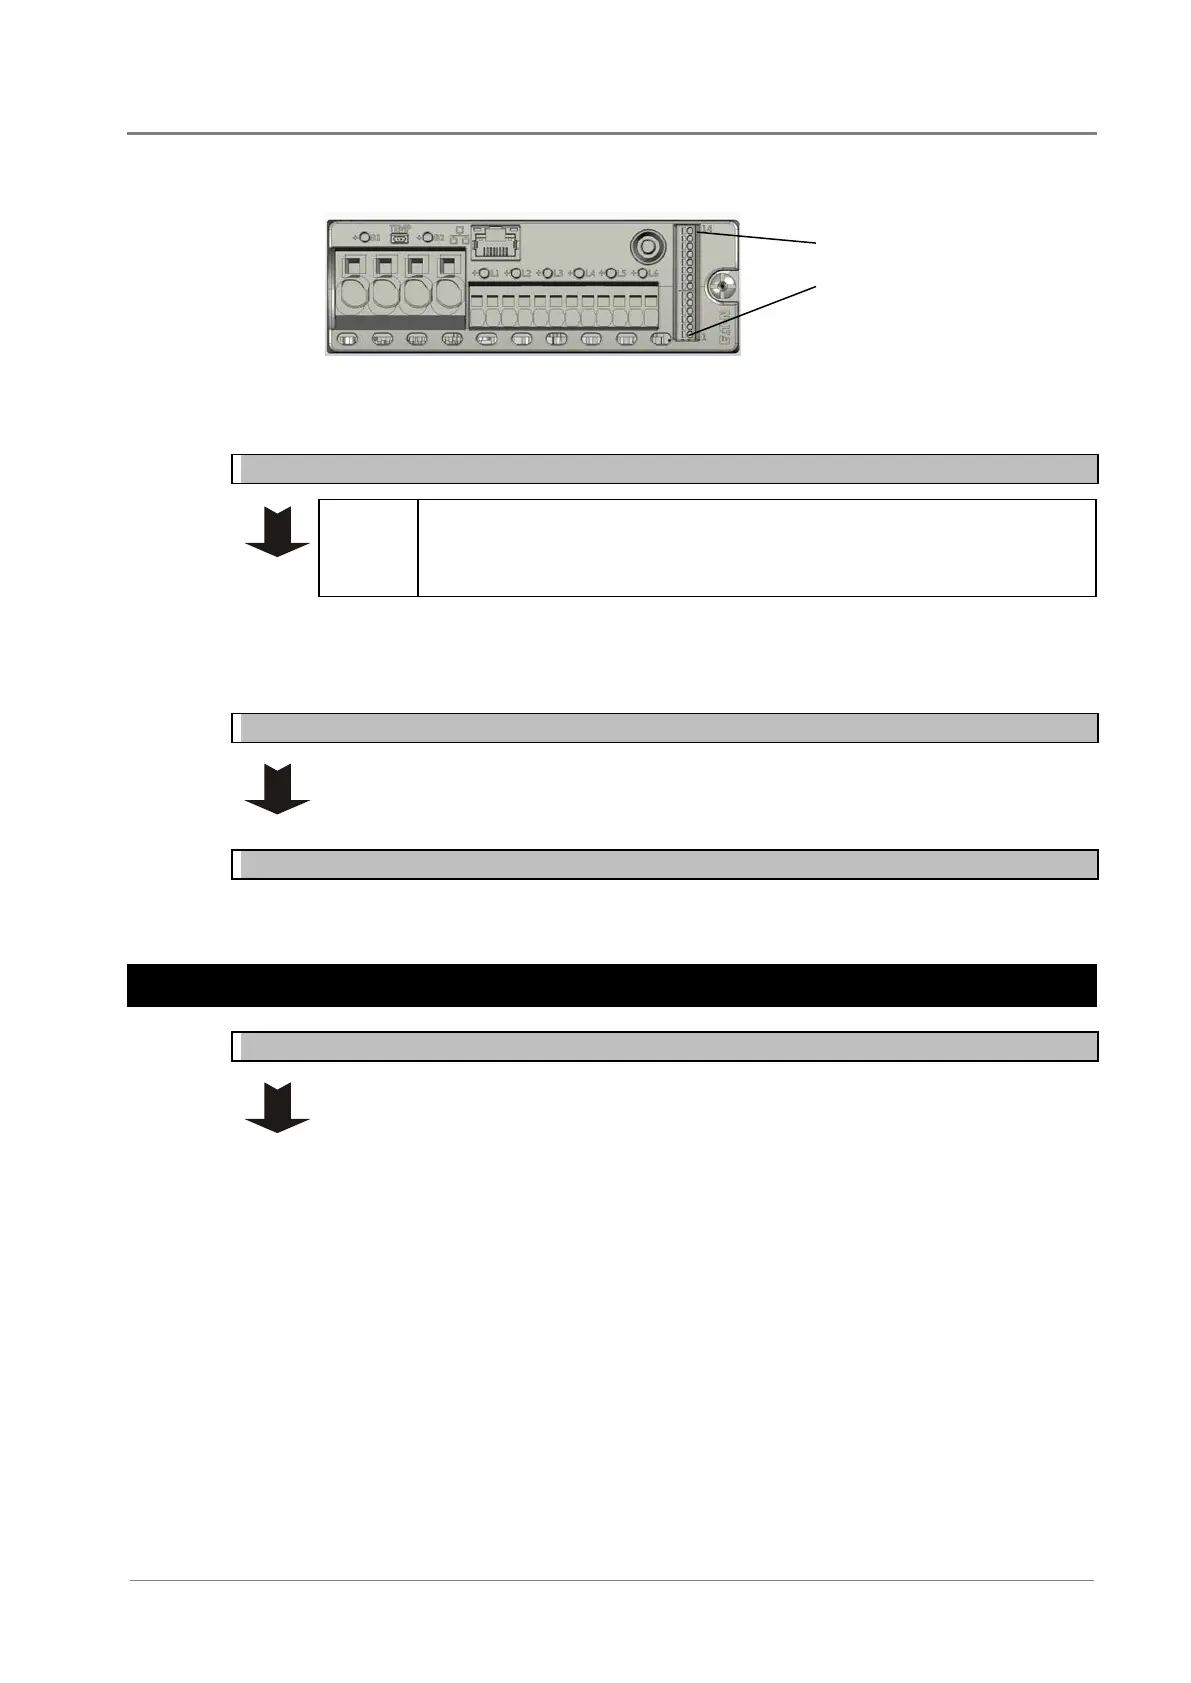
GPIO terminal #14
GPIO terminal #1
Step 2 - Terminate the cabling
Connect only voltage-free switch or relay contacts to Digital Inputs.
• Do not exceed the voltage and current limits of the relay contacts.
• For wire size and I/O ratings see Specifications on page 138.
1 Terminate the cable as in the diagram above.
2 Use cable ties to secure the cable and prevent strain on the connectors.
Step 3 - Set up EFX48
Configure the inputs and outputs after completing the installation and all the Startup
Tasks on page 69 Operation information on page 75.
Procedure complete
Task 9 - Connect to the AC Supply Point
Step 1 - RM3-340/440 systems with IEC cord sets
If the RM3-340/440 has permanently connected ac cords then go to Step 2.
Connect one of the cord sets provided to each IEC connector on the rear of the RM3-
340/440.
If the cord sets are missing or must be replaced then refer to Spare Parts on
page 154 for replacement items.
 Loading...