20
EN
EBS Ink-Jet Systeme 20111028#4.2
EN
file by pressing the Select
Workbook... key.
8. Then press the OK key in suc-
cessive windows a number of
times until you return to the
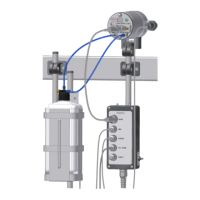
Connecting database window.
9. Press the Connect key.
10. Select the type of database from
the Type of database drop-down
list box.
11. Fill in the Table(File) name box.
For Excel files type in the name
of a spreadsheet.
12. In the Search for box, select the
column where all records (lines)
are numbered.
13. After the above mentioned op-
tions have been set, the first re-
cord of the table is read in. Using
the Record number parameter
you can choose the record to
start printing with.
14. Press the OK button.
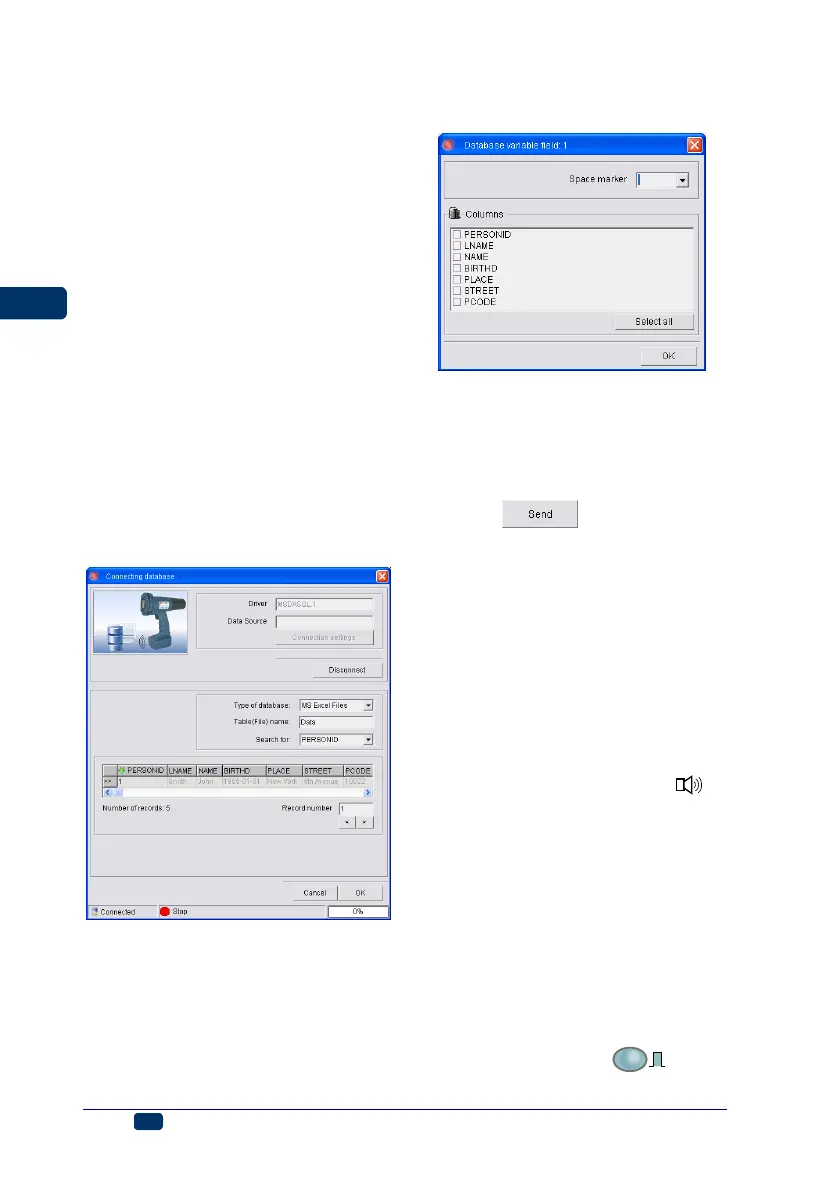
After connection with the database
has been configured, the Database
variable field window is displayed.
Tick the names of the parameters
(column headings) whose data is to
be copied to the variable field and
press the OK button. You can also
define the character to be used as a
database data separator.
In order to choose other parameters
(column headings), double-click on the
database variable field in the list dis-
played in the Variable Field window.
In order to establish connection be-
tween the printer and the database,
press the
button or use the
Database command in the Tools
MENU.
The status bar of the window dis-
played shows the state of connection
with the database and of communica-
tion with the printer, as well as the
progress bar. The selected columns
are displayed in green. In order to
start transferring data to the printer,
click the Start sending button. When
the data has been transferred suc-
cessfully, an audible signal 32 is
heard and the lamp 17 goes on. If the
Send automatically option is en-
abled, text files are sent automatically
after a given text has been printed. In
the automatic transfer mode printing
is blocked after every project has
been printed until a successive text
file is received (the same text cannot
be printed several times). When print-
ing is blocked, the PRINT lamp flick-
ers. If this option is disabled, text files
are sent only after printing has been
switched off with the 18
PRINT
ON/OFF
key. In
the manual transfer mode printing is