20111028#4.2 EBS Ink-Jet Systeme
EN
13
EN
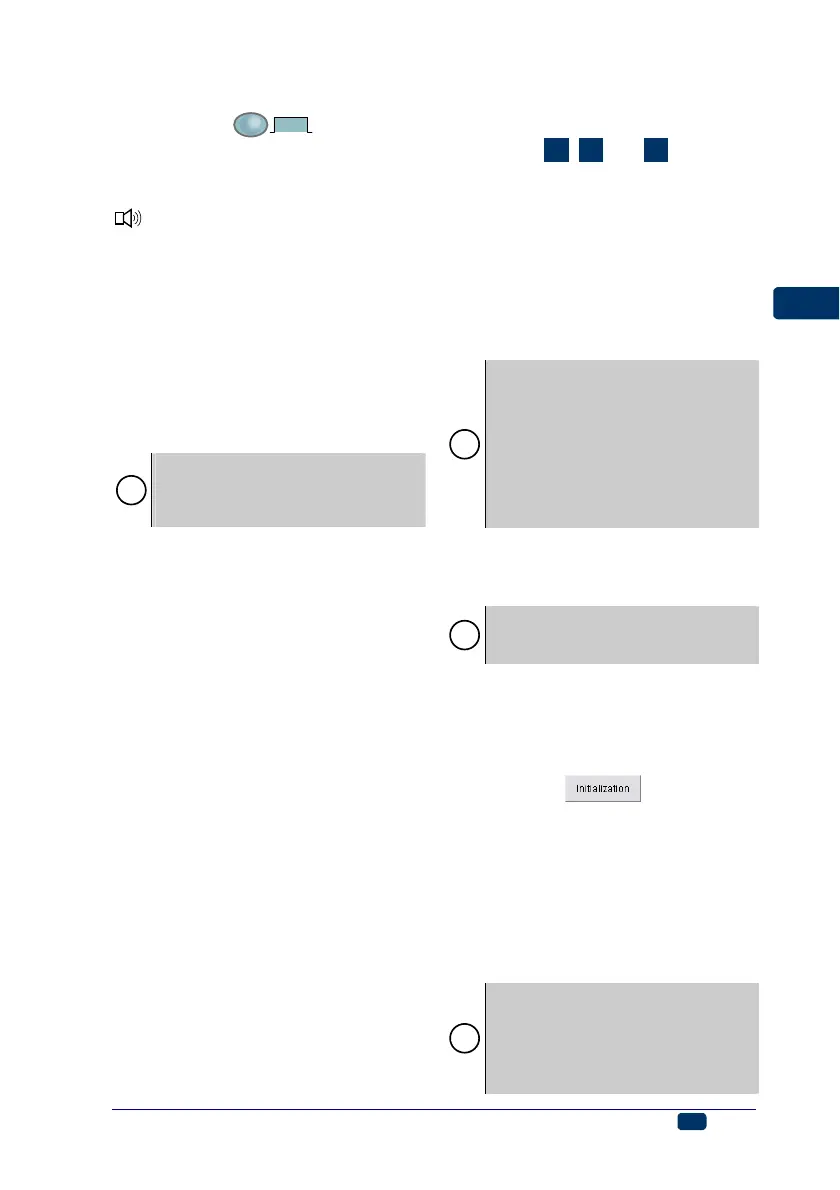
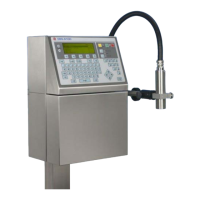
Switching the Printer Off
Press key 19,
F
3 sec.
, and release
button 5 at the same time and keep
them down for a few seconds until all
lamps stop glowing after buzzing 32
has been heard.
Installing and Starting the
Printer Control Program
Installing Control Program
1. Insert the CD supplied along with
the printer to the CDROM drive in
your computer and wait for the
program to start.
!
If the programs on the CD do not
start running on the computer auto-
matically, start setup.exe from the
CD’s main directory.
2. After the program MENU has
been displayed, choose the in-
stallation option.
3. Follow the instructions displayed
during the installation.
4. After all control program compo-
nents and USB drivers required
have been installed, you can
communicate with your printer via
a radio link - see
Connecting the
Printer with Computer
.
Starting the Control Program
1. Click the EBS printer icon on the
control panel or, if there is no
such an icon, start EBS200.exe
from the folder where the control
program has been installed
(C:\Program Files\EBS printers\
EBS-250\ as standard).
2. Once started, the control pro-
gram automatically activates the
find-the-printer(s) function and
signs the printer on, if the printer
is on and the radio communica-
tions link operates properly.
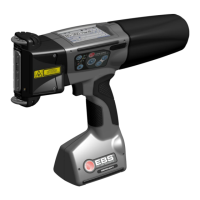
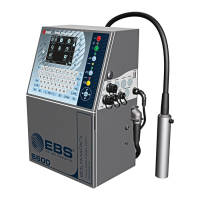
Connecting the Printer with
Computer
See figures
B
,
D
and
F
.
The printer communicates with the
computer through module 22 via a
radio link. The module uses an USB
interface.
1. Find a free USB port in your
computer.
2. Connect the USB-Bluetooth
module 22 to a USB port on your
computer via a USB plug 23.
!
If USB drivers of module 22 have
been installed during the installation
of the control program (see
Installing Control Program), then
the module is automatically detected
and installed on your computer.
Otherwise you are prompted to
indicate the location of the drivers on
the CD.
3. Place module 22 and the printer
so that the widest radio transmis-
sion range is ensured.
!
Do not cover module 22 with unnec-
essary shields or objects, especially
metal ones.
4. Switch the printer on.
5. Start the control program. The
program will find the printer,
communicate with it and display
a Printer is found message.
6. Click the
key (the key
is available in the communication
window only after the Adv. op-
tions item has been ticked) to
view the printer configuration.
Data have been transmitted
properly if an O.K. message is
displayed in the transmission
status window.
!
If you cannot communicate with the
printer, try to configure it in the sys-
tem once again. From the Guides
menu start the Network configura-
tion creator and follow the creator’s
prompts.