Po w e r Pr u n e r
TM
oP e r a T o r 's Ma n u a l
27
a
B
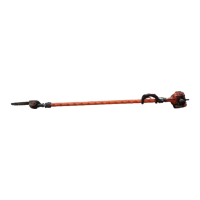
To Adjust Saw Chain Tension
1. Move stop switch to STOP position.
2. Disconnect spark plug lead.
3. Loosen two guide bar nuts (A) until nger tight.
4. Hold the bar nose up, and turn the adjuster screw (B) clockwise un-
til the chain ts snugly against the underside of the bar, as shown.
Cold Chain Only - turn adjuster screw CW an additional 1/8 - 1/4
turn.
5. Tighten both guide bar nuts with nose held up. Tighten rear nut
rst.
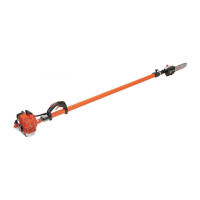
6. Pull the chain around the guide bar by hand. Reduce the chain ten-
sion if you feel tight spots.
7. When chain is properly tensioned, tighten guide bar nuts securely.
IMPORTANT
Tighten guide bar nuts to 8 - 9 N•m (71 - 80 in. lbs.) DO NOT
over-tighten nuts. Damage may result.
8. Keep chain properly tensioned at all times.
NOTE
All chains require frequent adjustment.
9. Connect spark plug lead.
Guide Bar Cover Cleaning
1. Remove two (2) 6 mm guide bar nuts (A) and guide bar cover
screw (B).
2. Remove guide bar cover (D).
3. Gently brush debris from inside guide bar cover and from around
sprocket.
4. Install guide bar cover (D), install and tighten guide bar nuts, and
install guide bar cover screw (B).
A
C
D
B
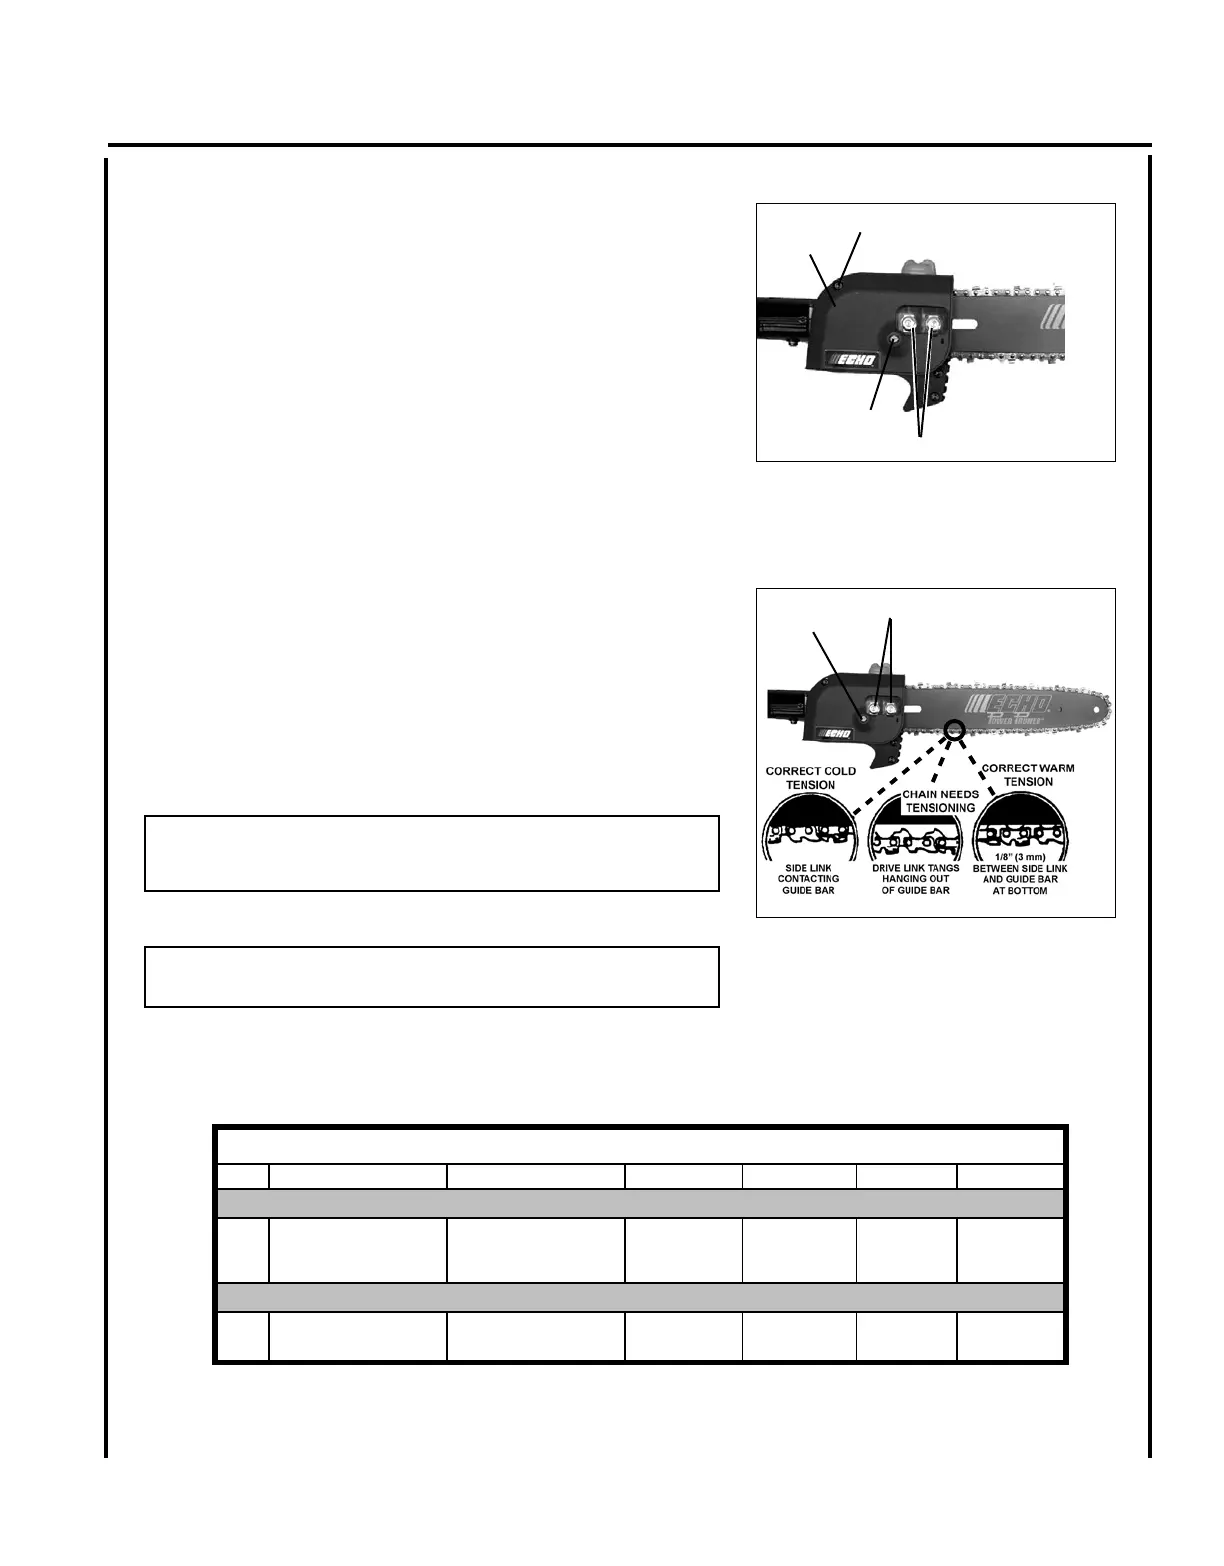
PPT-300ES Power Pruner Bar & Chain
Bar P/N Chain P/N Chain Type Links Pitch Gauge
Standard
12" regular bar P/N
12A0CD3744
M91VX44G 91 44 3/8" 0.050
Optional
N1C-BL or N1C 91 44 3/8" 0.050