© Edwards Limited 2008. All rights reserved. Page 29
Edwards and the Edwards logo are trademarks of Edwards Limited.
Installation
S900-01-880 Issue C
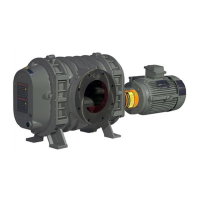
3.7 Belt drive booster pump installation
Ensure that the alignment of the pulleys and the tension of the booster pump drive belt are correct. Comply with the
installation requirements specified in this manual and inspect the drive system regularly, to avoid mechanical
problems and unnecessary repairs. Belt axial load should be less than 890 N (200 lb). Table 12 shows the minimum
permissible pulley diameters. Contact Edwards for advice if you want to use a motor with a power rating which
exceeds 30 kW (40 h.p.). Obey all of the safety precautions outlined in Section 3.1
Pulley misalignment can damage the bearing, belts and seal(s). Pulley alignment does not change during operation.
The motor and booster pump drive shafts must be parallel to avoid uneven loading of belts. Your motor and drive
components must comply with local and national safety regulations. Check for free rotation of the booster pump
before you start the booster pump.
New belts usually lose some tension during initial operation, and you should re-check the belts during the first few
days of operation. Tension all belts in accordance with the belt manufacturer's instructions. Excessive tension can
induce unnecessary loading on the booster pump bearings and bending moments on the booster pump drive shaft.
Extreme over-tensioning may cause the pump drive shaft to fail, due to fatigue damage.
Booster pumps with belt drive systems supplied by Edwards have the pulley and belt tension already preset. Recheck
the alignment and tension (See Tables 13 and 14) before initial operation; use the following procedure:
1. Ensure that the shaft, hub and pulley components are free of lubricants, corrosion and protective coatings.
2. Check the pulley alignment with a straight edge or tight cord. The pulley faces must contact the straight edge at
all four points. Misalignment will significantly increase belt wear.
3. If pulley alignment or removal is required: loosen the motor hub set screws several turns; remove one set screw
completely; install the set screw in the centre position and then tighten the screw to free the locking bush.
Reposition the pulley and then reinstall the set screws in the original position in the locking bush. Tighten the
set screws evenly to the specified torque. Note that the locking bush number is stamped on the inner hub face.
4. Belt span distance, belt deflection and deflection force determine the correct belt tension. Determine the span
distance between contact points on the pulleys. The deflection must be 0.397 mm per 25.4 mm of span (1/64
inch per 1 inch of span).
5. Determine the correct belt force, based on the smallest pulley diameter and belt type. Edwards supplied belt
systems are usually a 3 groove "B" design. Check each belt for even loading. Uneven loading indicates pulley
misalignment or non-parallel shafts.
6. Ideal tension is the minimum tension to overcome peak loading. Never exceed 1.25 times the force specified in
Table 14. Lock down the tension adjustment mechanism.
7. Turn the pulleys over three times by hand. Check for free and easy rotation.
8. Recheck the tension before you refit the safety guards and operate the booster pump.
When any one belt needs to be replaced, replace all of the other belts at the same time. Check the tension frequently
during the first few days of operation. Never apply belt dressing. If you are installing your own belt or pulley drive
 Loading...