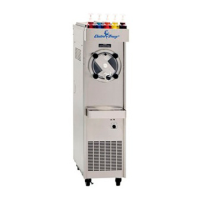
ELECTRO FREEZE Cocktail/Slush Freezer Model 812
2345678901234
2345678901234
2345678901234
2345678901234
2345678901234
2345678901234
2345678901234
2345678901234
2345678901234
2345678901234
2345678901234
2345678901234
2345678901234
2345678901234
2345678901234
2345678901234
2345678901234
2345678901234
2345678901234
2345678901234
2345678901234
2345678901234
2345678901234
2345678901234
2345678901234
2345678901234
2345678901234
2345678901234
2345678901234
2345678901234
2345678901234
2345678901234
2345678901234
2345678901234
2345678901234
2345678901234
2345678901234
2345678901234
2345678901234
2345678901234
2345678901234
2345678901234
2345678901234
2345678901234
2345678901234
2345678901234
2345678901234
2345678901234
2345678901234
2345678901234
2345678901234
2345678901234
2345678901234
2345678901234
2345678901234
2345678901234
2345678901234
2345678901234
2345678901234
2345678901234
2345678901234
2345678901234
2345678901234
2345678901234
2345678901234
2345678901234
2345678901234
2345678901234
2345678901234
2345678901234
2345678901234
2345678901234
2345678901234
2345678901234
2345678901234
2345678901234
2345678901234
2345678901234
2345678901234
2345678901234
2345678901234
2345678901234
2345678901234
2345678901234
2345678901234
2345678901234
2345678901234
2345678901234
2345678901234
2345678901234
2345678901234
2345678901234
2345678901234
2345678901234
2345678901234
2345678901234
2345678901234
2345678901234
2345678901234
2345678901234
2345678901234
2345678901234
2345678901234
2345678901234
2345678901234
2345678901234
2345678901234
2345678901234
2345678901234
2345678901234
2345678901234
2345678901234
2345678901234
2345678901234
2345678901234
2345678901234
2345678901234
2345678901234
2345678901234
2345678901234
2345678901234
2345678901234
2345678901234
2345678901234
2345678901234
2345678901234
2345678901234
2345678901234
2345678901234
2345678901234
2345678901234
2345678901234
2345678901234
2345678901234
2345678901234
2345678901234
2345678901234
2345678901234
2345678901234
2345678901234
2345678901234
2345678901234
2345678901234
2345678901234
2345678901234
2345678901234
2345678901234
2345678901234
2345678901234
2345678901234
2345678901234
2345678901234
2345678901234
2345678901234
2345678901234
2345678901234
2345678901234
2345678901234
2345678901234
2345678901234
2345678901234
2345678901234
2345678901234
2345678901234
2345678901234
2345678901234
2345678901234
2345678901234
2345678901234
2345678901234
2345678901234
2345678901234
2345678901234
2345678901234
2345678901234
2345678901234
2345678901234
12 184946
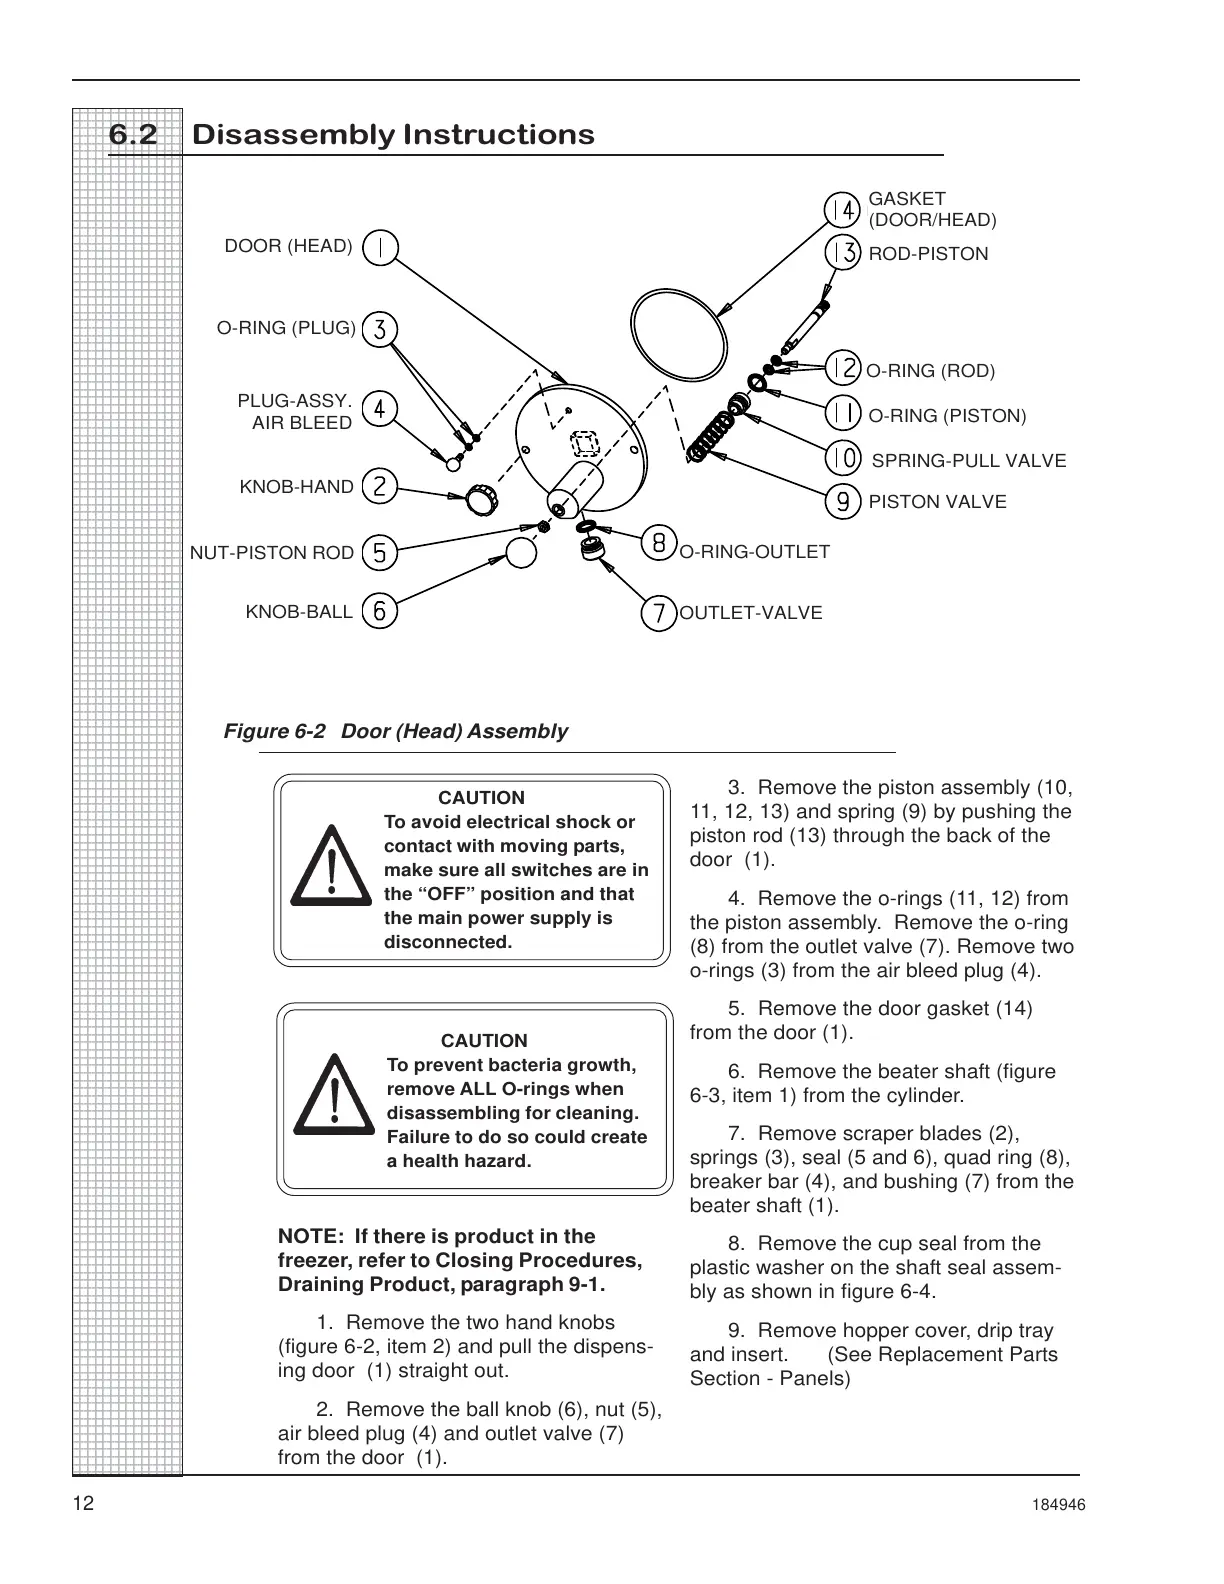
6.2 Disassembly Instructions
Figure 6-2 Door (Head) Assembly
CAUTION
To avoid electrical shock or
contact with moving parts,
make sure all switches are in
the “OFF” position and that
the main power supply is
disconnected.
CAUTION
To prevent bacteria growth,
remove ALL O-rings when
disassembling for cleaning.
Failure to do so could create
a health hazard.
NOTE: If there is product in the
freezer, refer to Closing Procedures,
Draining Product, paragraph 9-1.
1. Remove the two hand knobs
(figure 6-2, item 2) and pull the dispens-
ing door (1) straight out.
2. Remove the ball knob (6), nut (5),
air bleed plug (4) and outlet valve (7)
from the door (1).
3. Remove the piston assembly (10,
11, 12, 13) and spring (9) by pushing the
piston rod (13) through the back of the
door (1).
4. Remove the o-rings (11, 12) from
the piston assembly. Remove the o-ring
(8) from the outlet valve (7). Remove two
o-rings (3) from the air bleed plug (4).
5. Remove the door gasket (14)
from the door (1).
6. Remove the beater shaft (figure
6-3, item 1) from the cylinder.
7. Remove scraper blades (2),
springs (3), seal (5 and 6), quad ring (8),
breaker bar (4), and bushing (7) from the
beater shaft (1).
8. Remove the cup seal from the
plastic washer on the shaft seal assem-
bly as shown in figure 6-4.
9. Remove hopper cover, drip tray
and insert. (See Replacement Parts
Section - Panels)
O-RING (ROD)
PISTON VALVE
ROD-PISTON
O-RING-OUTLET
OUTLET-VALVE
GASKET
(DOOR/HEAD)
O-RING (PISTON)
SPRING-PULL VALVE
DOOR (HEAD)
KNOB-BALL
NUT-PISTON ROD
PLUG-ASSY.
AIR BLEED
O-RING (PLUG)
KNOB-HAND