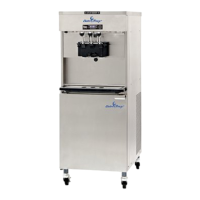
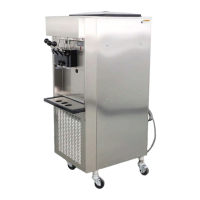
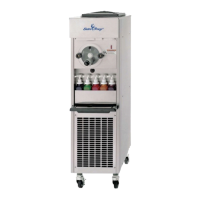
ELECTRO FREEZE Cocktail/Slush Freezer Model 812
2345678901234
2345678901234
2345678901234
2345678901234
2345678901234
2345678901234
2345678901234
2345678901234
2345678901234
2345678901234
2345678901234
2345678901234
2345678901234
2345678901234
2345678901234
2345678901234
2345678901234
2345678901234
2345678901234
2345678901234
2345678901234
2345678901234
2345678901234
2345678901234
2345678901234
2345678901234
2345678901234
2345678901234
2345678901234
2345678901234
2345678901234
2345678901234
2345678901234
2345678901234
2345678901234
2345678901234
2345678901234
2345678901234
2345678901234
2345678901234
2345678901234
2345678901234
2345678901234
2345678901234
2345678901234
2345678901234
2345678901234
2345678901234
2345678901234
2345678901234
2345678901234
2345678901234
2345678901234
2345678901234
2345678901234
2345678901234
2345678901234
2345678901234
2345678901234
2345678901234
2345678901234
2345678901234
2345678901234
2345678901234
2345678901234
2345678901234
2345678901234
2345678901234
2345678901234
2345678901234
2345678901234
2345678901234
2345678901234
2345678901234
2345678901234
2345678901234
2345678901234
2345678901234
2345678901234
2345678901234
2345678901234
2345678901234
2345678901234
2345678901234
2345678901234
2345678901234
2345678901234
2345678901234
2345678901234
2345678901234
2345678901234
2345678901234
2345678901234
2345678901234
2345678901234
2345678901234
2345678901234
2345678901234
2345678901234
2345678901234
2345678901234
2345678901234
2345678901234
2345678901234
2345678901234
2345678901234
2345678901234
2345678901234
2345678901234
2345678901234
2345678901234
2345678901234
2345678901234
2345678901234
2345678901234
2345678901234
2345678901234
2345678901234
2345678901234
2345678901234
2345678901234
2345678901234
2345678901234
2345678901234
2345678901234
2345678901234
2345678901234
2345678901234
2345678901234
2345678901234
2345678901234
2345678901234
2345678901234
2345678901234
2345678901234
2345678901234
2345678901234
2345678901234
2345678901234
2345678901234
2345678901234
2345678901234
2345678901234
2345678901234
2345678901234
2345678901234
2345678901234
2345678901234
2345678901234
2345678901234
2345678901234
2345678901234
2345678901234
2345678901234
2345678901234
2345678901234
2345678901234
2345678901234
2345678901234
2345678901234
2345678901234
2345678901234
2345678901234
2345678901234
2345678901234
2345678901234
2345678901234
2345678901234
2345678901234
2345678901234
2345678901234
2345678901234
2345678901234
2345678901234
2345678901234
2345678901234
2345678901234
184946 17
8 Start-up Instructions
8.1 Sanitizing
Figure 8-1
The washing and sanitizing instructions
explained in this manual are important
procedures designed to remove bacteria
and maintain a clean, sanitary freezer.
The slush/cocktail freezer must be
disassembled and cleaned according to
the instructions in the manual before
assembly and sanitizing to ensure the
best possible cleanliness.
CAUTION
To prevent bacteria growth,
use only approved sanitizers
to sanitize the machine.
Sanitizing must be done just
prior to starting the machine.
Failure to do so could create
a health hazard.
Important:
Do not use unapproved sanitizers or
laundry bleach. These materials may
contain high concentrations of chlo-
rine and will chemically attack freezer
components.
NOTE: It is your responsibility to be
aware of the requirements for meeting
federal, state and local laws concerning
the frequency of cleaning and sanitizing
the freezer.
1. Wash and sanitize your hands
and forearms.
2. Prepare 4 gallons (15.2 liters) of
sanitizing solution (example: Stera-
Sheen Green Label) in a container.
Sanitizing solution must be mixed ac-
cording to manufacturer’s instructions to
yield 100 PPM strength chlorine solution.
Important:
Never let the sanitizer remain in the
freezer for more than 15 minutes.
Important:
Do not insert any tools or objects into
the port from the hopper to the cylin-
der or the door dispensing hole while
the freezer is running.
3. Pour sanitizing solution into the
hopper pan. Using a clean brush, wash
down the hopper walls and the mix feed
tube from the hopper to the cylinder, as
shown in figure 8-1. Wipe the hopper
cover with the sanitizing solution.
Important:
DO NOT use the “FREEZE” position
with sanitizer in the cylinder. The
freezer will be damaged.
4. Remove the air bleed plug and
allow sanitizer to flow into the cylinder.
Replace the plug when sanitizer reaches
the bottom of the air plug opening.
5. When the cylinder has filled with
sanitizing solution, reconnect the main
power supply to the freezer. Turn the
selector switch to the “CLEAN” position
and allow the beater to run for 5 minutes.
6. At this time check for leaks around
the door , plunger, and drain tube.
Important:
DO NOT hang containers from the
dispensing spout. Doing so will dam-
age the door.
7. Turn the selector switch to the
“OFF” position. Place an empty container
under the dispensing door and drain the
solution by opening the piston to allow
the cylinder and hopper to empty.
 Loading...