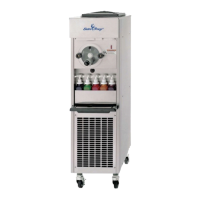
ELECTRO FREEZE Cocktail/Slush Freezer Model 812
2345678901234
2345678901234
2345678901234
2345678901234
2345678901234
2345678901234
2345678901234
2345678901234
2345678901234
2345678901234
2345678901234
2345678901234
2345678901234
2345678901234
2345678901234
2345678901234
2345678901234
2345678901234
2345678901234
2345678901234
2345678901234
2345678901234
2345678901234
2345678901234
2345678901234
2345678901234
2345678901234
2345678901234
2345678901234
2345678901234
2345678901234
2345678901234
2345678901234
2345678901234
2345678901234
2345678901234
2345678901234
2345678901234
2345678901234
2345678901234
2345678901234
2345678901234
2345678901234
2345678901234
2345678901234
2345678901234
2345678901234
2345678901234
2345678901234
2345678901234
2345678901234
2345678901234
2345678901234
2345678901234
2345678901234
2345678901234
2345678901234
2345678901234
2345678901234
2345678901234
2345678901234
2345678901234
2345678901234
2345678901234
2345678901234
2345678901234
2345678901234
2345678901234
2345678901234
2345678901234
2345678901234
2345678901234
2345678901234
2345678901234
2345678901234
2345678901234
2345678901234
2345678901234
2345678901234
2345678901234
2345678901234
2345678901234
2345678901234
2345678901234
2345678901234
2345678901234
2345678901234
2345678901234
2345678901234
2345678901234
2345678901234
2345678901234
2345678901234
2345678901234
2345678901234
2345678901234
2345678901234
2345678901234
2345678901234
2345678901234
2345678901234
2345678901234
2345678901234
2345678901234
2345678901234
2345678901234
2345678901234
2345678901234
2345678901234
2345678901234
2345678901234
2345678901234
2345678901234
2345678901234
2345678901234
2345678901234
2345678901234
2345678901234
2345678901234
2345678901234
2345678901234
2345678901234
2345678901234
2345678901234
2345678901234
2345678901234
2345678901234
2345678901234
2345678901234
2345678901234
2345678901234
2345678901234
2345678901234
2345678901234
2345678901234
2345678901234
2345678901234
2345678901234
2345678901234
2345678901234
2345678901234
2345678901234
2345678901234
2345678901234
2345678901234
2345678901234
2345678901234
2345678901234
2345678901234
2345678901234
2345678901234
2345678901234
2345678901234
2345678901234
2345678901234
2345678901234
2345678901234
2345678901234
2345678901234
2345678901234
2345678901234
2345678901234
2345678901234
2345678901234
2345678901234
2345678901234
2345678901234
2345678901234
2345678901234
2345678901234
2345678901234
2345678901234
2345678901234
2345678901234
2345678901234
2345678901234
2345678901234
184946 15
Figure 7-1 Shaft seal assembly
Figure 7-3 Install blade springs
Figure 7-2 Install shaft seal assem-
bly on beater shaft
7 Assembly
Correct assembly of the freezer is
essential to prevent leakage of product
and damage to the freezer. To as-
semble the freezer you will need an
approved lubricant (such as Lubri-Film
Plus). Make sure all parts of the assem-
blies have been washed and sanitized
before assembling. Persons assem-
—continued
BUSHING-SHAFT
bling the freezer must first wash and
sanitize their hands and forearms with an
approved sanitizer.
CAUTION
To avoid electrical shock or
contact with moving parts,
make sure all switches are
in the “OFF” position and
that the main power supply
is disconnected.
1. Assemble the cup seal on the
plastic washer to complete the beater
shaft seal (see figure 7-1). Apply a
moderate amount of approved sanitary
lubricant, such as Lubri-Film Plus, to the
internal surface and the face of the
plastic washer opposite the bell shaped
portion of the seal.
NOTE: Do not allow any lubricant to
come into contact with the bell-shaped
rubber portion of the seal.
2. Place the quad ring over the rear
of the beater shaft and lubricate. Install
the beater shaft seal (figure 7-2) over the
rear of the beater shaft, with the bell-
shaped portion facing the rear and the
washer portion against the quad ring.
3. Apply lubricant to the shaft
bushing (figure 7-2) and slide onto the
breaker bar.
4. Insert the breaker bar into center
of beater shaft. Lubricate the bearing
surfaces and insert the breaker bar into
the hole in rear beater shaft disc (figure
7-2).
Important:
The beater shaft bushing (shown in
figure 7-2) must be installed or the
freezer will be damaged.
5. Attach the blade springs to the
beater plates as shown in figure 7-3.
6. Insert the scraper blades into
proper beater plate slots so that end of
the spring rests in groove on the bottom
side of blade.
WASHER



 To Next Page