23
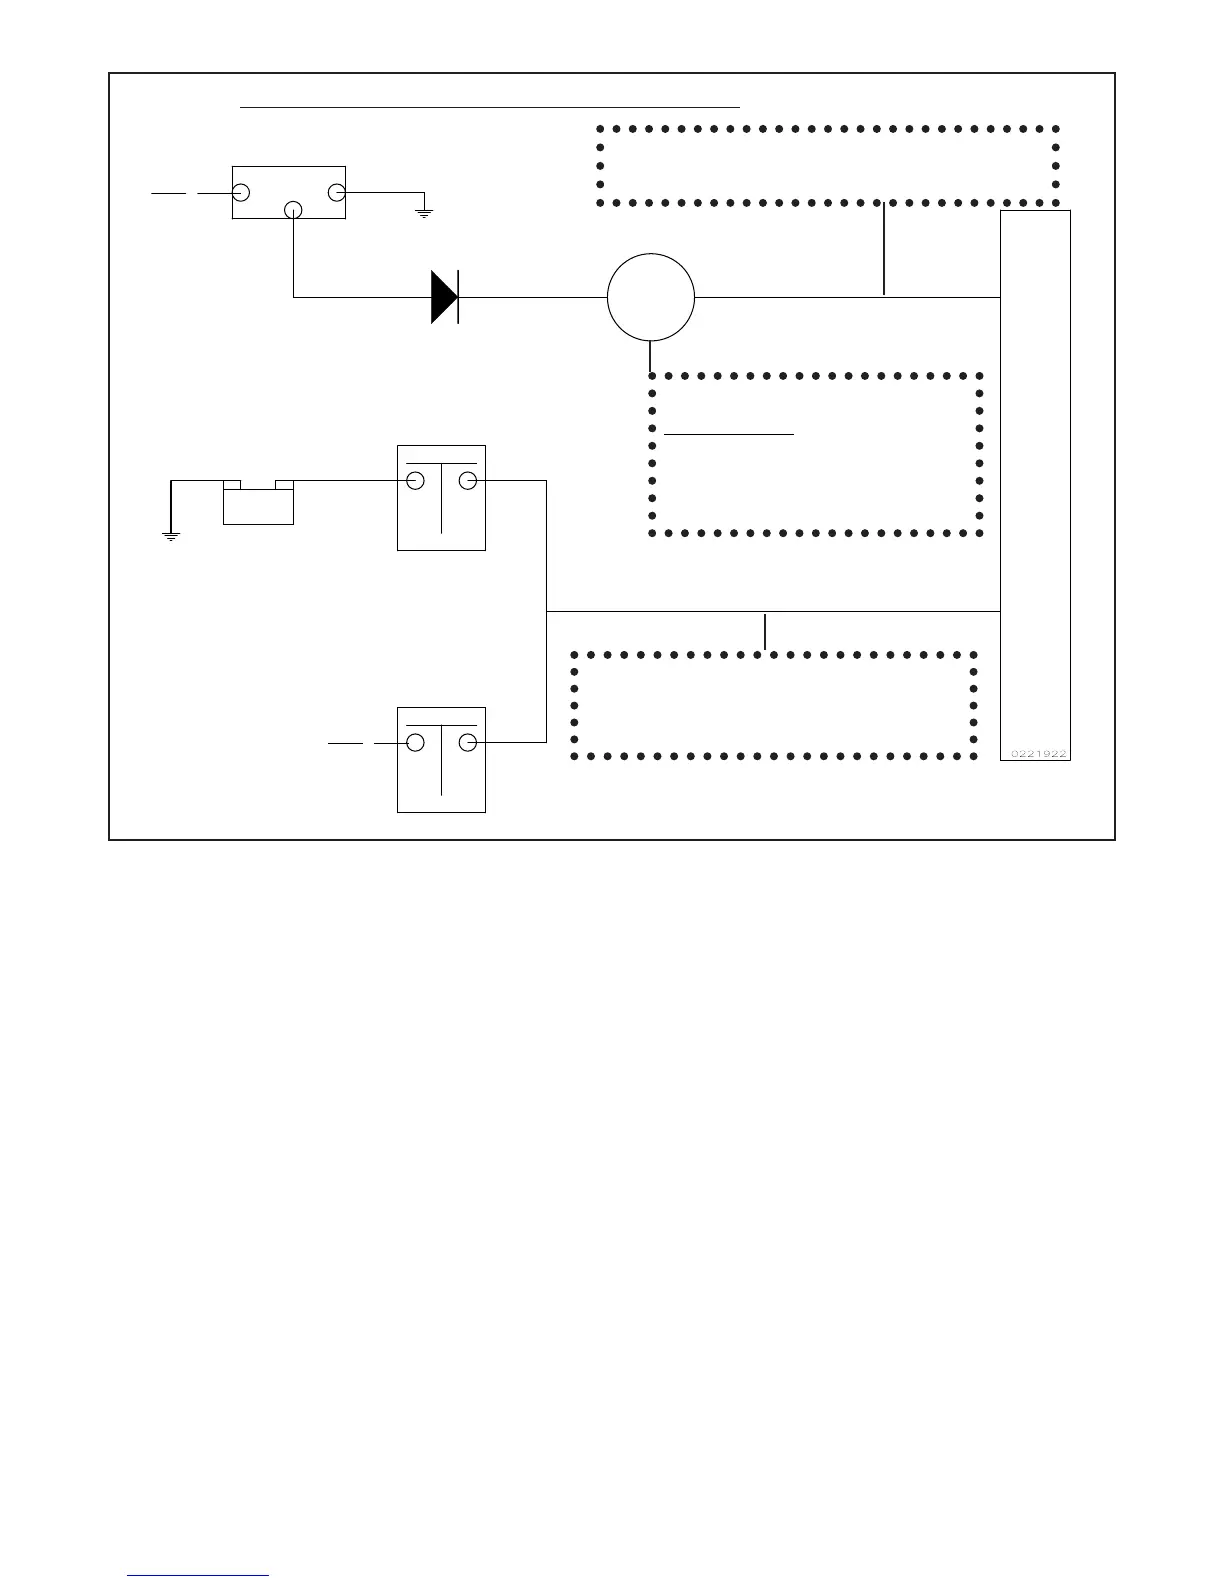
Alternator
F
Starter Solenoid
B
U
S
To Starter
This is the main lead going to the Bus.
It may come from the Master Switch
Contactor or the Starter Solenoid.
Figure 2: Figure 2:
Figure 2: Figure 2:
Figure 2:
External Shunt Installed in the Alternator LeadExternal Shunt Installed in the Alternator Lead
External Shunt Installed in the Alternator LeadExternal Shunt Installed in the Alternator Lead
External Shunt Installed in the Alternator Lead
This line may be connected to the Bus, Master
Switch Contactor or the Starter Solenoid.
B
G
-
+
External Shunt
Batt.
Note: The Shunt may be installed
before or after any reverse
current diode. However, it is
preferable to install it after the
reverse current diode as shown.
Reverse Current Diode.
(Some aircraft do not have this
diode)
Master Switch
Contactor
 Loading...