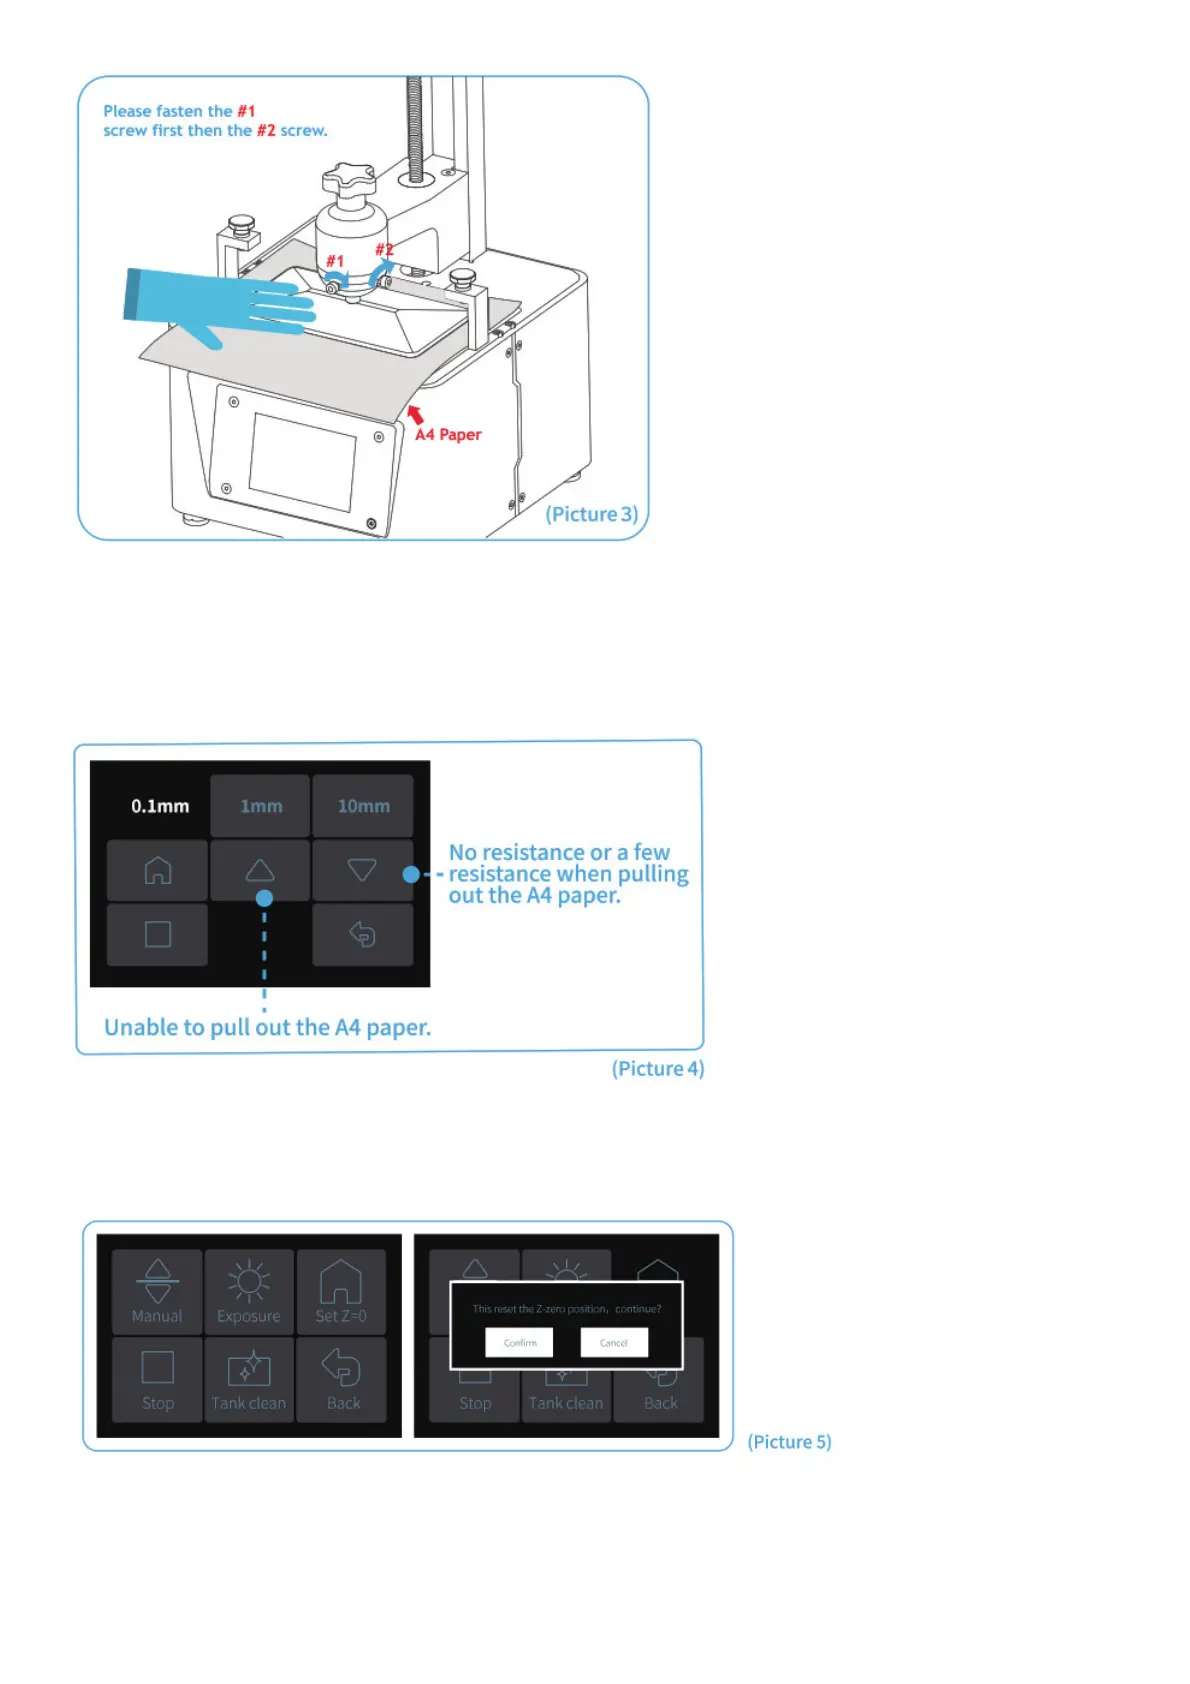
5. Since tightening the screws of the build plate will change the tightness when pulling out the A4 paper, you need to
calibrate the height of the Z axis slightly again. If there is no resistance or only a few resistance when pulling out the
A4 paper, click to descend the Z axis at the distance of 0.1mm. If the paper cannot be pulled out or the resistance is
very high, then you should click to rise the Z axis at the distance of 0.1mm. If there is some resistance but you can
still pull it out with slight efforts, then stop adjusting Z axis. (See Picture 4)
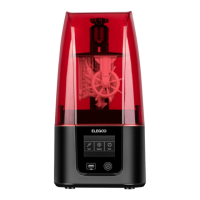
6. After the above leveling is complete, set the current Z axis position as the initial height of the first layer of printing.
The operation is as follows: Return to the previous interface and click “Set Z=0″. At this time, the screen will pop up a
message as shown in the picture. Then click ” Confirm ” to complete. (See Picture 5)
7. Press “10mm”-then press “up” for 10 times, then Zaxis will go up about 100mm. (See Picture 6)