Printhead Feeding Verification
1. First, insert the filament through the filament detection sensor and to the
bottom of the Printhead assembly.
2. Choose [Prepare] > [Extruder] > [Load ] (the temperature of the nozzle
will be automatically heated to 200ºC.
3. After the nozzle reaches 200ºC, choose the feed option to extrude
filament material from the nozzle.
4. Clean melted filament off the nozzle and heated bed before printing.
Model (Operation) Testing
Printing Functional Test:
1. Insert the USB Drive into the printer’s USB port.
2. Choose [Print] from the main menu and select the desired file.
3. When the nozzle and heated bed reach the required
temperatures, the X, Y & Z axis will return to Zero (Home) and
begin printing.
A
B
C
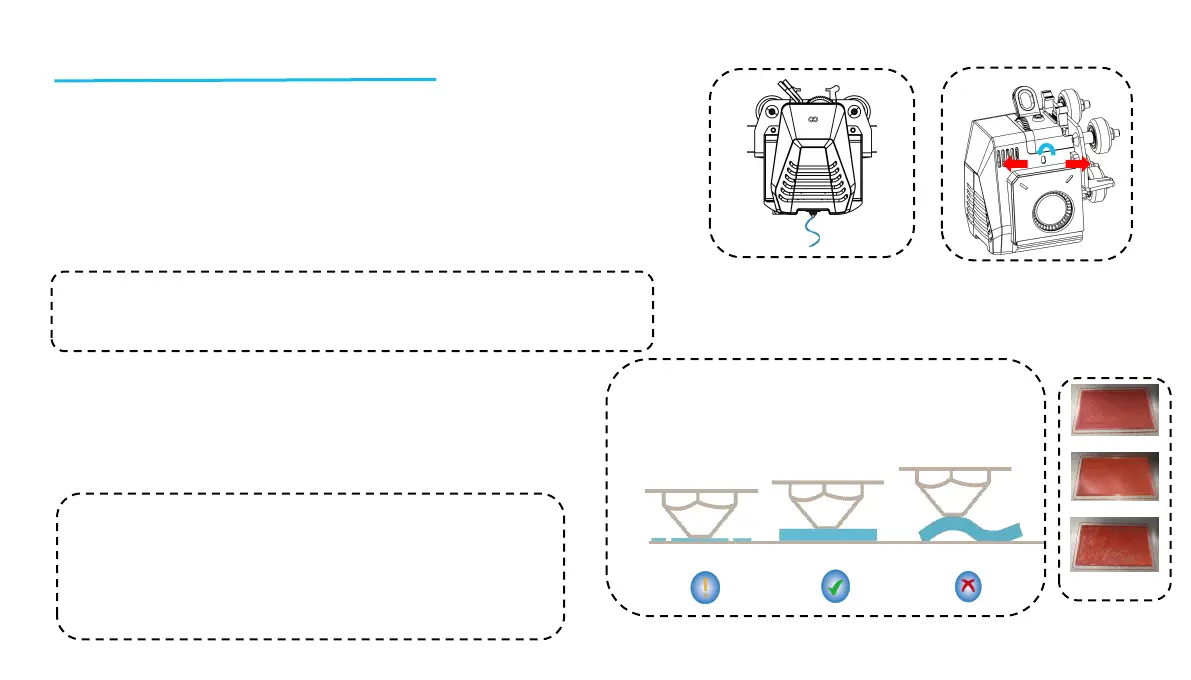
The nozzle is
too close to the
platform, and
resulting in
under extrusion.
The extrusion
volume & distance
between the nozzle
and the heated bed
platform is proper
with uniform
adhesion
The nozzle is too far
from the platform and
the resulting adhesion is
insufficient. The model
may fall of the heated
bed platform during
printing.
NOTE: Filament with different hardness have different requirements for “spring”
strength. The spring strength of the extruder can be adjusted with an Allen
Wrench(within 2.0mm). When turning counter-clockwise, spring strength is
increased, while spring strength is decreased when turned in a clockwise direction
NOTE: When printing the test model, please observe the first layer
printing and compare against the figure on the right. In cases A and
C, the compensation settings are not properly adjusted. You can
make compensation adjustments during printing to adjust the
distance between the nozzle and the heated bed platform. In case B,
the nozzle and the platform are at the ideal printing distance and
can continue printing without any further adjustments.
13
Normal Extrusion State
B
A
C
Rotating the button counter-clockwise: The
extrusion force increases, which means that the
filament is pushed out of the nozzle with more force.
Rotating the button clockwise: The extrusion force
decreases, resulting in a reduction of the force with
which the filament is pushed out of the nozzle.
 Loading...