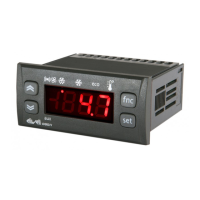
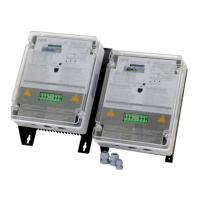
RGF 300
47/53
How to use the HELP
I
10 display module
•
Connect the
HELP
I
10
unit to the regulator to calibrate using the supplied cable; this can be done with the
regulator powered up and operating
but without transducers or sensors connected
•
Check the
Leds
corresponding to the input set-up of the regulator are lit up correctly.
•
If desired, for
4-20 mA
inputs, choose the scale in
bar
corresponding to the pressure transducer used. There are
three choices:
Transducers with range
0 - 15 bar
press key
1
: 0 - 15 bar
Transducers with range
0 - 25 bar
press key
2
: 0 - 25 bar
Transducers with range
0 - 30 bar
press key
3
: 0 - 30 bar
•
Set-point
Press key
5
"
SP
": the
“SP”
Led of the selected input and the Led of the unit of
measurement (
mA, bar, °C, V
) corresponding to the regulator input set-up will light up.
The current value of the
Set-point
will be displayed.
To alter it, adjust the
P3
adjustment trimmer.
•
Input 1
Press key
6
"
IN 1
": the
“In 1”
Led of transducer input 1 and the Led of the unit of
measurement (
mA, bar, °C, V
) corresponding to the regulator input set-up will light up.
The current value of the
N 1
transducer input will be displayed.
•
Input 2
Press key
7
"
IN 2
": the
“In 2”
Led of transducer input 2 and the Led of the unit of
measurement (
mA, bar, °C, V
) corresponding to the regulator input set-up will light up.
The current value of the
N 2
transducer input will be displayed.
•
Cut-Off (N.B : Only for regulators with PB1018/4 control card)
Press key
8
"
Cut-Off"
: the
“%C”
Led
of the selected input and the Led of the unit of
measurement“%”will light up
.
To check the regulator for correct cutting and the fans for correct rotation, adjust the
corresponding trimmer P6, and see the current value on the display
•
Cutting percentage
Press key
9
"
%C"
: the
“%C”
Led
of the selected input and the Led of the unit of
measurement“%”will light up.
The current value of the cutting percentage of voltage supplied by the regulator will be
displayed (
P4, P5, P7
trimmer set-up).
•
Transducer power
supply
Press key
12
"
+V
" : the
“+V”
Led
of the selected input and the Led of the unit of
measurement "
V
" will light up.
The value of the supply voltage for transducers connected to the service will be
displayed at circa
+22 V
rated (refer to the user manual of the connected regulator for
details of the connection to the terminal board) .
•
Proportional
Band
Press key
13
"
PB"
: the
“PB”
Led of the selected input and the Led of the unit of
measurement (
mA, bar, °C, V
) corresponding to the regulator input set-up will be
displayed.
The last value of the Proportional Band (
PB
) set will be displayed, differing for each
type of input signal (
mA, Vdc, bar, °C
); modifiable using arrow keys
14
and
15
(see the
limits shown on
fig. 32
).
To
…
increase
: press key
14
“
UP
” (up arrow) .
decrease
: press key
15
“
DOWN
” (down arrow).
(*) calibration
(*) without connecting the sensors to inputs IN1 and IN2 :
•
Press key
13
•
Set the desired PB value, using keys
14
&
15
•
Choose the operating mode of the regulator by pressing either
DIR
or
REV
.
•
Press key
16
“
Inputs Forcing
”: the corresponding yellow Led will light up.
•
Adjust the regulation trimmer of the
P2
band to read the
“50.0 (%)”.
•
Press key
16
again: the yellow Led will go out and the regulator will now
work with
PB
legible from key
13.
N.B. :
the value of
PB
in
mA, bar, Vdc, °C
read on the
HELP
I
unit is always the last one set and different for the type
of incoming signal (
mA, Vdc, bar, °C
)
For more information, consult the user manual for
HELP
I
10
display module
.