905U Wireless I/O Module User Manual
105S Serial I/O Module
Page 42 © January 2011
The password can be between 6 and 256 characters. You can also change password by selecting this
option from the “Utilities” menu.
If you are starting a new project, you have the option
of “Enabling Security” - please read Section 4.3.7 and
the associated warnings before using this option.
To proceed with the configuration, double-click on the
project name on the menu on the left side of the screen.
“Units” will appear. You can now enter the types of
units which will be used in the system. If you double-
click on “Units”, then the modules that have already
been selected will appear.
Loading configuration from an existing module
To load the configuration from a module, connect the module to the PC via the RS232 cable and click
on “Load Unit”. This will allow you to view the module configuration, change it, or copy it for
another module - refer to section 4.3.3 for more information.
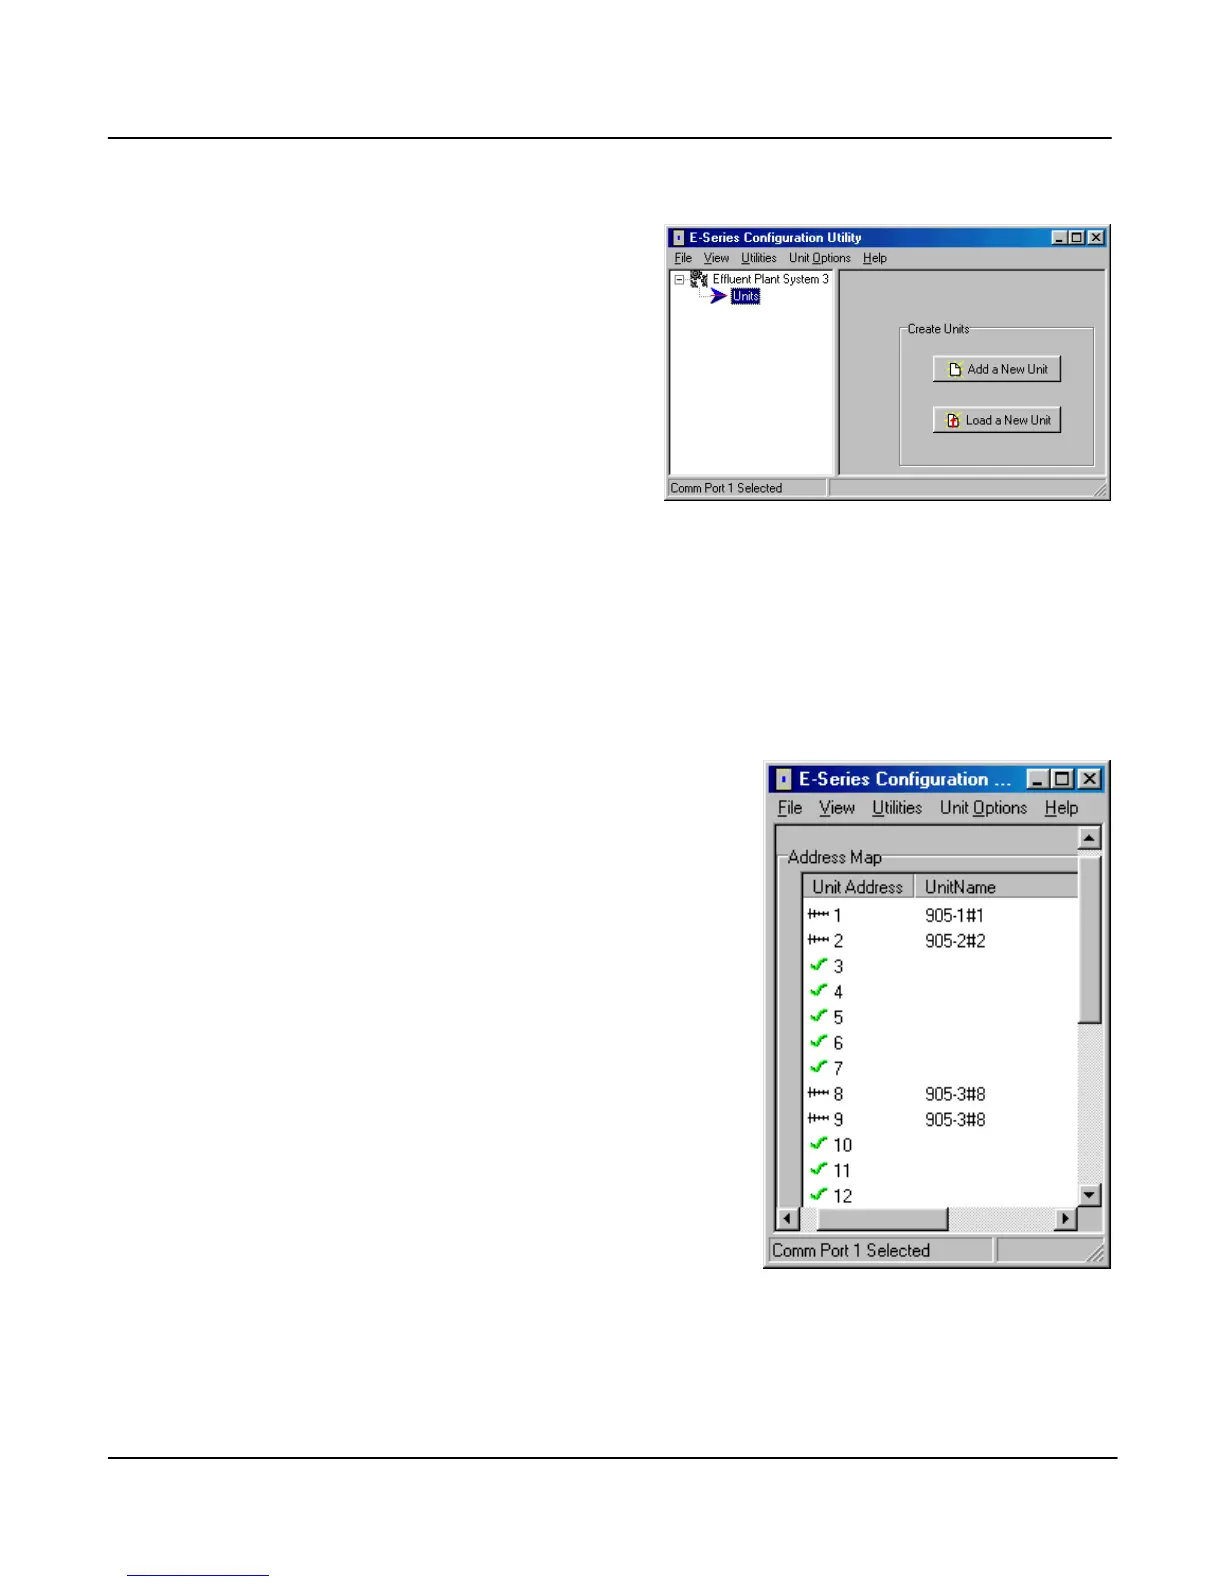
Adding a new module to the system configuration
To add a new module to the system configuration, click on “Units” on the left-hand menu and then
“Add Unit”. Select the type of module from the list.
Note that this program covers 105U, 105S and 905U modules.
These modules are essentially the same as far as configuration is
concerned. That is, a 105-1 or a 905-1 selection will configure a
105U-1, 105S-1 or a 905U-1.
The program will ask to select the unit address and will display
the list of available addresses for you to select. For 905U
modules, select an address between 1 and 95. For 105S
modules, select an address between 96 and 127.
The default name for a unit will include the unit address. For
example, “905-3#8” is a 905U-3 module with unit address 8
(and also 9, as a -3 takes two unit addresses). You can change
the name of a unit - for example, you could replace the default
name with “Pump Station 14”.
Deleting a Unit
A module can be deleted from the configuration by highlighting
the unit and selecting “Delete Unit”.