• Switches 1–7: Off
• Switch 8: On
The IP addess is set to 192.168.0.1.
6. If you are using a Model 1500, Model 2500, or Series 3000 transmitter, ensure that
the RS-485 terminals are in RS-485 mode.
7. Cycle power to the transmitter and wait 15 seconds before applying power to the
EtherNet/IP Module.
8. Power up the EtherNet/IP Module.
The module will attempt to make a Modbus connection to the transmitter.
9. Is the Subnet Status LED (LED 5) green?
Option Description
Yes Continue with these steps.
No See LED indicators.
10. Set the network settings for the EtherNet/IP Module.
a) Change the Ethernet address setting for your PC so that it is on the same
subnet as the device. When prompted, enter the following:
• IP address: 192.168.0.x, where x is something other than 1
• Subnet mask: 255.255.255.0
b) Disable the popup blocker on your web browser.
c) Use a crossover cable (or a standard cable with a switch) and your web
browser to connect to the device, using the IP address assigned in Step 6:
192.168.0.1.
d) At the login screen, log in as user admin. The default password is admin.
Ignore the auto-configuration popup window.
e) On the Network Settings page, change the settings as required, and close the
web browser.
f) At the EtherNet/IP Module, set all dip switches to Off.
g) Cycle power to the EtherNet/IP Module.
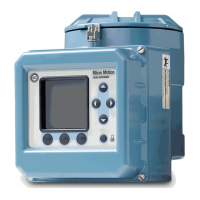
11. Connect the EtherNet/IP Module to the Ethernet network.
See Ethernet connector.
12. Wait for the auto-configuration process to complete.
Important
For initial startup, you must use the auto-configuration process to ensure that
device memory is completely set up.
13. Add the EtherNet/IP Module to the Ethernet network control system. The EDS file is
available on the Resource CD, the EtherNet/IP Module (download from
Administration page), and the Emerson web site.
Installation
User Guide
January 2019 MMI-20019808
12 Micro Motion EtherNet/IP Module