Do you have a question about the Emerson Micro Motion SGM Series and is the answer not in the manual?
Covers manual introduction, model codes, communication tools, and additional resources.
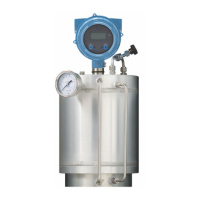
Details functional view, terms, core process variables, and calculation equations.
Provides essential steps for powering up, checking status, and connecting the transmitter.
Covers default values, display menu access, HART security, HART lock, and factory reset.
Details on-site setup, purging, calibration procedures using display, ProLink III, and Field Communicator.
Explains how to set measurement units for process variables using the transmitter display.
Guides on configuring specific gravity, temperature, pressure, compressibility, density, and concentration via ProLink III.
Details on configuring density, temperature, gas, and concentration measurements via Field Communicator.
Covers transmitter display settings, alert handling, security, and informational parameters.
Explains configuration of Channel B, mA output, discrete output, HART, Modbus, and fault actions.
Covers testing with sensor simulation, backing up configuration, and enabling HART security.
Covers recording process variables, viewing data, and managing status alerts.
Details on density verification, temperature compensation, calibration, and user-defined calculations.
Provides guides for common issues like power, grounding, loop tests, alerts, density, temperature, and milliamp outputs.
Presents an example calibration certificate describing factory calibrations and configurations.
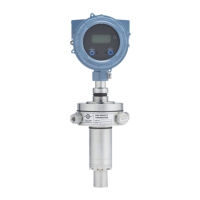
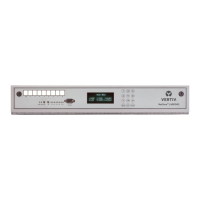
Describes the physical components of the transmitter interface, including LEDs and optical switches.
Explains how to use the Scroll and Select optical switches to control the transmitter display.
Details how to navigate and use the display's menu system for configuration and maintenance tasks.
Lists and defines codes used to represent various process variables on the transmitter display.
Provides a reference for codes and abbreviations found in the transmitter's display menus.
Introduces ProLink III as a configuration and service tool for Micro Motion transmitters.
Explains how to establish connections using different types like HART, Modbus/RS-485.
Provides an overview of the Field Communicator as a handheld configuration and management tool.
Details the procedure for connecting the Field Communicator to the transmitter via terminals or HART loops.
| Product Category | Coriolis Flow Meter |
|---|---|
| Brand | Emerson |
| Process Connection | Flanged, Threaded, Sanitary |
| Material | Stainless Steel |
| Accuracy | ±0.1% of rate |
| Flow Range | Varies by line size; refer to product data sheet |
| Outputs | 4-20 mA, HART, FOUNDATION Fieldbus, Modbus |
| Series | Micro Motion SGM Series |