4
3.1 Opening the carton
Save the packing material for possible further re-use. Shipment of your DX -2 in other than factory packing may result in non-warranty
damage.
3.2 Opening the DX-2 cover
An inspection of the interior of the amplifier should reveal no damage or adversely affected components. Remove the 4 screws on each
side and remove the cover. Should there be any form of problem, notify your supplier immediately.
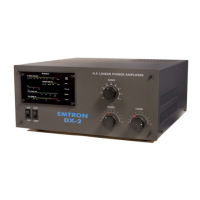
4 INSTALLATION I ENVIRONMENT
4.1 Required environment
The DX-2 amplifier can be operated at an ambient temperature between 0 and 40° Celsius. It should be installed in a place with a good
ventilation and protected from the direct sunlight. At least 5 cm (2 inches) of free space must be left at the rear and left and right, for
ventilation. Do not place any object on top of the amplifier, especially above the ventilation opening.
An environment free of dust, smoke and high humidity is required, as for any high powered RF amplifier. Dust, or particles resulting
from burning fire wood or coal could be responsible for sparks or electrical discharges between the capacitor plates, or in other parts of
the RF section.
4.2 Power requirements
When operating at full power, up to 16A from the 240 VAC mains is required. Ensure that the AC supply you intend to use is fully
rated and properly fused. The Emtron "soft start" circuitry ensures that there are no momentary surges of current at power-up, therefore
the fuse does not need to be over-rated. However, the wiring of the mains supply for the amplifier should be able to handle the power at
full load with minimal drop in the voltage, to insure the performance of your DX-2 does not suffer.
5 REAR PANEL
The following connectors and controls are present on the rear panel
5.1 Power / Earth connections
A wing-nut Earth connection is provided at the rear of DX-2. A good Earth link must be provided here. Connect this first, before
making any other connection to the amplifier. The AC power input is protected by two 20A fuses.
5.2 RF connections
RF INPUT
The RF input is an SO-239 female connector. A 50 ohm coaxial cable line of good quality terminated with a PL-259 coaxial
connector is required to connect the transceiver or exciter output to the input connector of your DX-2 amplifier.
RF OUTPUT
The RF output is also a female SO-239 connector. The use of a high quality RG-8A/U, RG-213 or similar 50 ohm coaxial
cable line terminated with a ‘VHF’ type PL-259 connector is essential. Similarly, a VSWR of 2: 1 or better is
mandatory. Remember too, that the EMTRON DX-2 amplifier can deliver 1.5 kW continuously in the SSB mode. Not all antennas can
handle such power.
5.3 Transceiver control
ALC
The ALC output is via a black female RCA connector.
This is an ALC system for use with transceivers or transmitters having a negative-going ALC system and possessing an external ALC
input jack. A shielded patch lead with an appropriate connector at one end and a male RCA connector for the DX-2 at the other end is
required. Check the specifications of your transceiver for a suitable connection.
PTT
The PTT input is a female RCA connector (red). This line controls the transmit/receive switching system. This jack must be connected
to transceiver or exciter relay contacts which are open on RECEIVE and closed on TRANSMIT. In the standard version (DX-2 fitted
with a l2V antenna relay), the PTT input presents an open circuit voltage of + l2V with respect to the chassis, with an impedance of
about 70 ohm. Therefore, a current of typically 0.17 A must be switched by the transceiver or exciter.
In the QSK version, the voltage at the PTT input is typically 28V (and up to 36V unloaded), with an impedance of about 240 ohm. A
current of about 0.12 A has to be switched in this case.
ALC CONTROL
This is a user-accessible control for setting the negative voltage at the ALC output. Further details are given in section 10.2