16/16
Endress+Hauser
Kits CM42
https://portal.endress.com/picpool/sft/advicepdfs/51517406_cm42.pdf
Wenn Sie weitere Informationen zu Ihrem
Produkt benötigen:
www.endress.com/cm42
Hier finden Sie (soweit für Ihr Produkt
zutreffend bzw. verfügbar):
•
Produktspezifikationen
•
Technische Information (TI)
•
Betriebsanleitung (BA)
•
Kurzanleitung (KA)
•
Sonderdokumentationen (SD)
•
Zertifikate und Ex-Sicherheitshinweise (XA)
•
Firmware, Software, Treiber
•
Zubehör
•
Wartungsteile und Ersatzteile
•
und mehr
Das Original der vorliegenden Anleitung in
Format DIN A4 und Farbe erhalten Sie über
folgendem Link oder den QR-Code:
If you need more information about your
product:
www.endress.com/cm42
Here you'll find (as far as applicable to your
product or available):
•
Specifications of the product
•
Technical Information (TI)
•
Operating instruction (BA)
•
Short instruction (KA)
•
Special documentation (SD)
•
Certificates and Ex safety instructions (XA)
•
Firmware, software, driver
•
Accessories
•
Maintenance parts and spare parts
•
and more
You can get the original edition of the present
instruction in paper size (DIN A4) and in color
via following link or the QR-Code:
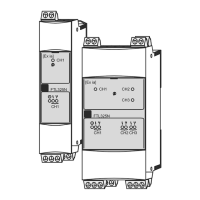
51517406 Anleitung Kits CM42 Sammelanleitung
51517406
Endress+Hauser
2003227
• Montieren Sie die neuen Verschlussschrauben.
Bitte beachten: Alle Dichtungen werden an
der Außenseite des Gehäuses angebracht.
• Schließen Sie alle Kabel wieder an.
Beachten Sie die Anschlussaufkleber im
Gerät und/oder ihre eigenen Notizen.
• Erden Sie die Kabelschirme an der Erdschiene.
• Ziehen Sie dann die Überwurfmuttern aller
Kabelverschraubungen an, bis die Zugent-
lastungen der Kabel gewährleistet sind.
• Schließen Sie den Deckel, stellen Sie die
Stromversorgung des MUS wieder her und
prüfen Sie die Funktionen des Gerätes.
• Mount the new screw plugs.
Please note: All seals must be placed on
the outside of the housing.
• Reconnect all cables to the modules.
Note the wiring diagram stickers inside the
instrument and/or your own notes.
• Ground the cable shields to the ground bar.
• Tighten the outer screw caps of all cable
glands until the strain reliefs are ensured.
• Close and screw down the lid, restore the
power supply of the transmitter power
supply unit and check the functions of the
instrument.

 Loading...