20
INSTALLAZIONE
Informazioni preliminari
Le barre falcianti di nostra produzione possono
essere installate su tutti i trattori purché provvisti di
attacco universale posteriore a 3 punti, di sollevatore
idraulico e dei requisiti tecnici (potenza, presa di
forza con numero di giri adeguato, ossia 540 giri, ed
altro) richiesti da ogni singolo modello (vedi tabella
pag.7).
L’installazione deve essere eseguita da uno o più
operatori qualificati e a conoscenza delle norme di
sicurezza richieste dall’intervento. Inoltre è
necessario che l’attrezzatura sia posta all’interno di
un’area, predisposta per l’intervento, con superficie
piana e sgombra da oggetti od altro materiale e da
persone non addette e/o animali.
Installazione al trattore e configurazione da
lavoro
L’operatore, come prima cosa, deve abbassare
completamente il sollevatore idraulico del trattore e
poi si deve avvicinare lentamente alla barra falciante
per eseguire il centraggio. La barra falciante è in
configurazione di parcheggio.
IMPORTANTE
L’allineamento dei fori degli attacchi del trattore con
quelli delle rispettive sedi sul telaio della barra
falciante, ossia il centraggio, deve sempre essere
eseguito con estrema cautela ed attenzione.
Terminata la manovra, l’ope-
ratore arresta il trattore, lascia il
sollevatore nella posizione
bassa, inserisce il freno di
stazionamento, disinnesta even-
tualmente lo sforzo controllato,
estrae le chiavi dal cruscotto.
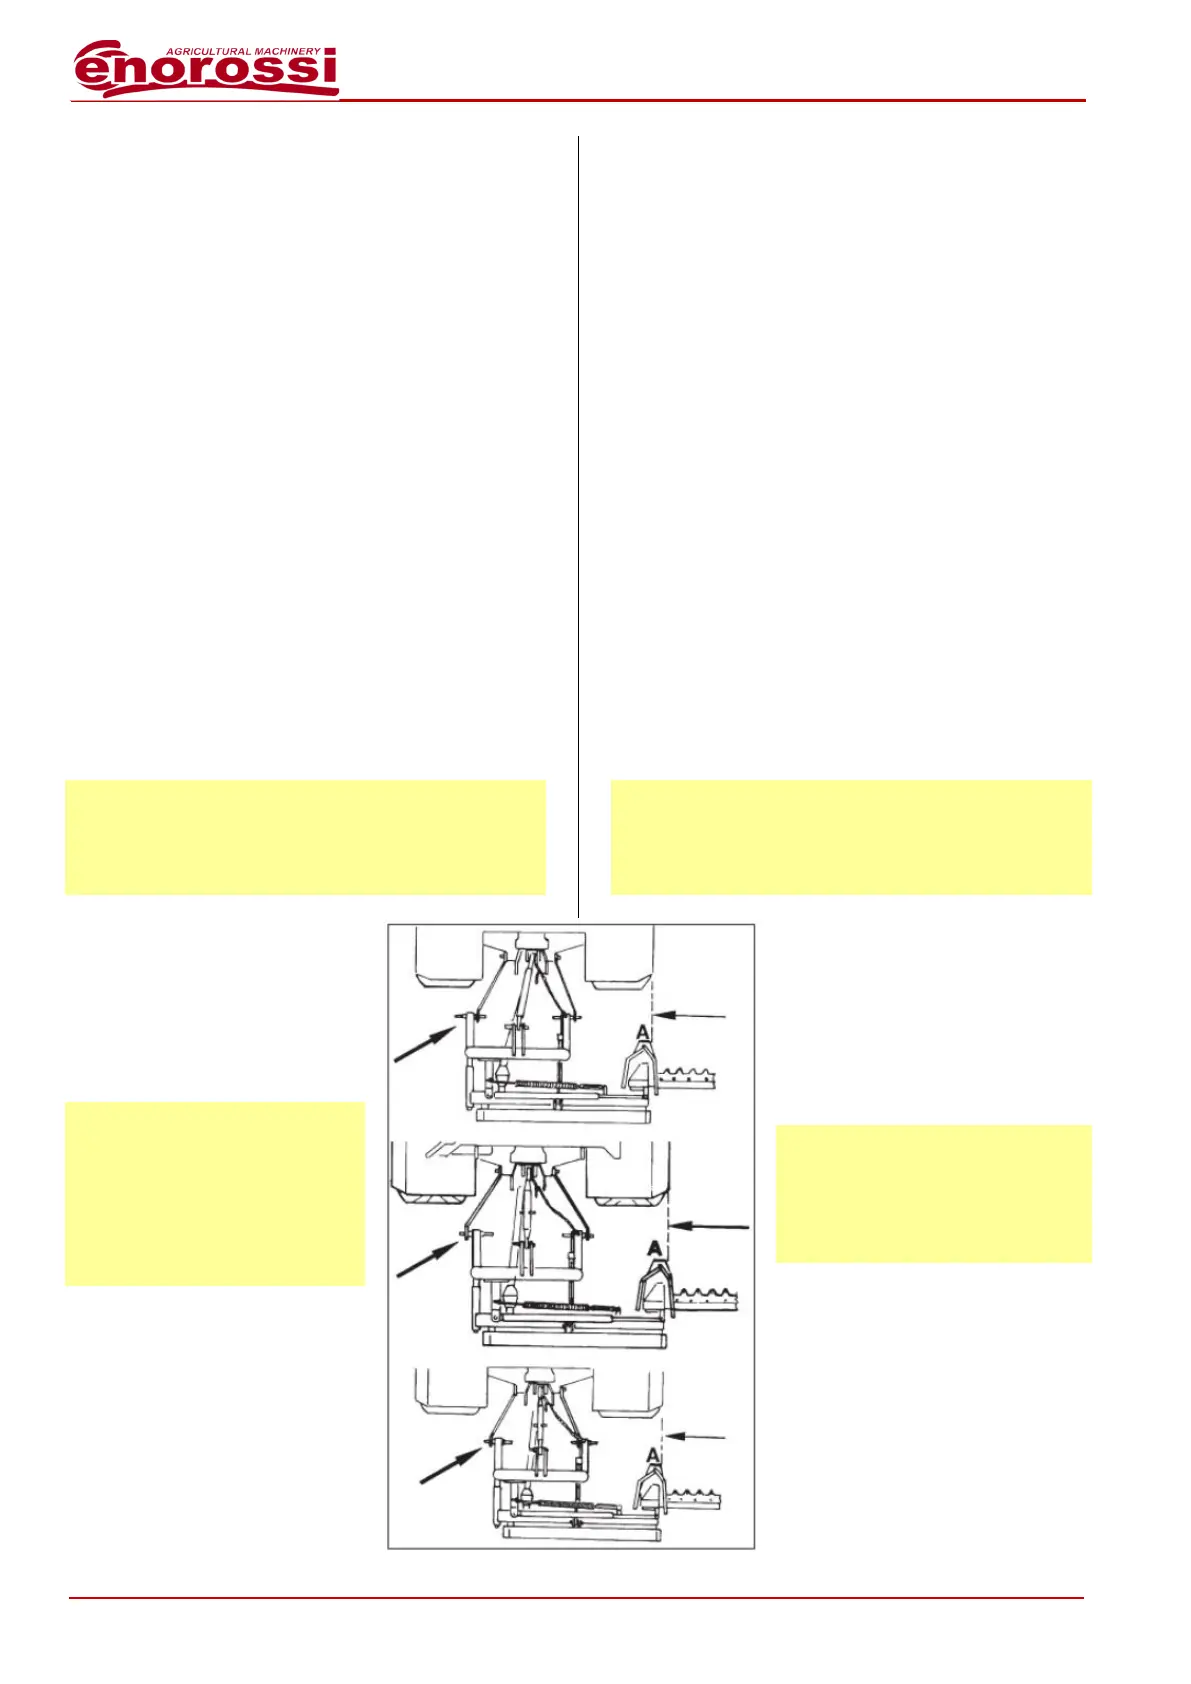
IMPORTANTE
A seconda della carreggiata del
trattore utilizzare i perni interni
od esterni inferiori
dell’attrezzatura in modo che la
slitta interna della barra (A -
fig.C1) possa trovarsi all’interno
della ruota del trattore.
Assicurarsi che i perni di attacco
inferiore della barra (A - fig.C2)
siano puliti e lubrificati.
inserire i bracci del sollevatore
idraulico del trattore (B - fig.C2)
nei perni della barra e bloccarli,
uno alla volta, con relative spine
di sicurezza (C - fig.C2).
INSTALLATION
Preliminary informations
Sickle bar mower of our production can be installed
on all the tractors equipped with an universal three-
point hitch, with a hydraulic lift and of the technical
requirements (power, P.T.O., rpm, etc.) that each
disc mower model requires (see table page 7).
The installation must be performs by one or more
qualified operators and to knowledge of the safety
norms required by the intervention. Besides, it is
necessary that the equipment is placed inside an
area, foreseen for the intervention, with plain surface
and free from objects or other material and from
unauthorized personnel and/or animals.
Installation to the tractor and working
configuration
The operator must completely lower the tractor
hydraulic lift and then approach the sickle bar mower
slowly to perform the alignment procedure. The bar
mower is in parking configuration.
IMPORTANT
The alignment of the holes of the tractor attachments
with those coupling on the sickle bar mower chassis
(operation called centering), must be always
performed with extreme caution.
At the end of the manoeuvre, stop
the tractor, leave the lift in the low
position, insert the parking brake,
disengage the traction control
system and remove the keys from
the dashboard.
IMPORTANT
According to the type of tractor you
have use either internal or external
pins so that internal skid of sickle
bar mower (A - fig.C1) remains
behind tractor wheel.
Make sure that pins of three-point
hitch (A - fig.C2) are clean and
greased.
Insert the arms of tractor hydraulic
lift (B - fig.C2) in the pins of sickle
bar mower and lock them, one at
time, with safety pins (C - fig.C2).