Refer to illustrations on pages 20.
1. Set POWER control to STAND BY. Always use this setting
when connecting the clamp or changing the brush.
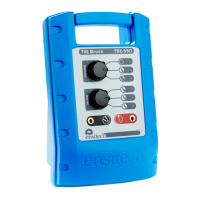
2. Ensure the Power Cord is connected to a suitable 110V
or 240V AC power outlet and connected to the TIG Brush
Power Socket.
3. Push the Power Button on the back of the Control Unit to turn ON.
The switch should be illuminated.
4. Make sure the brush has its insulating shroud and the
insulation on the wand is undamaged.
5. Ensure the TIG Brush is switched on and all equipment is
correctly connected as described above in S4.2.
6. Select power level and operating mode using the rotary
switches. See section 5 below for details.
7. Dip brush in cleaning fluid and apply brush tip to weld area to
be cleaned. Use only recommended cleaning fluids, see S7.3.
8. Ensure brush and work area remain wet with the fluid
during cleaning.
9. Apply brush only for as long as necessary to remove
discolouration. Prolonged application may affect
surface quality.
10. Some light sparking may occur where brush tip contacts
workpiece, particularly on higher power settings, and this
is normal. Excessive sparking for a prolonged time in one
area may cause surface pitting.
11. When desired surface finish is achieved, turn the TIG
Brush Power Control to STAND BY.
12. During and after use the brush may be very hot, put the
brush down on a non-flammable surface and out of contact
with the work piece.
13. Be careful touching the work as it may be hot.
14. Rinse thoroughly with clean water to remove all traces of
cleaning fluid. To ensure acidic residue is removed and
prevent any acidic residual salts recrystallizing and forming
a ‘white frosting’ on the surface of your work, always use
the recommended Ensitech neutralising fluid, see S7.3.
OPERATION4.4
21
TIG Brush™ Instruction Manual
Ensitech Pty Ltd
S4 OPERATION
 Loading...