EasyManuals Logo

Epson DFX-9000 User Manual

Epson DFX-9000
28 pages
To Next Page IconTo Next Page
To Previous Page IconTo Previous Page
Page #4 background imageLoading...
Page #4 background image
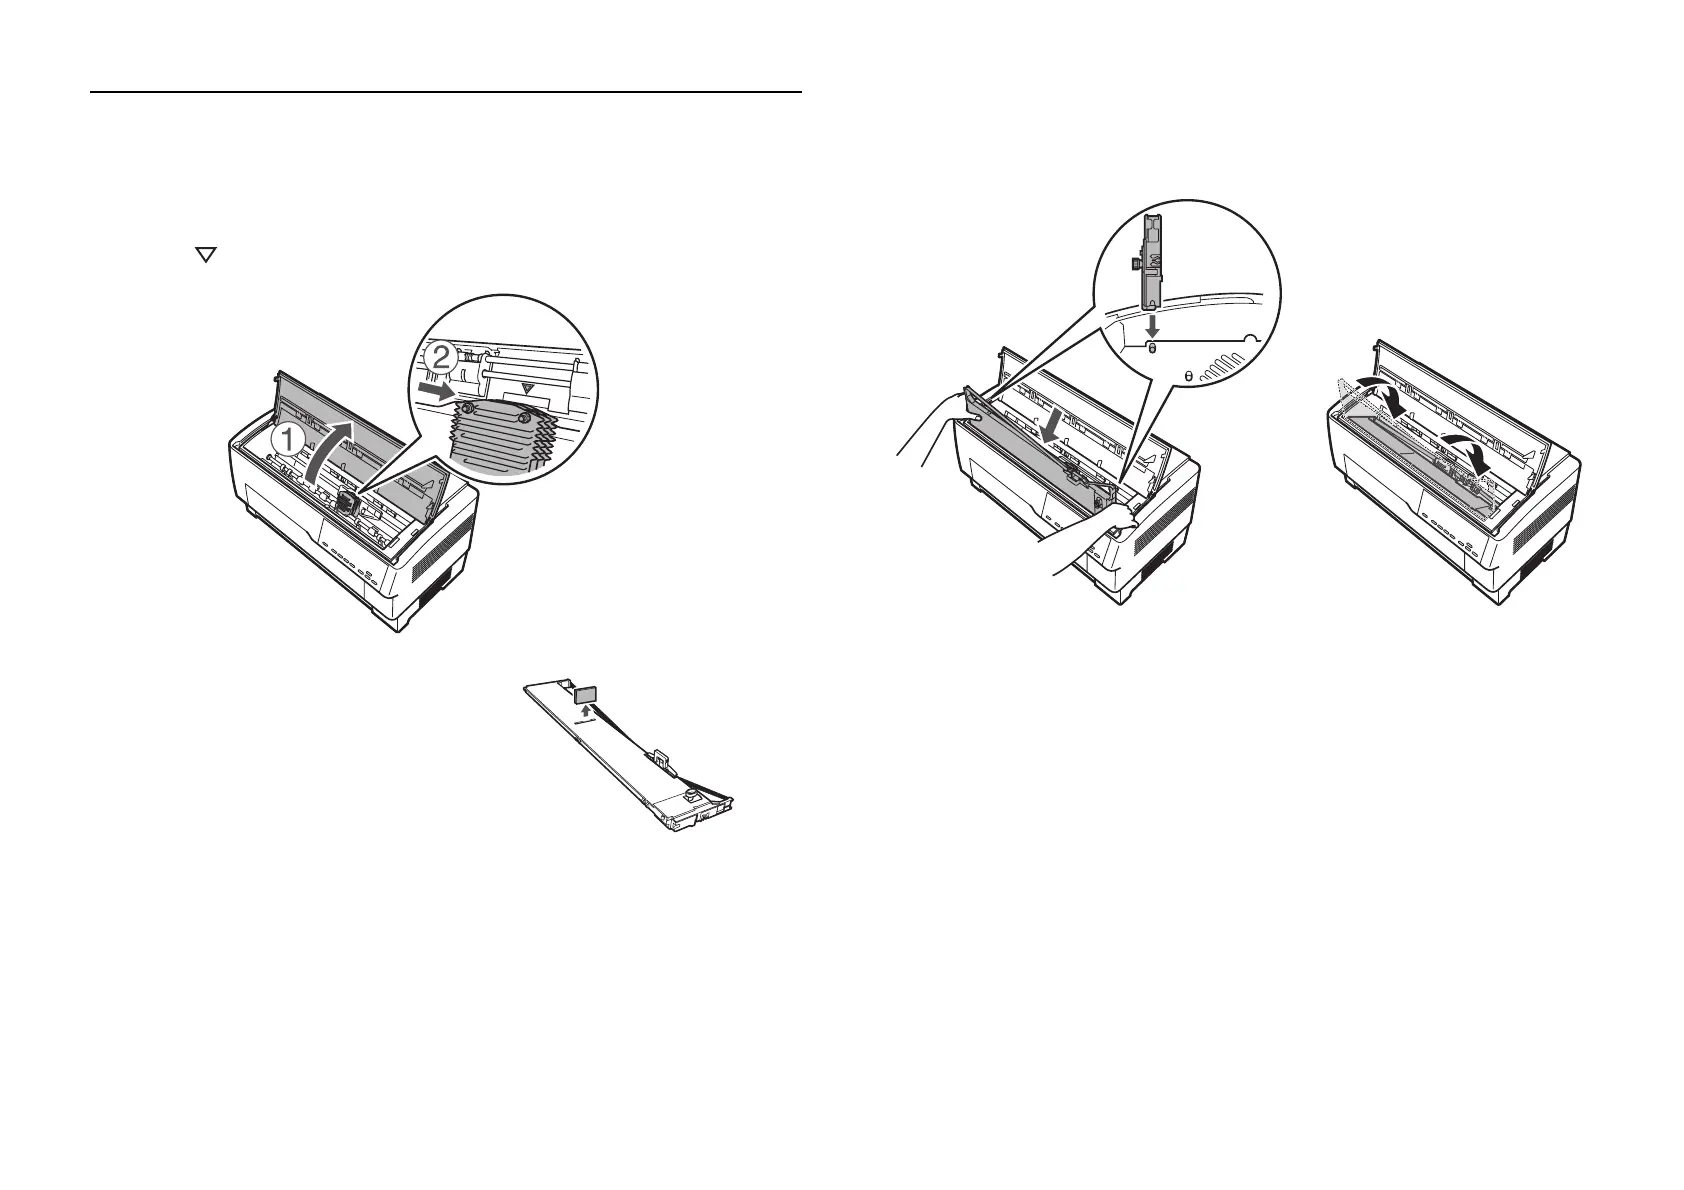
4 Installing the Ribbon Cartridge
Installing the Ribbon Cartridge
1. Make sure the printer is turned off. (The switch should be in the O
position.)
2. Open the top cover and slide the print head to the position shown, marked
by the symbol.
3. Unpack the ribbon cartridge and
remove the black plastic separator.
4. Holding the sides of the cartridge, place the notch on each end onto the
metal posts inside the printer. Then tilt the cartridge down into the printer
until it clicks into place.
http://www.ochimp.com
For More Info
Click Here ===>

Other manuals for Epson DFX-9000

Questions and Answers:

Question and Answer IconNeed help?

Do you have a question about the Epson DFX-9000 and is the answer not in the manual?

Epson DFX-9000 Specifications

General IconGeneral
ColorNo
Built-in barcodesCode 39, POSTNET, UPC-A, UPC-E
Maximum resolution240 x 144 DPI
Maximum print sizeA4 (210 x 297 mm)
Standard interfacesSerial
Dimensions (WxDxH)700 x 378 x 363 mm
Power requirements100-240V, 50-60Hz
Connectivity technologyWired
Compatible operating systemsMicrosoft Windows 95 / 98 / 2000 / Me / XP/ Windows NT 4.0
Sound pressure level (printing)58 dB
Mean time between failures (MTBF)20000 h
Sustainability certificatesENERGY STAR
Power consumption (standby)1.85 W
Power consumption (typical)7.5 W
Operating temperature (T-T)5 - 35 °C
Operating relative humidity (H-H)10 - 80 %

Related product manuals