EH-TW3500/4500/5500 Disassembly and Assembly CONFIDENTIAL
SEIKO EPSON 60 Revision A
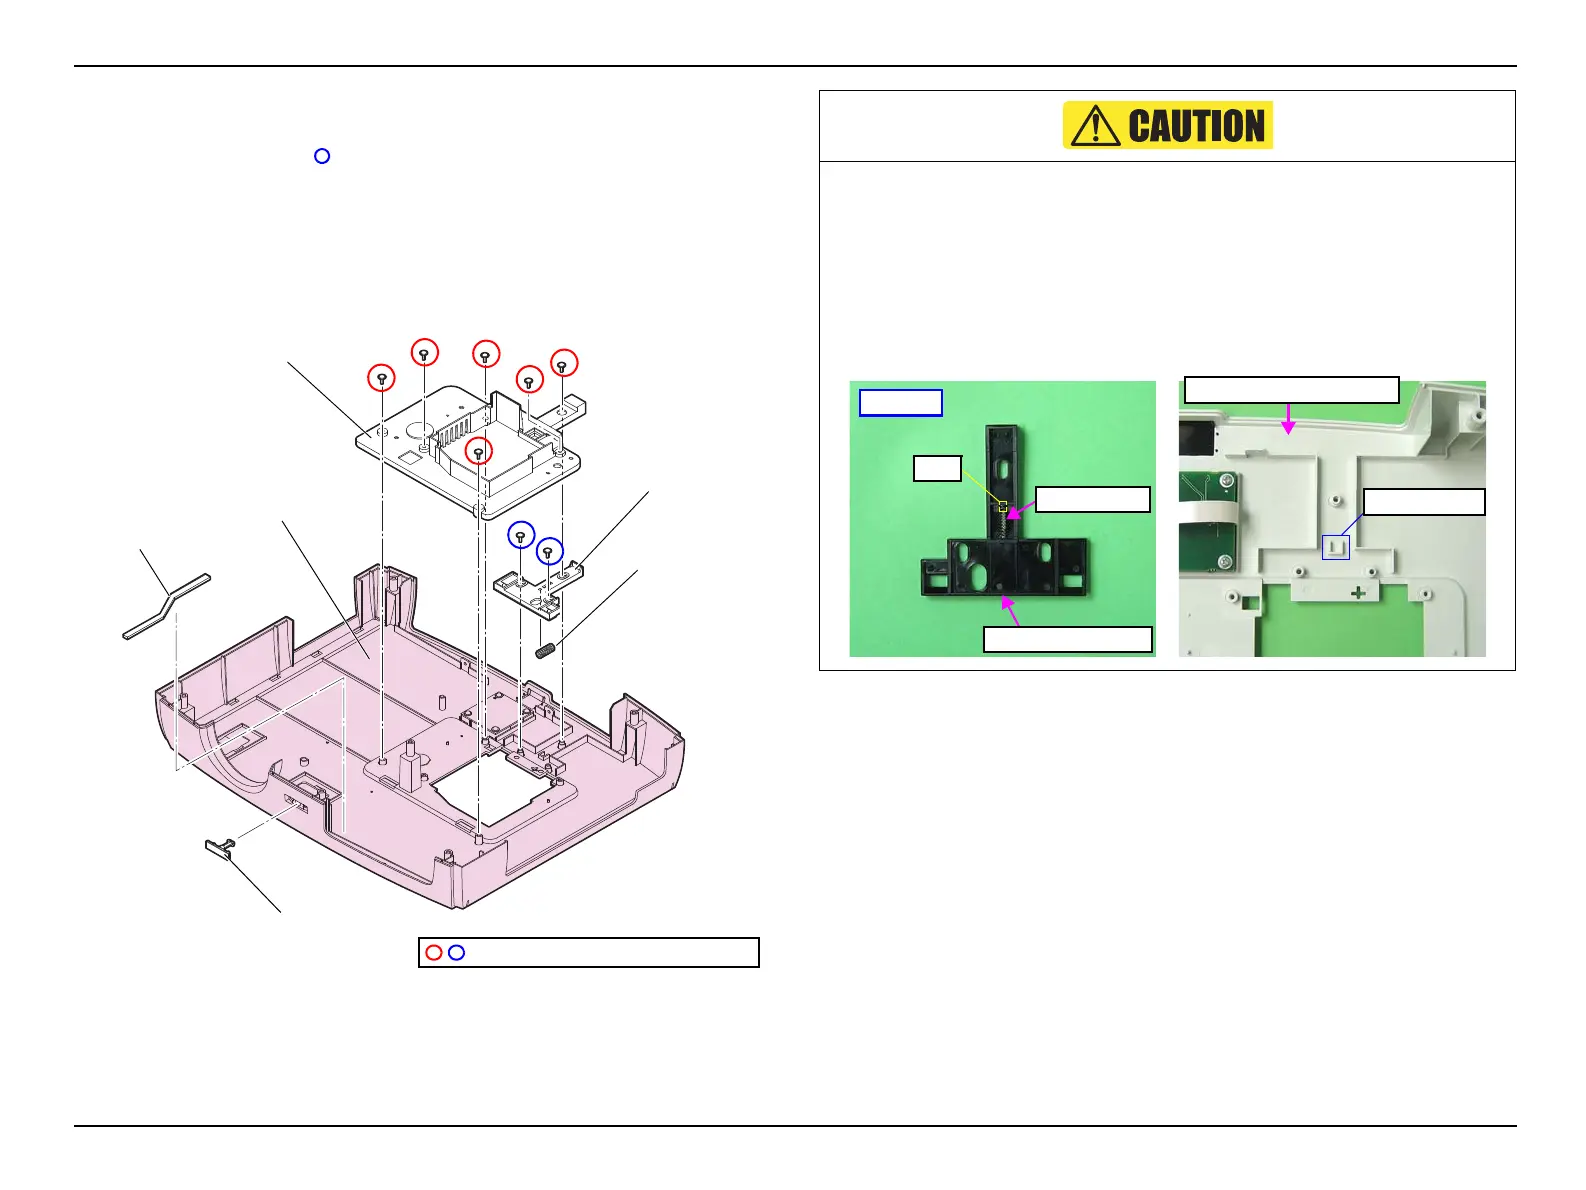
6. Remove the six screws and remove the Inner Upper Cover from the Upper Case
(assembly).
7. Remove the two screws ( ) and remove the Lamp Latch Cover from the Upper
Case (assembly).
8. Remove the Latch Spring from the Lamp Latch Cover.
9. Remove the Logo Plate Base from the Upper Case (assembly).
10. Remove the EX Seal from the Upper Case (assembly).
Figure 3-9.
Upper Case
(assembly)
C.C.P-TITE SCREW,3X8,F/ZB-3C
Inner Upper Cover
Lamp Latch Cover
Latch Spring
Logo Plate Base
EX Seal
When reassembling the Lamp Latch Cover and Latch Spring, follow the
procedure below.
1. Insert the Latch Spring into the attachment location until the spring is firmly
secured into the pin.
2. Place the Lamp Latch Cover on the Upper Case (assembly) correctly, then
install the end of the spring into the Spring holder adjusting it from the slit on
the Lamp Latch Cover.
3. Secure the Lamp Latch Cover with the screws.
Latch Spring
Backside
Pin
Lamp Latch Cover
Upper Case (assembly)
Spring holder

 Loading...