Print Head Alignment
Auto
The same adjustment as Print Head Alignment of
Automatic Adjustment is performed.
The approximate maximum length of the media
required to print the test pattern is given below.
Approx. 300 mm
A
Check that the printer is ready, and load the
media according to the actual usage conditions.
When using the Auto Take-up Reel Unit, attach
the media to the roll core.
U “Loading media” on page 67
U “Using the Auto Take-up Reel Unit” on
page 74
B
Press , and then press in the order of Media
Settings - Print Adjustments - Print Head
Alignment - Auto.
C
Press Start.
Auto adjust starts, and an adjustment pattern is
printed. Wait until adjustment is complete.
Manual
You can select Manual(Simple) or Manual(Standard)
to make adjustments.
Manual(Simple)
Select this when Auto adjustment has failed or when you
want to perform quick and simple adjustment by
visually inspecting the pattern.
Manual(Standard)
Select this when you want to perform adjustment
equivalent to Auto adjustment by visually inspecting the
pattern.
The approximate maximum length of the media
required to print the test pattern is given below.
Manual(Simple): Approx. 50 mm
Manual(Standard): Approx. 150 mm
Adjustment Procedure
A
Check that the printer is ready, and load the
media according to the actual usage conditions.
When using the Auto Take-up Reel Unit, attach
the media to the roll core.
U “Loading media” on page 67
U “Using the Auto Take-up Reel Unit” on
page 74
B
Press , and then press in the order of Media
Settings - Print Adjustments - Print Head
Alignment.
C
Select Manual(Simple) or Manual(Standard),
and then press Start.
An adjustment pattern is printed. Wait until
printing is complete.
D
Check the printed adjustment pattern.
Adjustment pattern blocks are printed as shown
below according to the type of manual
adjustments.
Manual(Simple): 4 blocks, A to D
Manual(Standard): 31 blocks, A to Z and a to e
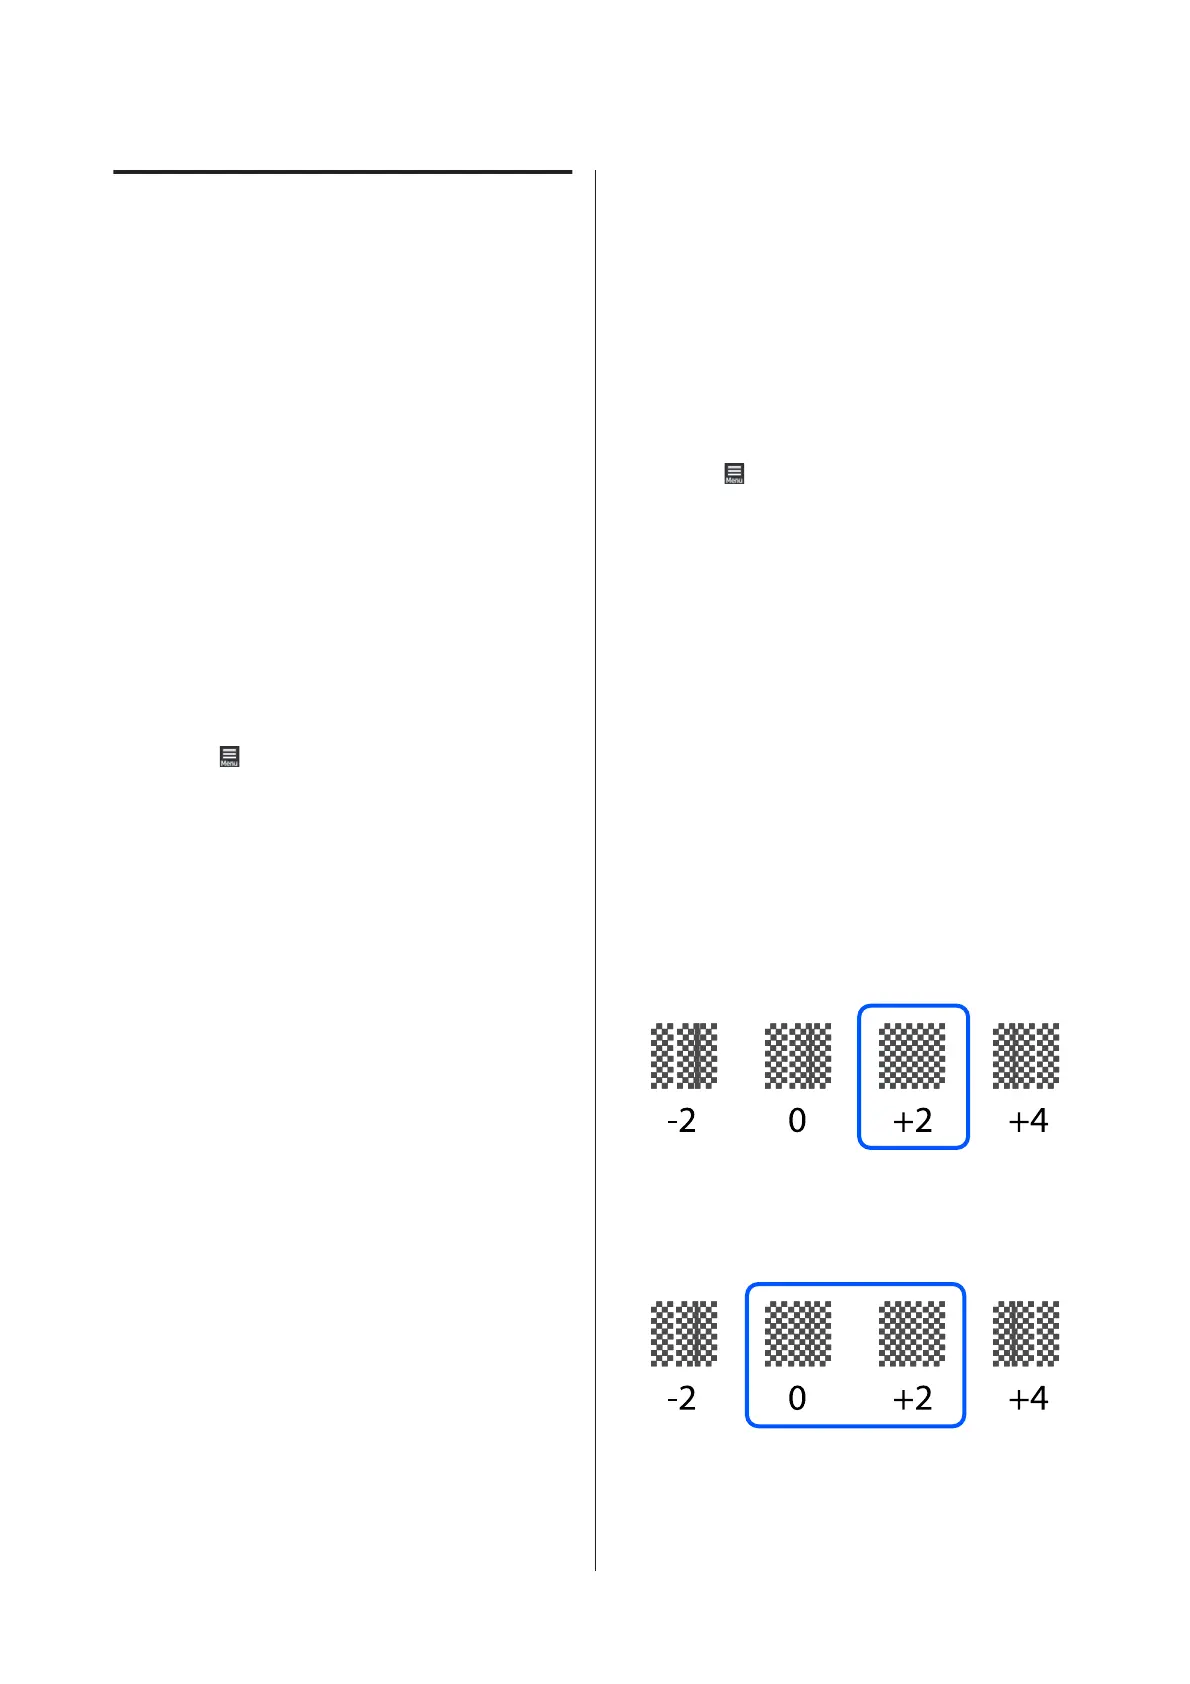
Select the pattern with the least tint unevenness
for each block.
Select “+2” in the cases shown below.
If there are patterns where unevenness is the
same, set an intermediate value in Step 5.
Set “+1” in the cases shown below.
SC-F10000 Series User's Guide
Basic Operations
91
 Loading...