EPSON Stylus C110/C120/D120 Revision B
DISASSEMBLY/ASSEMBLY Disassembling Printer Mechanism 89
4.5.7 EJ Roller
Part/Unit that should be removed before removing EJ Roller
Upper Housing/Lower Housing/Main Board Unit/Left Frame/Panel Unit/Star
Wheel Holder Assy.
Removal Procedure
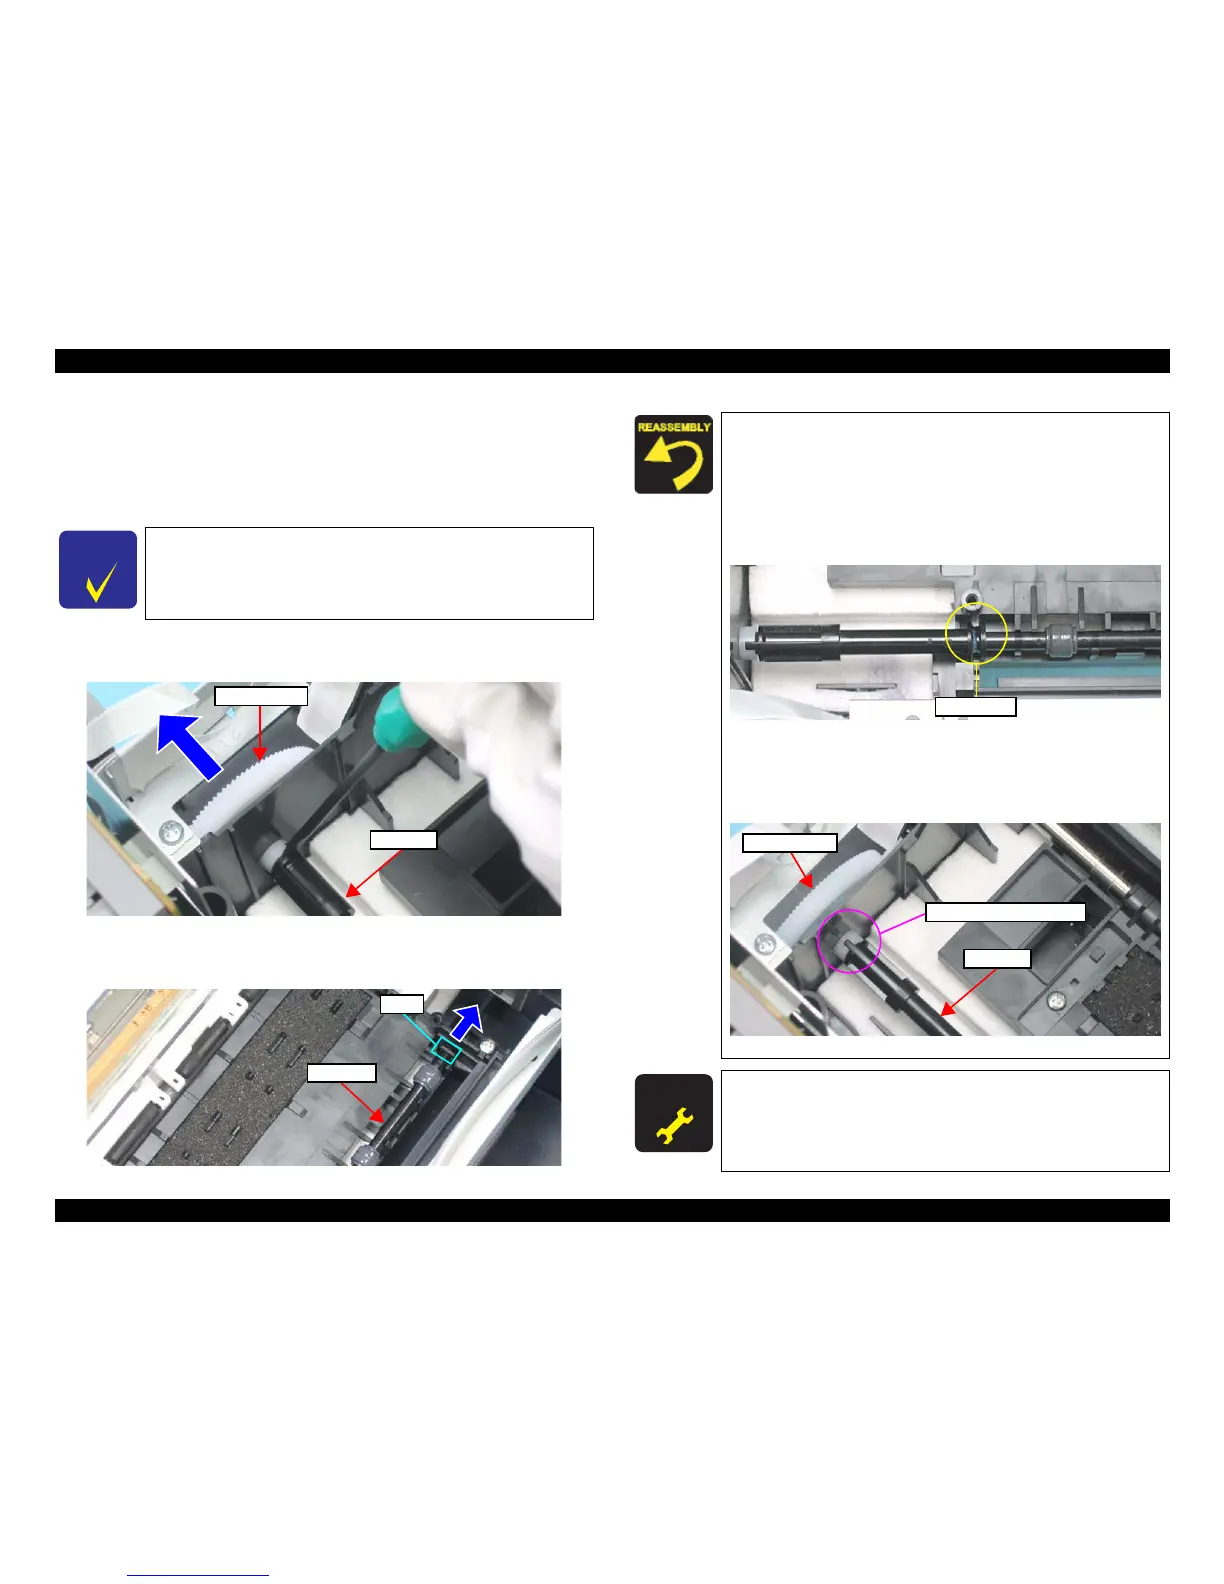
1. Insert a flathead precision screwdriver into the gap between the Spur Gear 51.5
and the EJ Roller, and push the gear with the screwdriver in the direction of the
arrow to remove it.
Figure 4-41. Removing EJ Roller (1)
2. Remove the EJ Roller while pushing the tab on the right side of the Base Frame in
the direction of the arrow.
Figure 4-42. Removing EJ (2)
The Spur Gear 51.5 cannot be reused once it is removed. Whenever
the gear is removed, make sure to attach a new one.
When installing the EJ Roller, pay attention to the following
instructions.
• Make sure that the rubber part of the EJ Roller does not
contact with the hook of the Front Paper Guide.
• Be cautious not to touch the rubber part of the EJ Roller.
• Be sure to align the rib (x1) of the Front Paper Guide with the
slit on the EJ Roller.
Figure 4-43. Installing EJ Roller
When installing the Spur Gear 51.5, be sure to align the
concave section of the Spur Gear 51.5 with the convex section
of the EJ Roller.
Figure 4-44. Installing Spur Gear 51.5
A D J U S T M E N T
R E Q U I R E D
After removing/replacing the EJ Roller, be sure to perform
the specified adjustment. See
Chapter 5 “ ADJUSTMENT”
(p.107)
After replacing the EJ roller, be sure to perform the required
lubrication. See
Chapter 6 “ MAINTENANCE” (p.116)
Concave and Convex Section
Spur Gear 51.5
EJ Roller