Confidential
Adjustment Details of Adjustments (TBD) 40
Epson Stylus Photo R3000 Revision A
2. Install the printer on a level workbench.
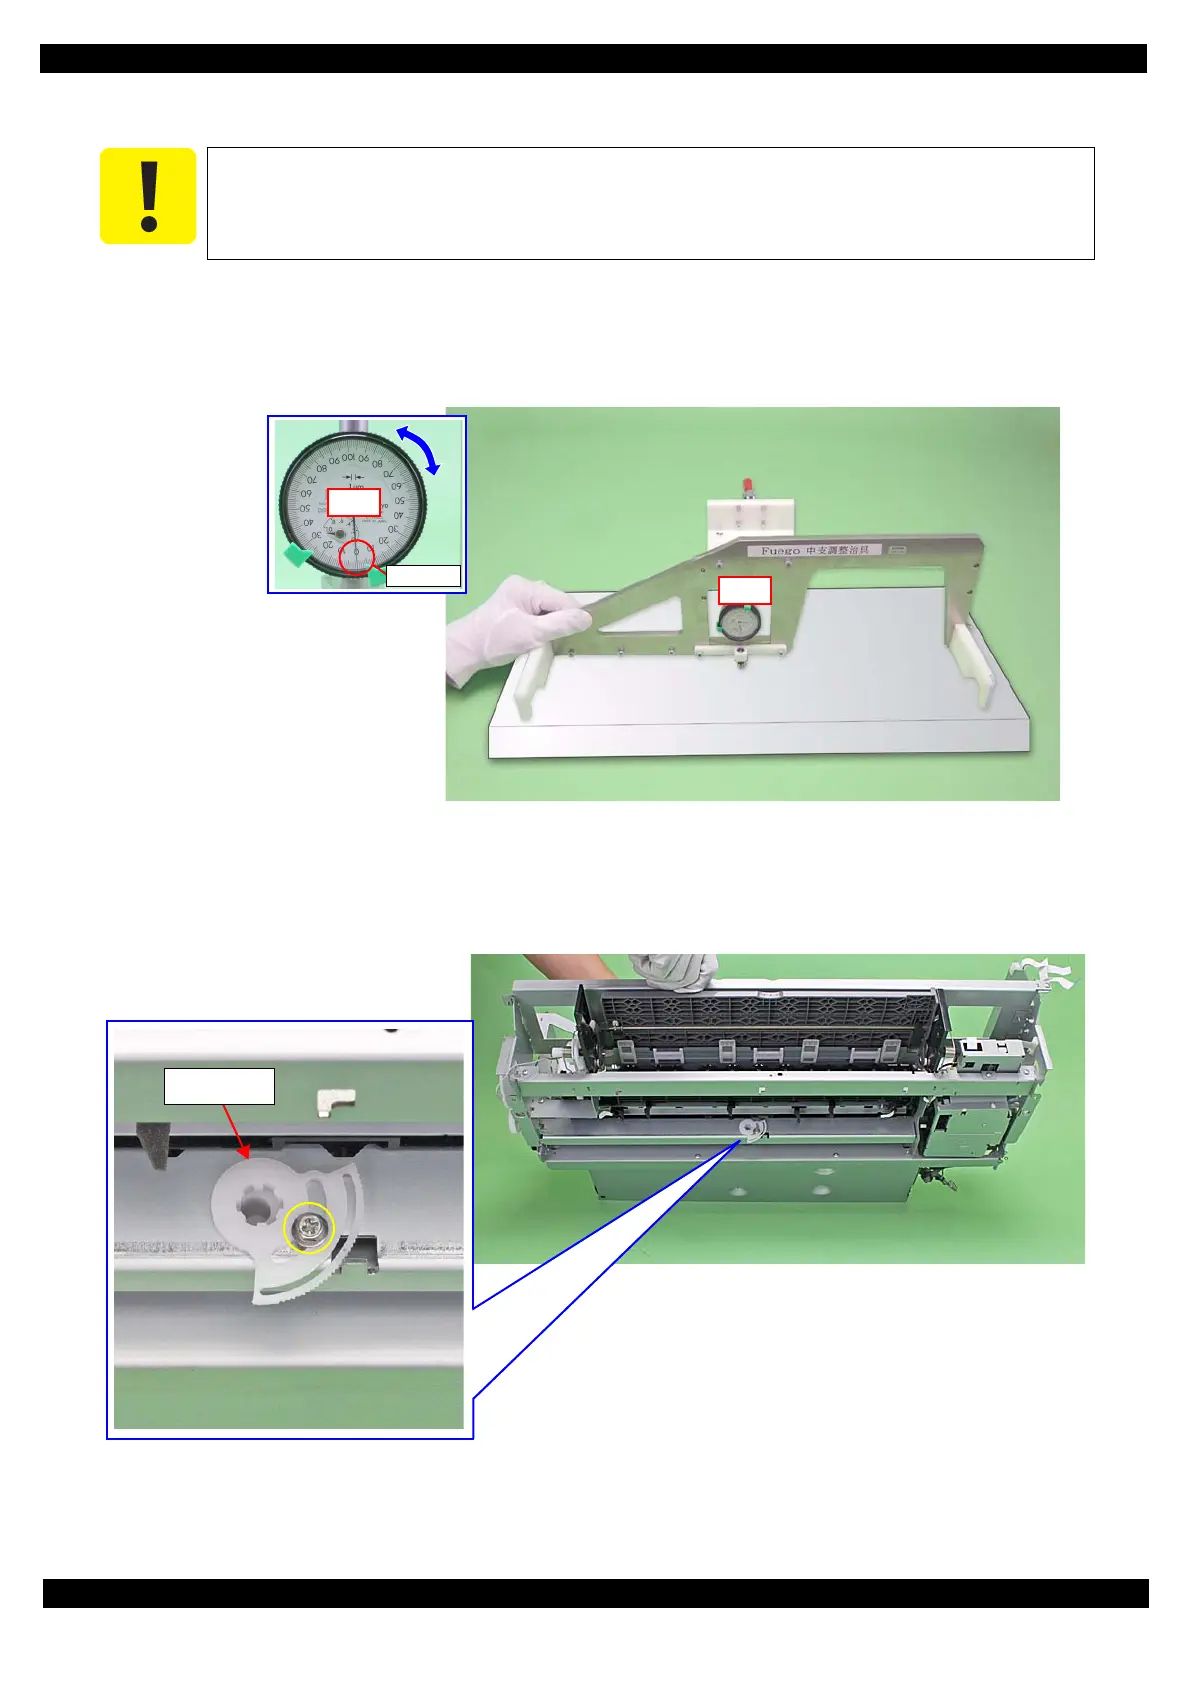
3. Set the PF Roller Shaft Position Adjustment Jig in place on the Level block, and perform zero adjustment.
Long hand position: Turn the dial to adjust the “0” position on the scale to the long hand position with the jig set in
place on the Level block.
Short hand position: Check it.
Figure 2-3. Setting the PF Roller Shaft Position Adjustment Jig (1)
4. Tilt the Printer Mechanism at about 45 degrees, and loosen the screw that secures the Center Support
Bushing Cam.
Figure 2-4. Center Support Bushing Cam and the Screw
Place the printer on a level, warp-free table. This adjustment cannot be performed correctly if
it is performed on a warped table.
Center Support
Bushing Cam

 Loading...


