Epson Stylus Pro 3800/3800C/3850/3880/3885/3890 Revision C
DISASSEMBLY & ASSEMBLY Disassembly/Assembly Procedure (Group 1) 177
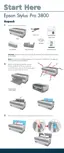
12. Insert the “Space Making Jig” in the position shown in Figure 4-114.
13. With the “Space Making Jig” is attached, temporarily secure the ink tube, FFC,
GUIDE, TUBE, CR with acetate tape.
Figure 4-114. Attaching the Space Making Jig
Figure 4-115. Temporarily Securing with Acetate Tape
C A U T I O N
Before securing the FFC and tube with acetate tape in the next step,
make sure they are NOT in the following conditions.
The FFC is tightly routed and causing the “Space Making Jig”
to push the ink tube in the direction of the arrow.
Too much slack in the FFC is causing the FFC to push the ink
tube in the direction of the arrow.
FFC
GUIDE, TUBE, CR
Ink tube
Carriage
Space Making Jig
FFC
Ink tube
Carriage
Space Making Jig
Screw
Frame R
Space Making Jig
Align center of Space
Making Jig with screw.
Align Space Making Jig
with frame R.
Center of Space Making Jig
Insert Space
Making Jig
between ink tube
and FFC.
Space Making Jig
GUIDE, TUBE, CR
Ink tube
Acetate tape

 Loading...