3-32 Disassembly and Assembly Rev.C
Confidential
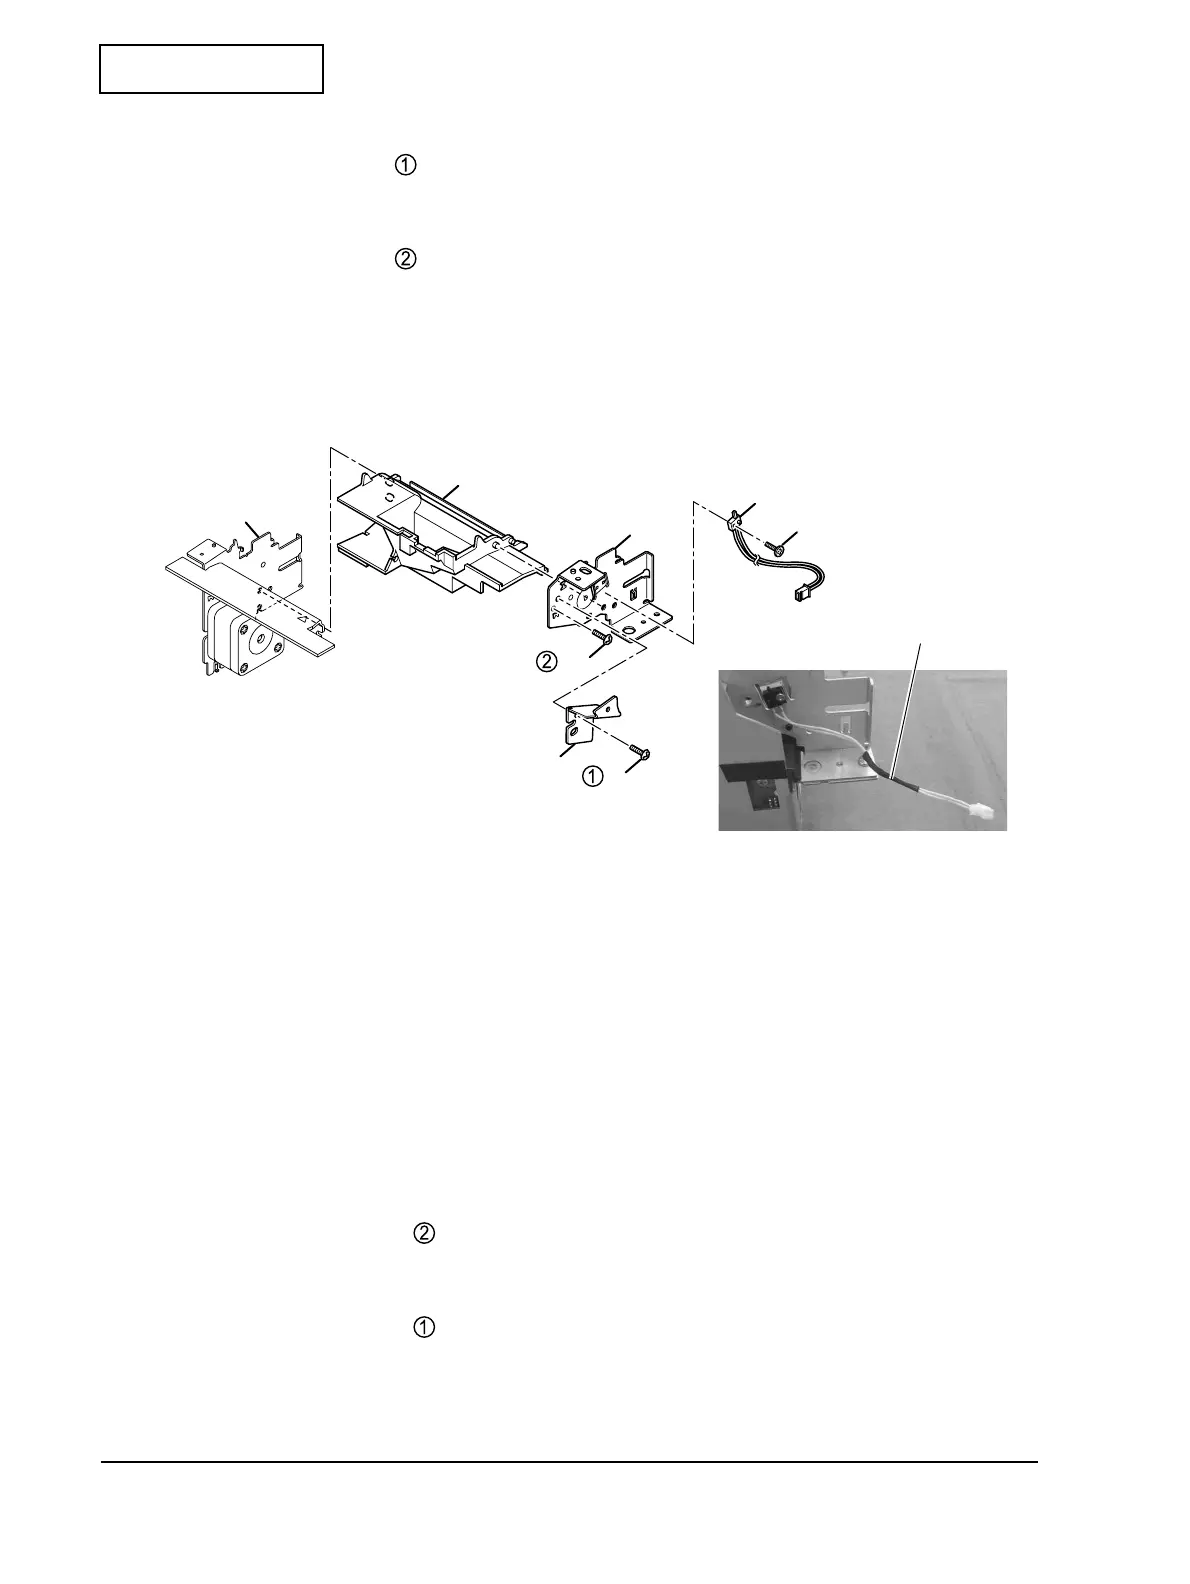
Frame R and Center Frame
1. Remove one S4 screw .
2. Remove frame strengthening plate R.
3. Remove one S4 screw .
4. Remove frame R.
5. Remove the center frame.
6. Remove one switch screw and remove the cover detector assembly from frame R.
Install using the following steps:
1. Affix the insulating tape on the cover detector assembly, as shown in the photo above. (This
process is necessary only if the original cover detector assembly has the insulation tape
affixed.)
2. Install the cover detector assembly onto frame R and secure with one switch screw. Then,
align the front and back so that the protrusion on the switch faces the position marked on
frame R.
3. Install the center frame. Then, route the lead wire of the paper feed motor forward. Align
two dowels on the center frame with two holes in the frame L assembly.
4. Install frame R.
5. Tighten one S4 screw at .
6. Install frame strengthening plate R.
7. Tighten one S4 screw at .
Center frame
Frame R
Frame strengthening plate R
S4
S4
Cover detector assembly
Switch screw
Frame L assembly
Insulating tape
 Loading...