QX5
QXFXO4/QXISDN4/QXE1T1/QXFXS24; (SW Version 6.0.x) 66
QXFXO4/QXISDN4/QXE1T1/QXFXS24 Manual II: Administrator’s Guide
When the SIP Tunneling service is enabled, virtual tunnels between the master and its slaves are created. A possibility to use the created SIP tunnels will
be automatically enabled in the
Call Routing Table.
Optionally, a SIP tunnel can be mutually established on two QXs allowing to route SIP calls back and forth. A QX can be at the same time configured both as
a slave and as a master to the same remote device, i.e. the slave QX can act as a master for the master device it is registered on. For example, the QX can act
as a slave for the QX -2. In its turn, the QX -2 can act as a slave for the QX -1. With this configuration and the corresponding routing rules added in the
Call
Routing Table on both devices, the SIP calls will be routed from QX-1 to QX -2 and vice versa.
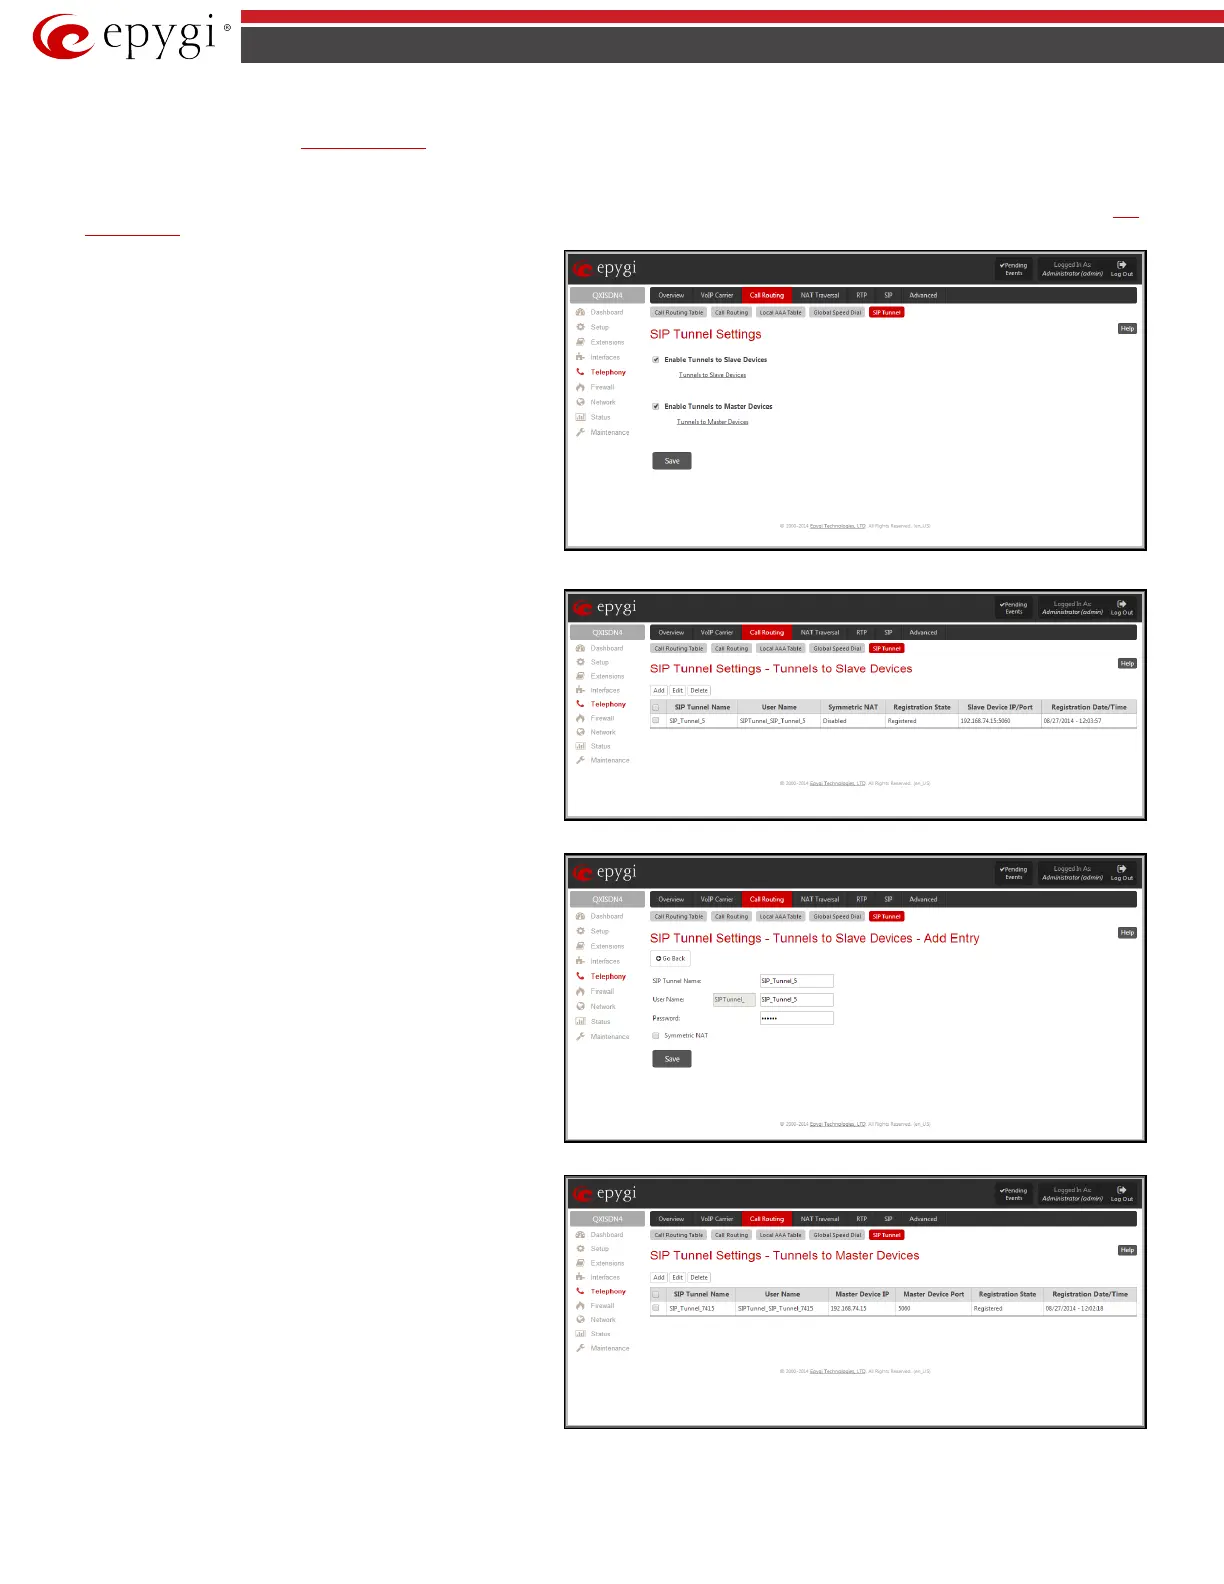
SIP Tunnel Settings
page is used to enable the QX as a slave
or master device for SIP tunneling. The page consists of the
following components:
The Enable Tunnels to Slave Devices checkbox enables the QX as
a master device and allows you to configure the SIP tunnels to the
slave QXs. When this checkbox is enabled the Tunnels to Slave
Devices table needs to be configured.
The link Tunnels to Slave Devices moves you to the page where a
list of slave devices needs to be defined.
Fig.II- 77: SIP Tunnel Settings page
Tunnels to Slave Devices
page consists of a table where slave
devices are listed with the corresponding authentication
parameters.
Add functional button leads to the Add Entry page where a new
slave device parameters needs to be provided.
The Add Entry page consists of the following components:
The SIP Tunnel Name text field requires the tunnel name for the
corresponding connection. System suggests you to start the SIP
tunnel name with the “SIP_Tunnel_” words, according to the
automatic prefix used for the SIP tunnels on the QX, however this
is not mandatory.
The User Name text field requires the authentication user name.
The field in front of this text field displays the default non-editable
prefix for SIP tunnels: “SIPTunnel_”.
The Password text field requires the authentication password.
Please Note: The User Name and Password should match both
on master and slave QXs for the successful SIP tunnel
establishment.
Symmetric NAT
checkbox should be selected when the slave
QX is located behind the symmetrical NAT.
Fig.II- 78: SIP Tunnel Settings – Tunnels to Slave Devices page
Fig.II- 79: SIP Tunnel Settings – Tunnels to Slave Devices – Add Entry page
The Enable Tunnels to Master Devices checkbox enables the QX
as a slave device and allows connecting to the master QX via SIP
tunnel. When this checkbox is enabled the Tunnels to Master
Devices table needs to be configured.
The link Tunnels to Master Devices moves you to the page where
a list of master devices needs to be defined.
Fig.II- 80: SIP Tunnel Settings – Tunnels to Master Devices page

 Loading...

