5 OPERATION
0463 605 001
- 33 -
© ESAB AB 2018
5.12.2 Center wire-guide removal/installation
1. Loosen and remove the original center wire-guide tube. This center wire-guide tube
removes/installs only from the left side.
2. Install the new center wire-guide tube. This center wire-guide tube removes/installs
only from the left side. Slide this tube (narrow part first and to the right) into its center
post until it stops and hand-tighten its thumb screw.
3. Install (re-install) wire-feed rollers:
CAUTION!
Since neither wire-guide has been adjusted (done after this step) the arbitrary
position of a wire-guide may interfere when attempting to install a roller. Do not
force a roller on to its shaft. Inspect the cause of the interference and move
the offending wire-guide tube out of the way.
a) See steps 8 – 11 in "Removing/Installing wire-feed rollers" section (for installing).
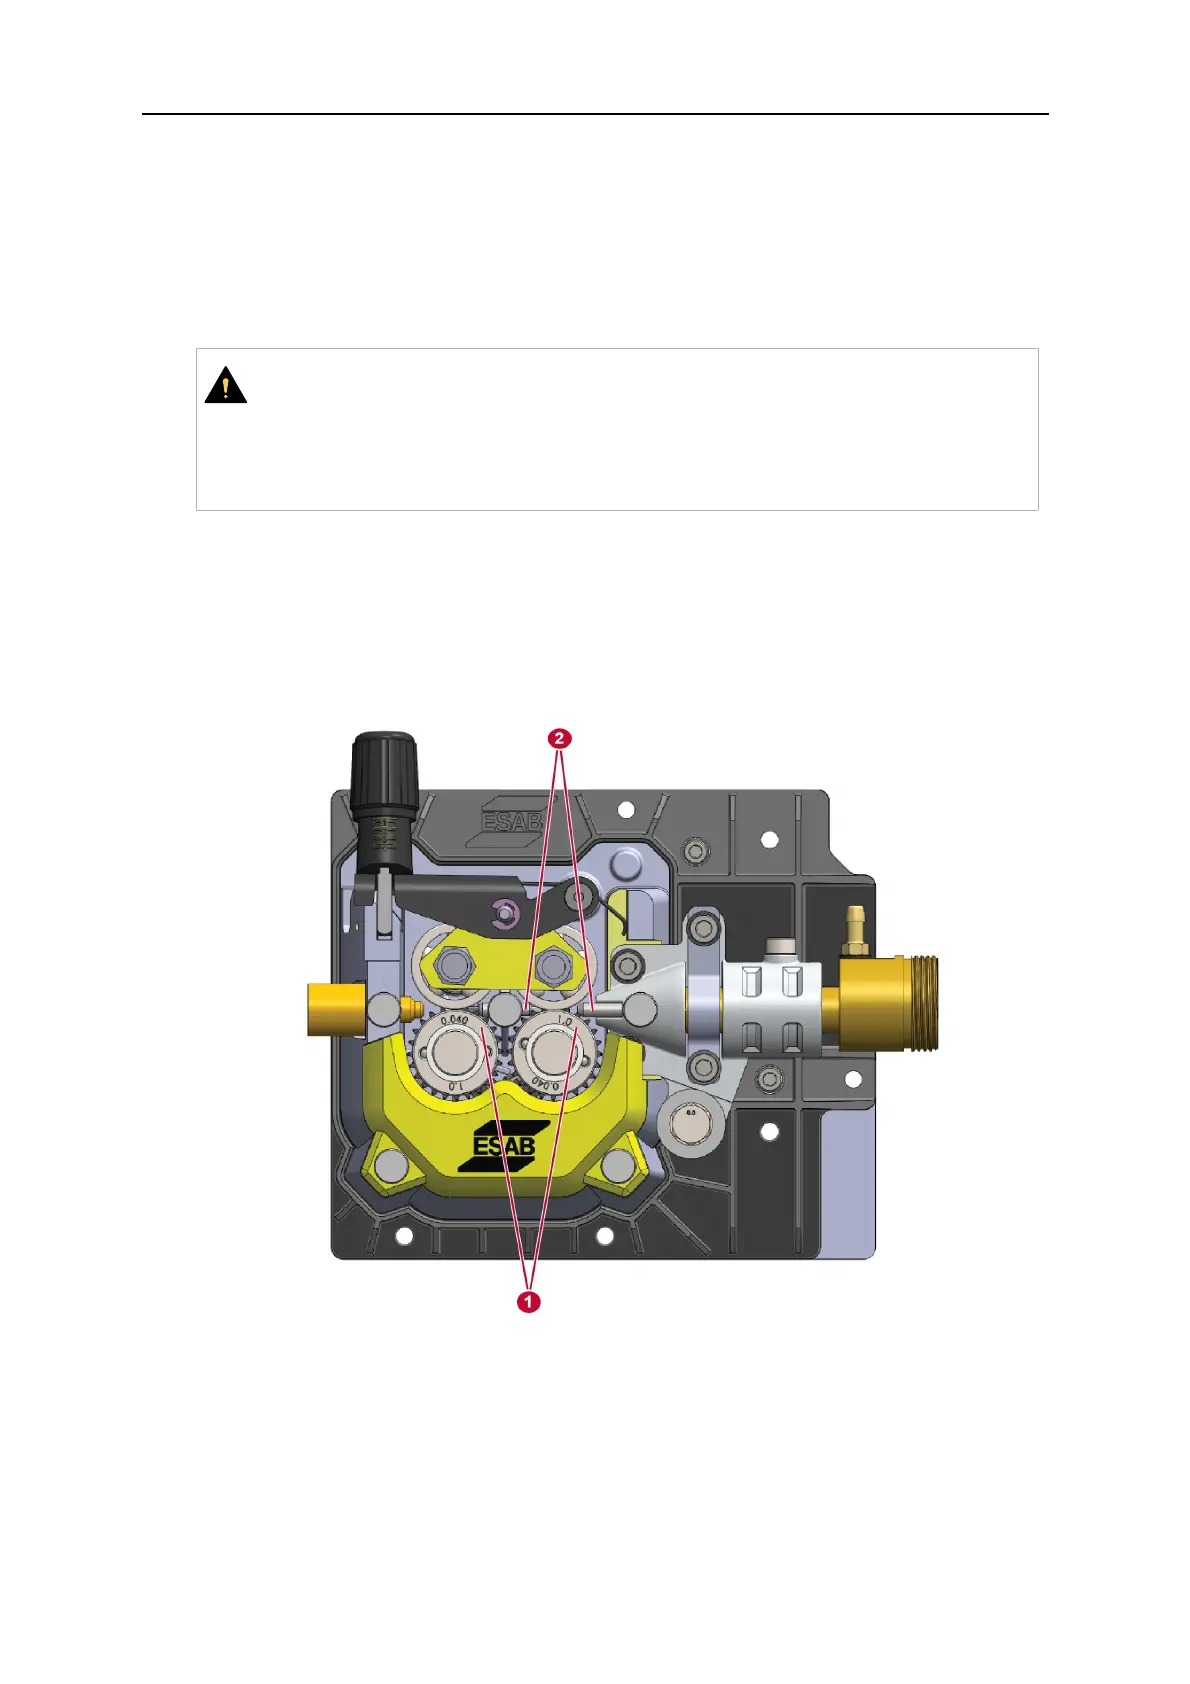
5.12.3 Adjusting wire guides
1. Verify center wire-guide tube has clearance from each feed-roller. The center
wire-guide tube thumb screw should be finger-tight.
2. Adjust the output wire-guide tube for approximately 1 mm (0.03 in.) of clearance from
the right feed-roller and tighten its thumb screw finger-tight.
1. Feed-rollers 2. Wire-guide tubes
3. Access the bitter-end of the wire on the bobbin and cut off the length from the bitter
end to have a clean, straight, bitter-end. This is needed to allow a
low-resistance-travel re-install of the wire along the length of the torch cable to the
torch tip.
4. Feed the wire from the bobbin through the wire-feed guides laying the wire in the
grooves of the wire-feed rollers. Lay the wire into the inside groove of the wire-feed
rollers. Continue feeding the wire until it projects beyond the Euro-adapter output side
by a few centimeters.