© ESAB AB 2010
-35-
bp12a3
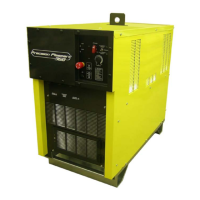
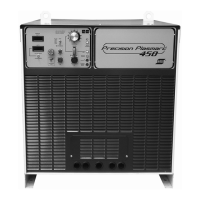
10 TROUBLESHOOTING
ELECTRIC SHOCK CAN KILL!
DO NOT PERMIT UNTRAINED PERSONS TO INSPECT OR
REPAIR THIS EQUIPMENT. ELECTRICAL WORK MUST BE
PERFORMED BY AN EXPERIENCED ELECTRICI AN.
Stopworkimmediatelyifpowersourcedoesnotworkproperly.
Have only trained personnel investigate the cause. Use only
recommended replacement parts.
Check the problem against the symptoms in the following troubleshooting guide. The
remedy may be quite simple. If the cause cannot be quickly located, shut off the
input power, open up the unit, and perform a simple visual inspection of all the
components and wiring. Check for secure terminal connections, loose or burned
wiring or components, bulged or leaking capacitors, or any other sign of damage or
discoloration.
The cause of control malfunctions can be found by referring to the sequence of
operations, electrical schematics and checking the various components. A
volt-ohmmeter will be necessary for some of these checks.
10.1 Troubleshooting guide
As the unit is powered up, the display should show EPP-360 for one second and
then show the program number such as: Pr 3.01 or h igher. If the display remains
blank, look for the following:
a. loose or m issing display cable between the main control board and the
display board
b. lack of +15 volt bias supply which could be caused by blown fuses F1 or F2
c. an open circuit breaker CB1 on the front panel.
If the unit shows Error 5 after the program number display times out, look for a
closed start switch. To r eset the unit simply open the start switch. At this point the
display should show 0’s in both windows. If the power source is not connected to a
CNC at power up, the emergency stop relay (K4) in the power source is not
energized, preventing any relay operation in the power source itself.
If the CNC has been booted up the display should read 0 for both the volts and
amps. The unit will not respond to a start signal until it’s master select input (pin H on
J1) is connected to the “HOT “ side of 115 input (master select input). This
connection is handled in the CNC to primary supply cable. Note all inputs from the
CNC are relay closures, providing 115 V AC inputs to the isolation board (PCB4 in
the power source). The isolation board converts these inputs to open collector type
outputs. The control will monitor various signals in the idle m ode and will shut down
with an error indication if the condition is not satisfactory: Error 1, 3, 4, 5, 9 or 12
(See 10.2 Help code list).
As the start switch is activated and the unit is being prepared for cutting, additional
conditions are being monitored.The resulting error conditions are as follows: Error 2,
6, 8, 12, 13, 15, 17, 18, 19 or 113 (See 10.2 Help code list).
US