© ESAB AB 2010
-33-
bp12a2
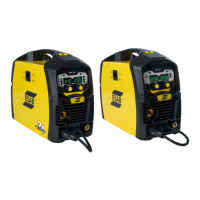
8.3.2 Multiple power sources
1. Parallel mode of operation - Connect power sources together as shown in
section 3.6. Set the panel/remote switches on both power sources to remote. If
the units will be used for cu tting and b oth power sources are to contribute to the
cut current value, activate the logic input labeled “HI CURRENT” (pin “T”) on the
CNC cable. In this manner a maximum current of 720 amps can be provided for
an analog input of 10 VDC fr o m the CNC. If the “HI CURRENT” input is
deactivated the supplem ental power source will not pr ovide any output even
though it is connected to the primary power source. In marking mode only the
primary power source will supply the marking curr ent. If alternating marking and
cutting operations ar e done, the “HI CURRENT” input can be maintained and the
mark input will contro l whether both or only one power source will provide output
current. The marking current range is from 10 to 36 amps and the cut current
range is from 30 to 720 amps.
8.4 Sequence of operation
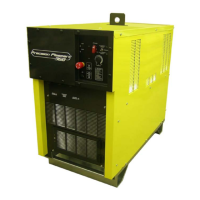
1. Apply power by closing the line (wall) switch. The EPP-360 does not contain its
own power On/Off switch. Once power is supplied, the EPP-360 display board
will display “EPP-360” briefly, followed by the display “ Pr x.xx”, indicating the
software program revision number, then “0 amps” and “0 volts”.
2. Select Panel / Remote setting for current control depending on whether your
CNC has remote current control capability.
a. If using the “Panel” mode, the selected cutting current may be viewed by
holding the front panel switch in the “Cut Current Preset” position. In the
“Panel” mode, the Pilot Arc Current, Initial Current, and Upslope Time are
determined by the power source based on the selected cutting current. The
selected Pilot Arc Current can be viewed by holding the front panel switch in
the “PA Current Preset” position. See section 8.2 Control Panel.
b. If using the “Remote” mode, there are two possible modes of operation.
1 The default mode is similar to the “Panel” mode with the exception that
the cutting current command is supplied by the CNC instead of the front
panel potentiometer. Scaling of the remote current command is 1.0 V DC
= 3 6 am ps. T his mode is useful if the CNC does not have the capability
of controlling the initial current and sloping of the output. For remote
control connections see the CNC interface diagram.
2 If your CNC has the capability of controlling Initial Current and Slopes,
place the Panel/Remote switch in “Remote” and supply a contact closure
between pins “R” and “V” of the CNC interface connector. In this mode
the CNC must supply the analog signal to control Initial Current,
Upslope, and Cut Current level. Scaling is the same as default mode.
Pilot Arc current will be controlled by a second 0 – 10 V DC analog
signal, if available, or by supplying a binary coded signal as defined in
the CNC interface diagram. Scaling of the pilot arc signal is 10 V DC =
45 amps.
3. Begin plasma cutting operation. This may require setting of other variables such
as gas pressures, flow rates, and torch height etc.
4. If for any reason cutting or marking fails to initiate, the EPP-360 should display
an error code indicating the reason for the shutdown. See “Help Codes” in the
troubleshooting section.
US