ESAB FABRICATOR 211i
Manual 0-5450 4-11 INSTALLATION/SETUP
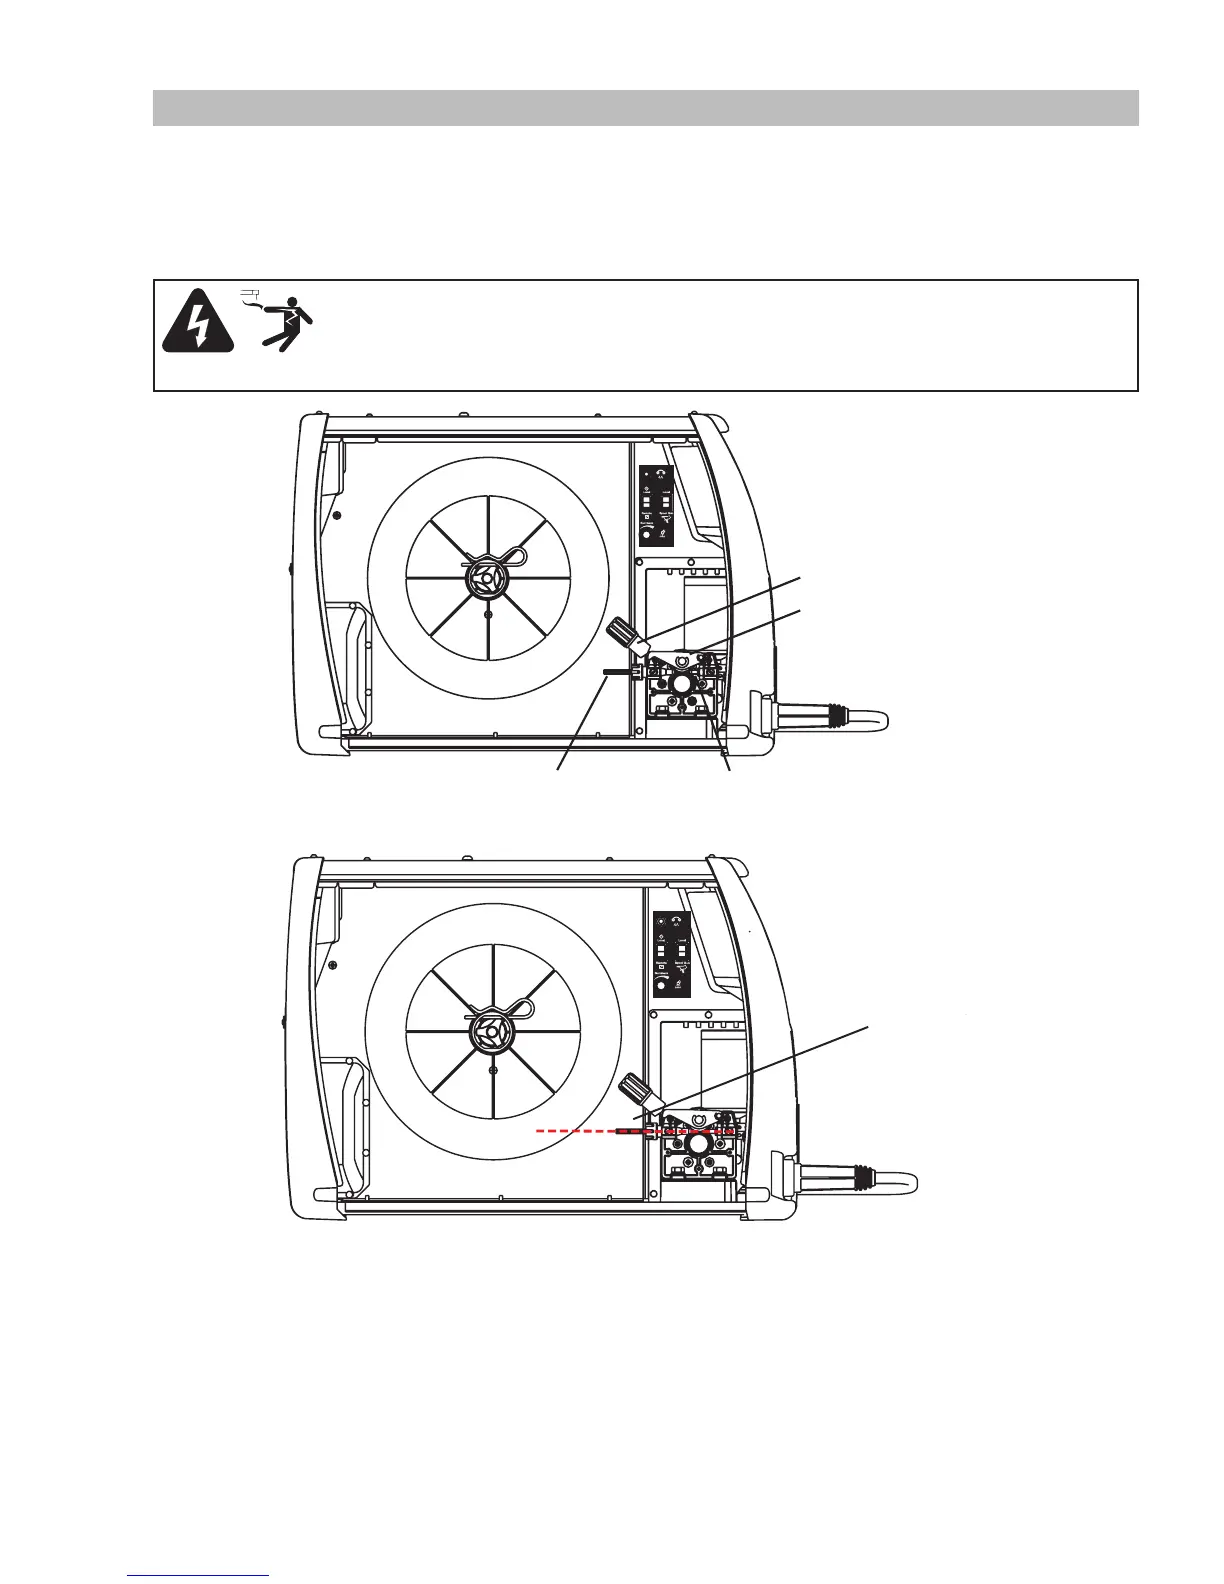
4.06 Inserting Wire Into The Wire Feed Mechanism
Release the tension from the pressure arm by turning the adjustable wire drive tension knob in an anti-clockwise direction. Then
push the tension knob toward the back of the machine to releases the pressue arm (Figure 4-9). With the MIG welding wire feeding
from the bottom of the spool (Figure 4-10) pass the electrode wire through the inlet guide, between the rolls, through the outlet guide
and into the MIG gun. Re-secure the pressue arm and wire drive tension knob and adjust the pressure accordingly (refer to Section
4.07). Remove the contact tip from the MIG gun. With the MIG gun lead reasonably straight, feed the wire through the MIG gun by
depressing the trigger switch. Fit the appropriate contact tip.
WARNING
Before connecting the work clamp to the work make sure the Electricity Supply is switched off.
The electrode wire will be at welding voltage potential while it is being feed through the system.
Keep MIG gun away from eyes and face.
Wire Drive Tension Knob
Pressure Arm
Outlet Guide
Inlet Guide
Art # A-10426_AB
Figure 4-9: Wire Drive Assembly Components
MIG Welding Wire
Art # A-10427_AB
Figure 4-10: MIG Welding Wire - Installation
 Loading...