IP Camera (C5900) User Manual
Figure 3.1-4
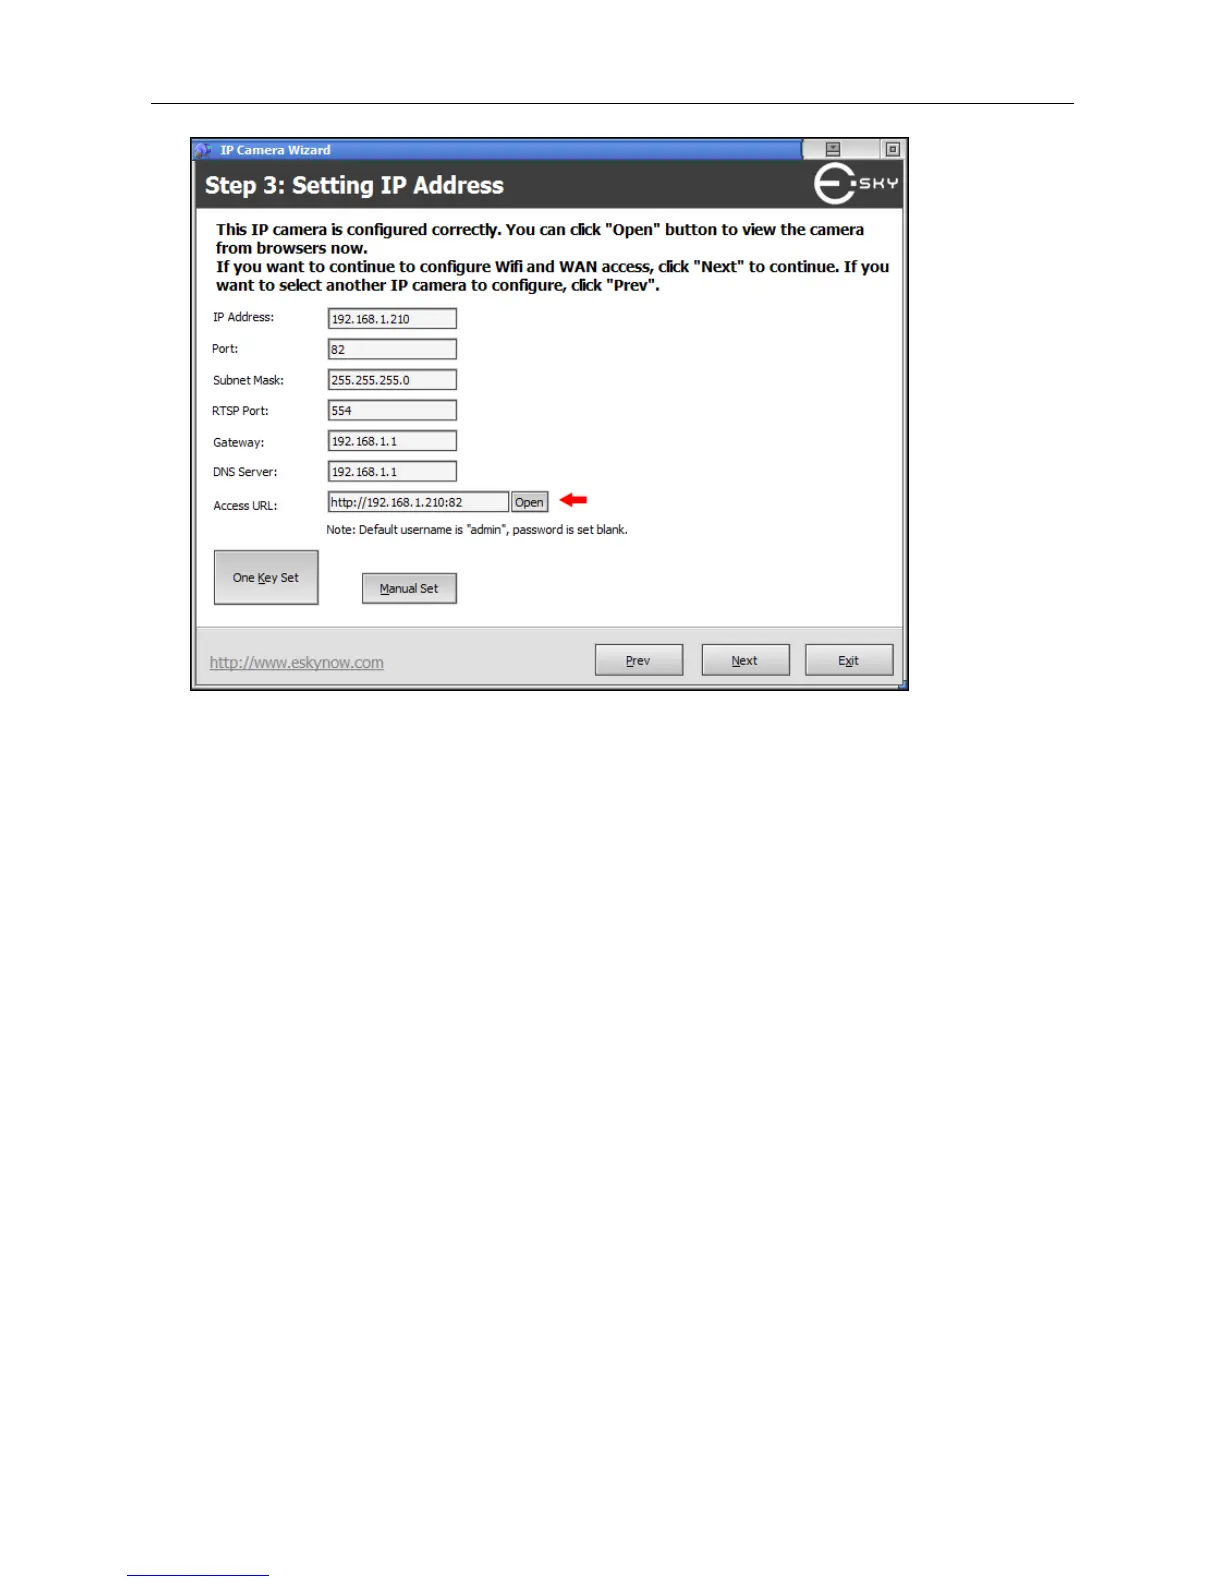
You can see the network parameters of your IP camera in this screen. You need to make sure they
are correct before you can view the camera from your PC.
If you see red words “The camera can not be accessed, please set with one key or manually set” on
your screen as shown in Figure3.1-3 it means that the IP address of your camera needs to be
configured. There are two ways to configure the parameters: One Key Set or Manually Set. The
software will configure the parameters automatically if you click One Key Set. You can also use
Manually Set if you understand what you are doing. The goal of this step, whether One Key Set or
Manually Set, is to configure the IP address of the camera to match your local network. For example,
if the IP address of your router is 192.168.1.1, usually the IP address of the camera should be
192.168.1.2-254, sub-mask should be 255.255.255.0, and Gateway and DNS server should be your
router, 192.168.1.1 in this case. You can leave the HTTP port as it is or choose whatever you want.
If the IP address is set correctly, you will see black words “The camera can be accessed, click ‘Open’
button to access immediately…” on your screen as shown in Figure 3.1-4. At this time, you can click
"open" to view the camera.
After opening the Web browser, a dialogue window pops up to request a username and password.
Upon successful authentication, the following figure is displayed.
The foreground in figure 3.1-5 is the login window. The user may check the option box to save the
password for future convenience.