31
(4)
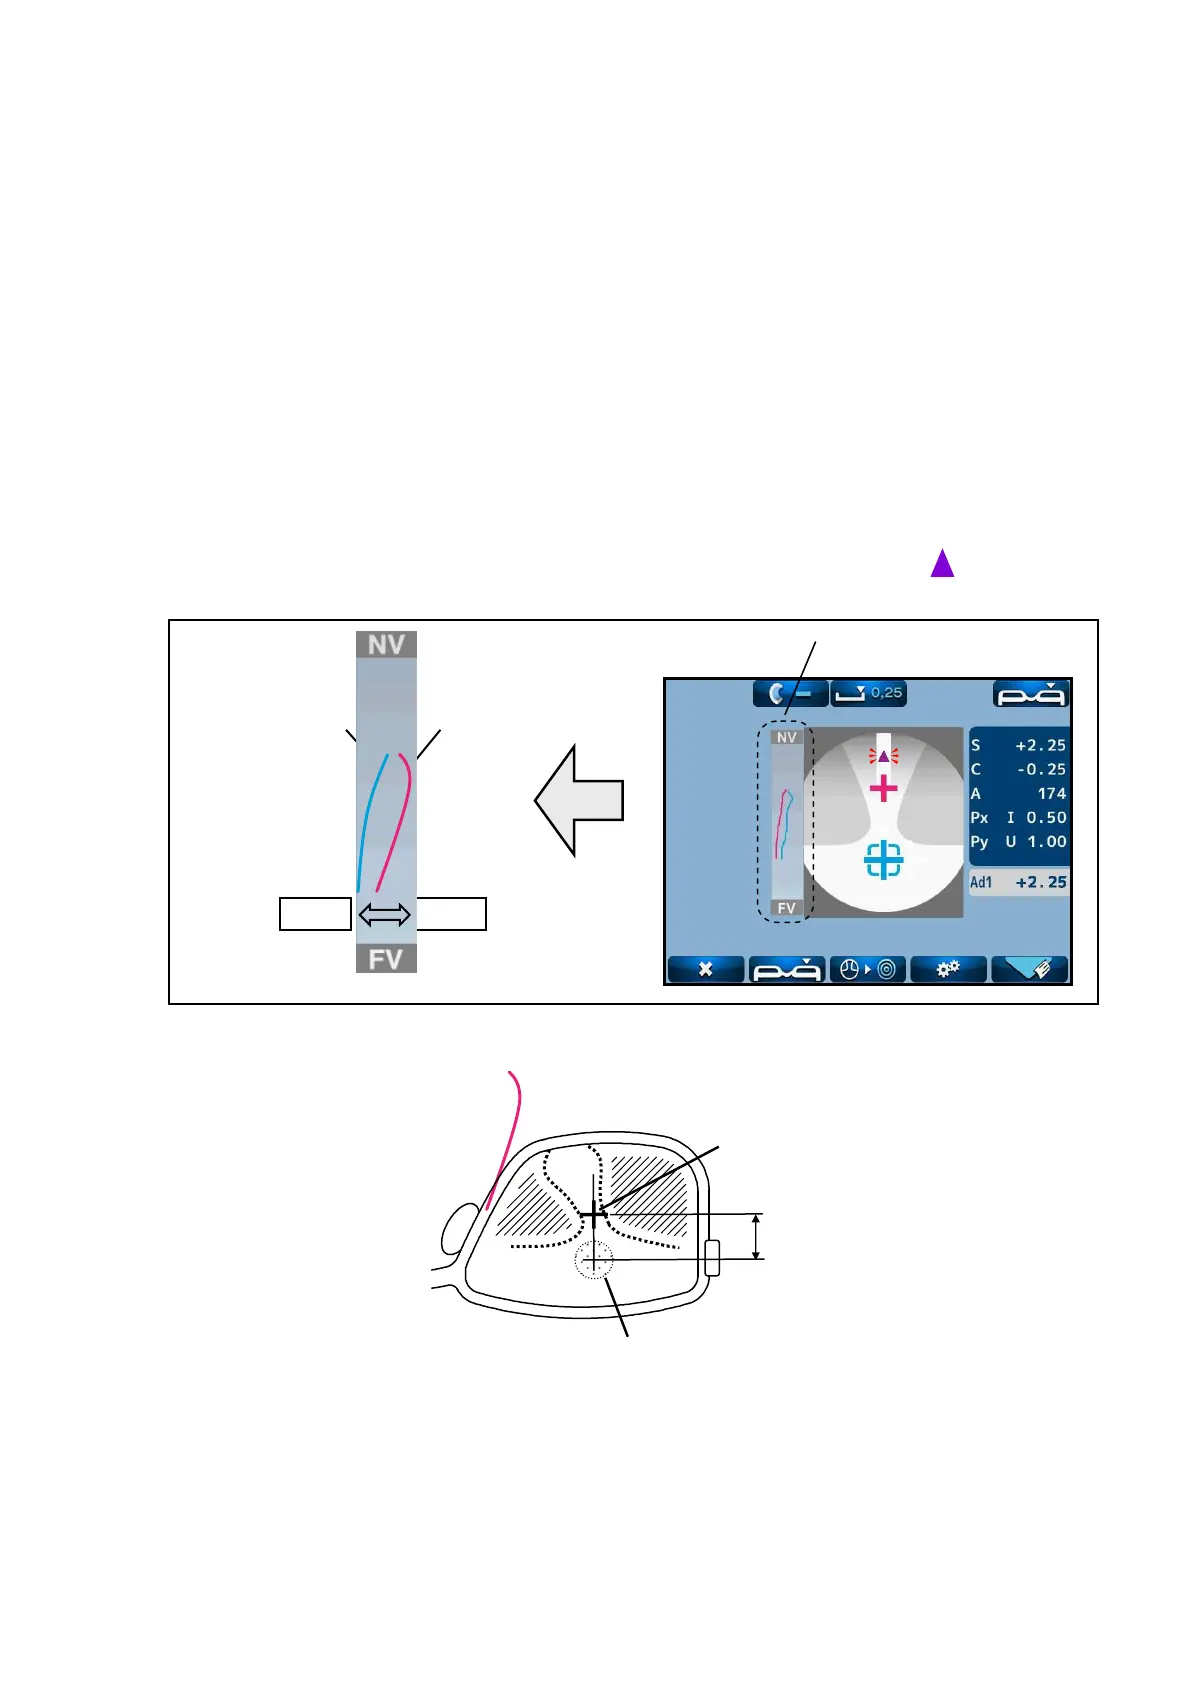
Display of ADD value and assessment graph, and manual operation
(when “Manual” of “ADD Measure” is selected)
When setting “Prog. Graph” as “On” on the Setup screen, the graph is displayed on the
progress lens measurement screen.
Depending on the type of lens, it may be difficult to detect each point automatically even
though normally the near and far points are detected automatically. In such case, take a
measurement manually by reference to the ADD value and assessment graph.
To take a measurement of far point manually, carry out the alignment in the same manner
as the auto measurement.
For the measurement of near point, press the Memory/ ADD switch where the ADD value
is the highest while the alignment cursor stays in the progressive area.
The near point is where the assessment line moves closer to the Y coordinate. Therefore,
carry out alignment by reference to the shape of the graph and blinking of .
【
Framed lens: reference
】
High
Low
Assessment line
ADD value line
Far point
Approx. 5 to 10mm
Near the center of lens
Graph
 Loading...