Disassembly
Removing the Hard Disk Drive 2 - 9
2.Disassembly
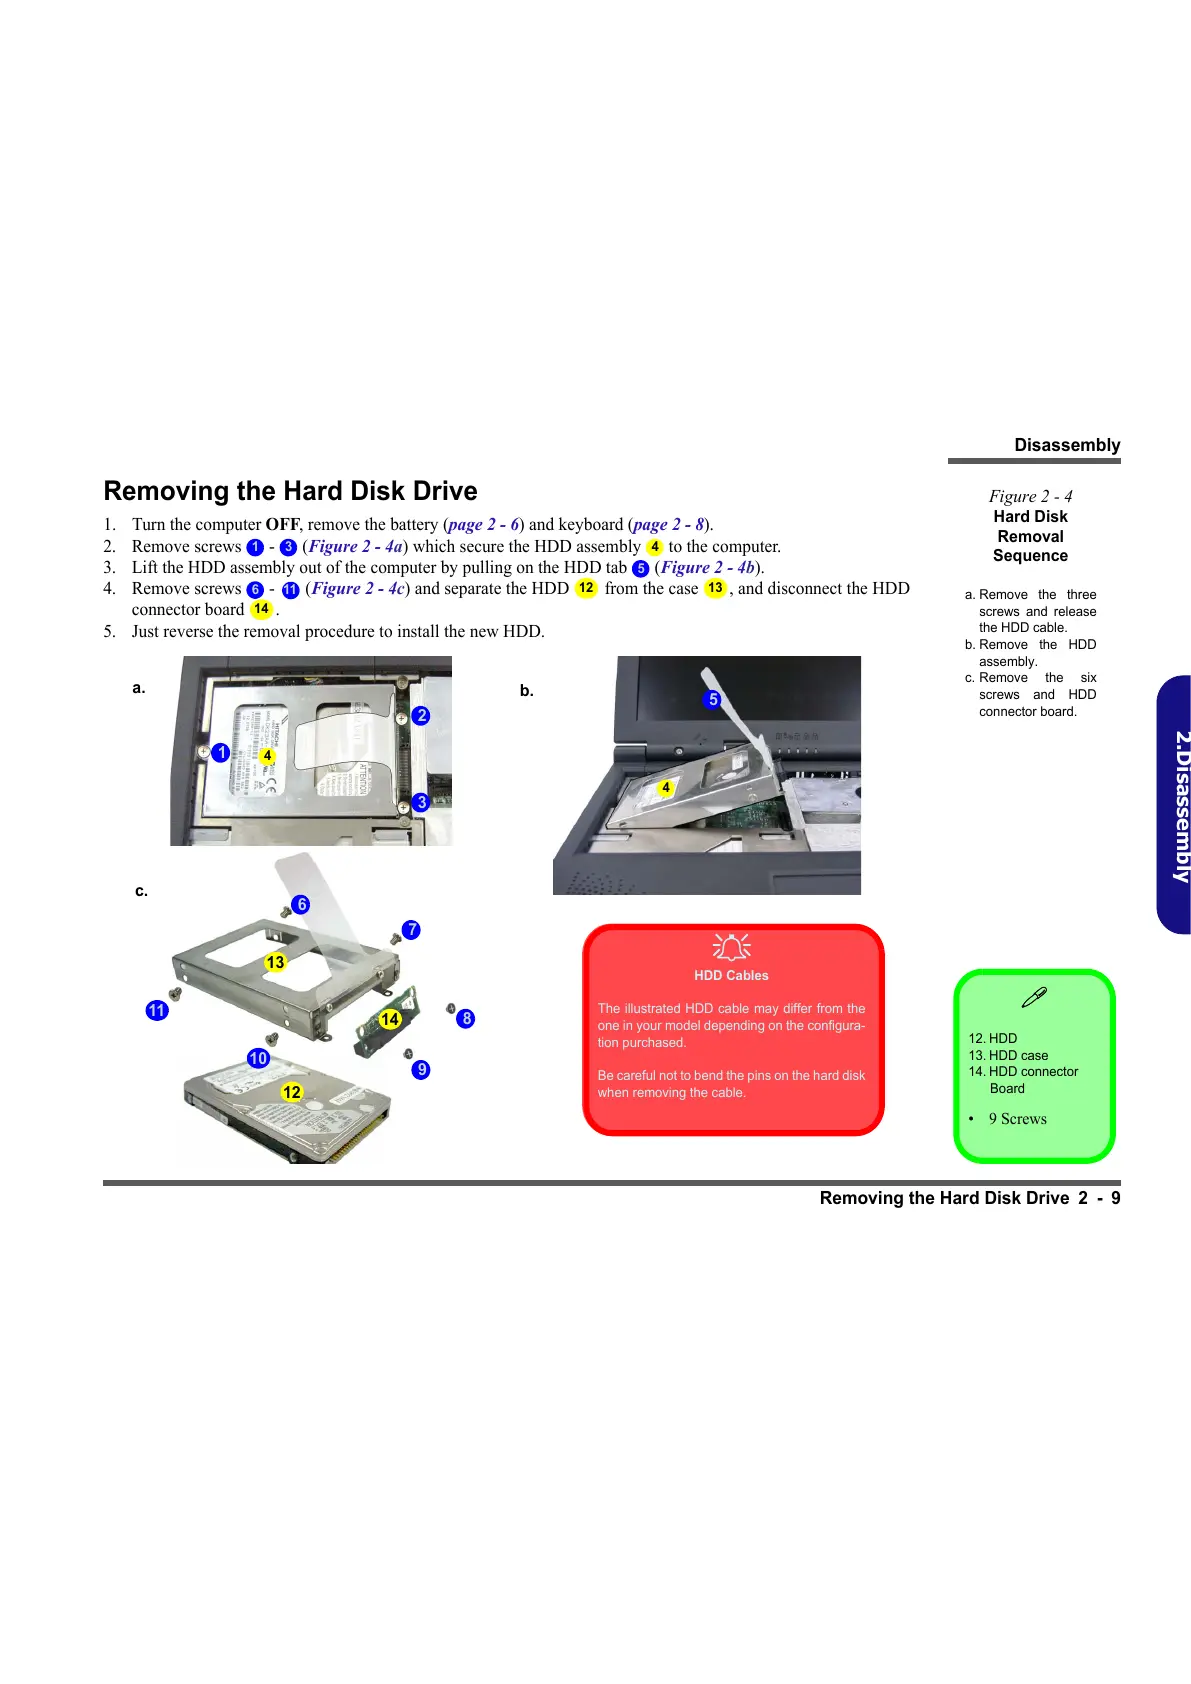
Removing the Hard Disk Drive
1. Turn the computer OFF, remove the battery (page 2 - 6) and keyboard (page 2 - 8).
2. Remove screws - (Figure 2 - 4a) which secure the HDD assembly to the computer.
3. Lift the HDD assembly out of the computer by pulling on the HDD tab (Figure 2 - 4b).
4. Remove screws - (Figure 2 - 4c) and separate the HDD from the case , and disconnect the HDD
connector board .
5. Just reverse the removal procedure to install the new HDD.
12. HDD
13. HDD case
14. HDD connector
Board
•9 Screws
Figure 2 - 4
Hard Disk
Removal
Sequence
a. Remove the three
screws and release
the HDD cable.
b. Remove the HDD
assembly.
c. Remove the six
screws and HDD
connector board.
1 3 4
5
6
11
12 13
14
a.
b.
2
1
c.
7
6
HDD Cables
The illustrated HDD cable may differ from the
one in your model depending on the configura-
tion purchased.
Be careful not to bend the pins on the hard disk
when removing the cable.
4
3
5
4
8
9
11
10
13
12
14