Disassembly
2 - 18 Removing the LCD Panel
2.Disassembly
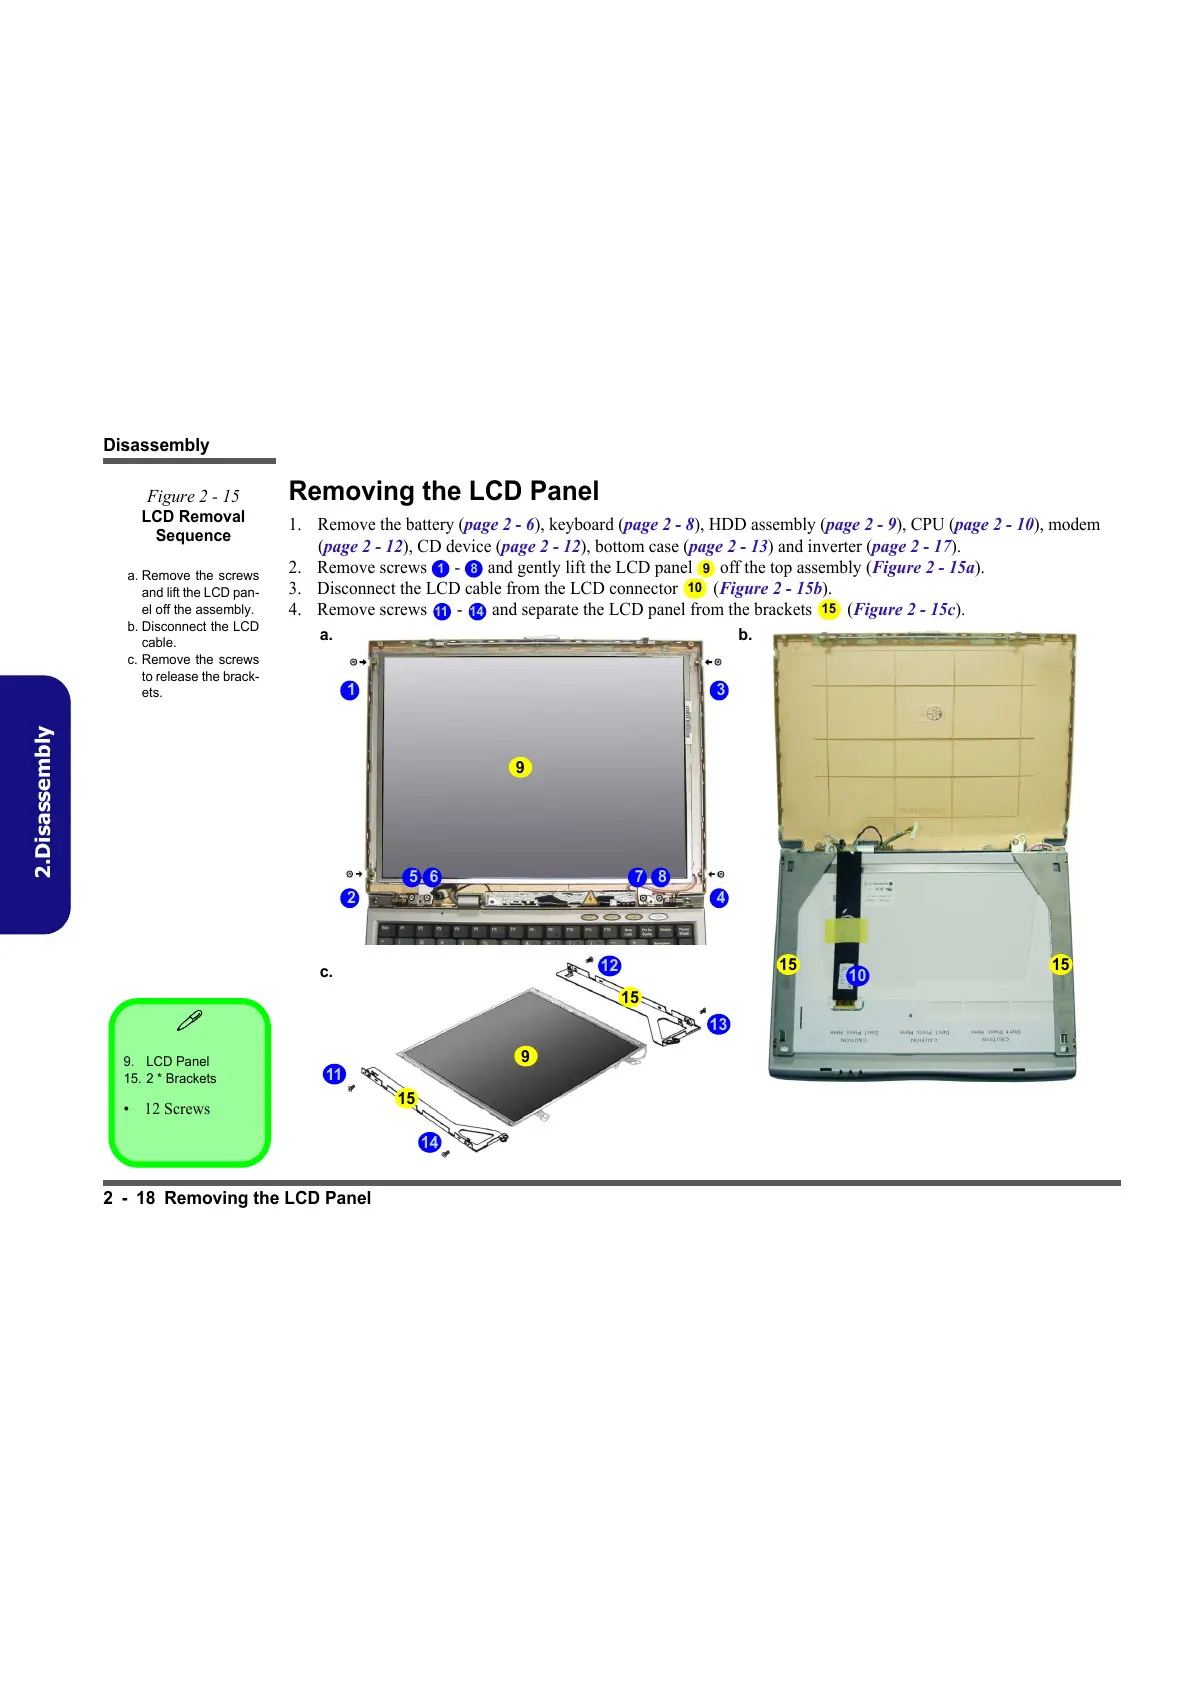
Removing the LCD Panel
1. Remove the battery (page 2 - 6), keyboard (page 2 - 8), HDD assembly (page 2 - 9), CPU (page 2 - 10), modem
(page 2 - 12), CD device (page 2 - 12), bottom case (page 2 - 13) and inverter (page 2 - 17).
2. Remove screws - and gently lift the LCD panel off the top assembly (Figure 2 - 15a).
3. Disconnect the LCD cable from the LCD connector (Figure 2 - 15b).
4. Remove screws - and separate the LCD panel from the brackets (Figure 2 - 15c).
9. LCD Panel
15. 2 * Brackets
•12 Screws
Figure 2 - 15
LCD Removal
Sequence
a. Remove the screws
and lift the LCD pan-
el off the assembly.
b. Disconnect the LCD
cable.
c. Remove the screws
to release the brack-
ets.
1 8 9
10
11 14
15
9
1 3
2 4
5 6 7 8
a. b.
15
12
13
11
14
15
c.
15
15
9
10