Disassembly
2 - 14 Removing the Bottom Case
2.Disassembly
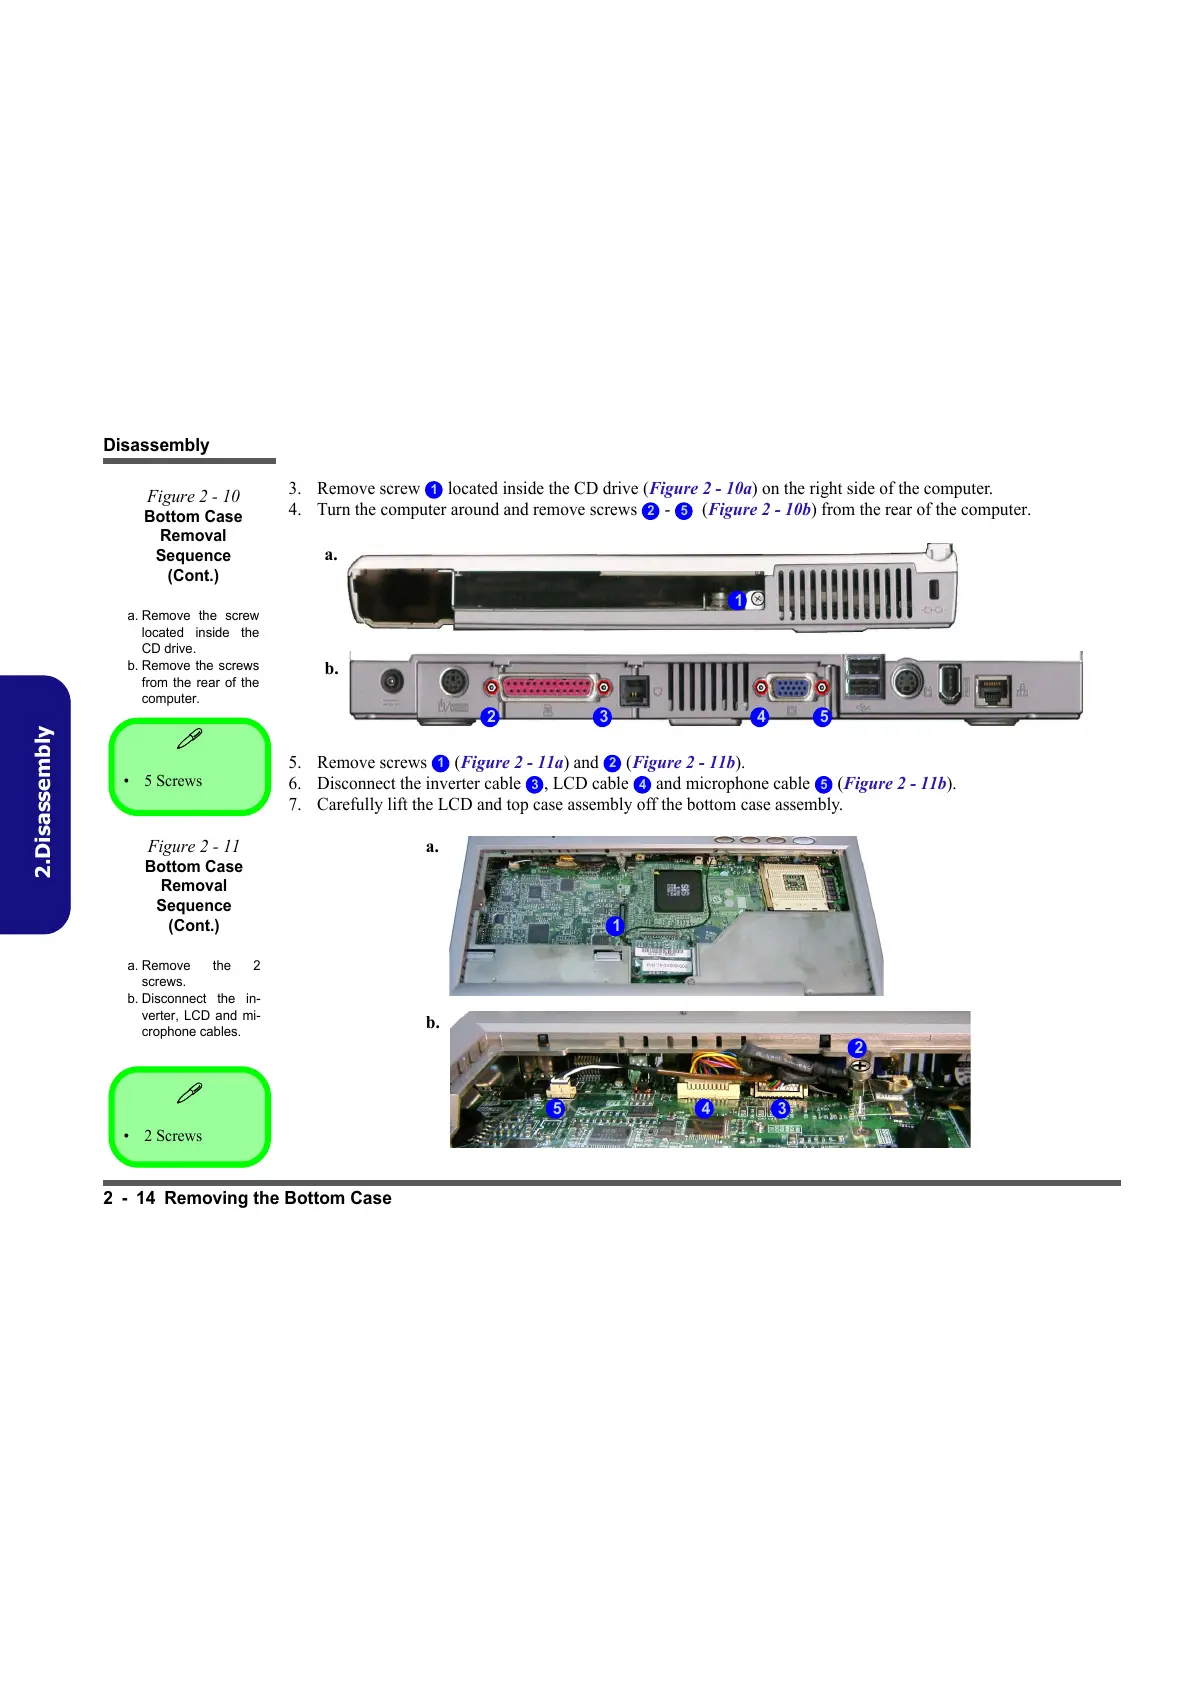
3. Remove screw located inside the CD drive (Figure 2 - 10a) on the right side of the computer.
4. Turn the computer around and remove screws - (Figure 2 - 10b) from the rear of the computer.
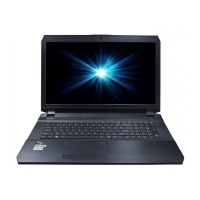
5. Remove screws (Figure 2 - 11a) and (Figure 2 - 11b).
6. Disconnect the inverter cable , LCD cable and microphone cable (Figure 2 - 11b).
7. Carefully lift the LCD and top case assembly off the bottom case assembly.
1
Figure 2 - 10
Bottom Case
Removal
Sequence
(Cont.)
a. Remove the screw
located inside the
CD drive.
b. Remove the screws
from the rear of the
computer.
2 5
1
32 4
b.
a.
5
•2 Screws
1 2
Figure 2 - 11
Bottom Case
Removal
Sequence
(Cont.)
a. Remove the 2
screws.
b. Disconnect the in-
verter, LCD and mi-
crophone cables.
3 4 5
1
3
2
4
a.
b.
5
•5 Screws