Euroscan MX1 12
Document number: EN-301-1:UD - based on Firmware version 1.033 and forward
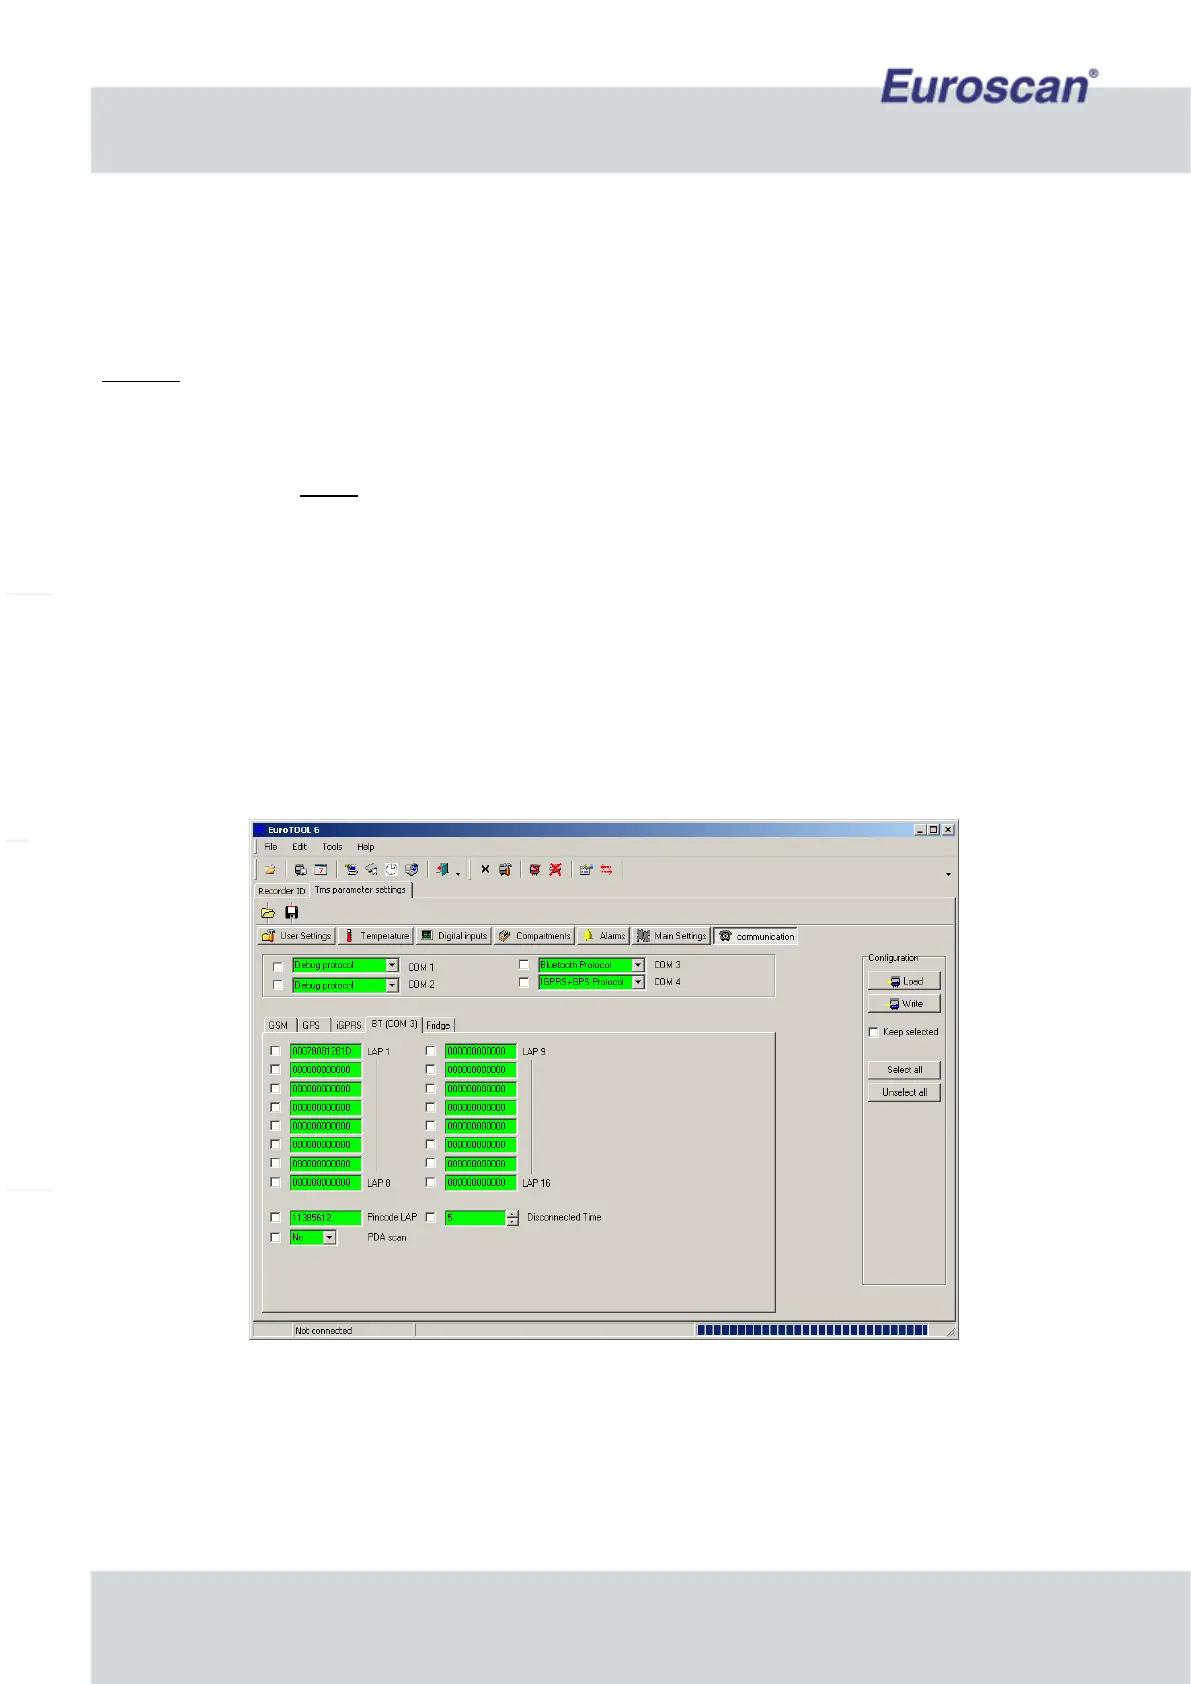
2.8.2 Bluetooth manual settings by using ‘EuroTOOL’
The build-in intelligent Bluetooth module has the possibility to take over the Bluetooth parameters from a
Euroscan recorder. In this paragraph is described what the Bluetooth-settings mean and how they can be
changed.
Example
• Start the program ‘EuroTOOL’ on your pc and ensure the recorder is correctly connected with the pc.
• Fill in the menu ‘parameter settings’ the pin code 1111 (is default) and press ‘Autodetect recorder’.
• Go to ‘TMS parameter settings’ (SHIFT + F12) -> menu ‘Communication’.
• Communication COM3: Edit and change settings to ‘Bluetooth Protocol’.
• Press ‘BT (COM3)’ in the same screen. The Bluetooth-parameters are now displayed on the screen.
• Edit ‘LAP1’. This is the IP-address of the access point where the recorder will connect. Fill in LAP2, LAP3
etc. when there are more access points. Up to 16 access points addresses can be saved. If the module
isn’t able to make a connection it will try the following address. When a connection is active, the module
will continuously monitor the data. If there is no dataflow for more than a minute the module will close the
connection.
• Fill in the PIN code of the LAP.
• Fill in the disconnect time; this is the interval (in minutes) between new connections of the recorder and an
access point.
• Make sure all parameters what have to be edit are checked. Press on the right of the screen on ‘Write’ and
wait till the fields of the edited parameters are green.
• Exit EuroTOOL.
Fig. 9 Example of Bluetooth settings in EuroTOOL