1-3 Installation
1-3a CONNECTING THE PRINTER
³
Connection to the power supply
The printer must be connected to a properly protected and earthed electrical installation.
FI: Laite on liitettävä suojamaadoitus koskettimilla varustettuun pistorasiaan.
NO: Apparatet må tilkoples jordet stikkontakt.
SE: Apparaten skall anslutas till jordat uttag.
This is a Class A device. Operation of this equipment in a residential
area may cause interference to radio communications. Should
this occur, the user may be asked to take appropriate measures.
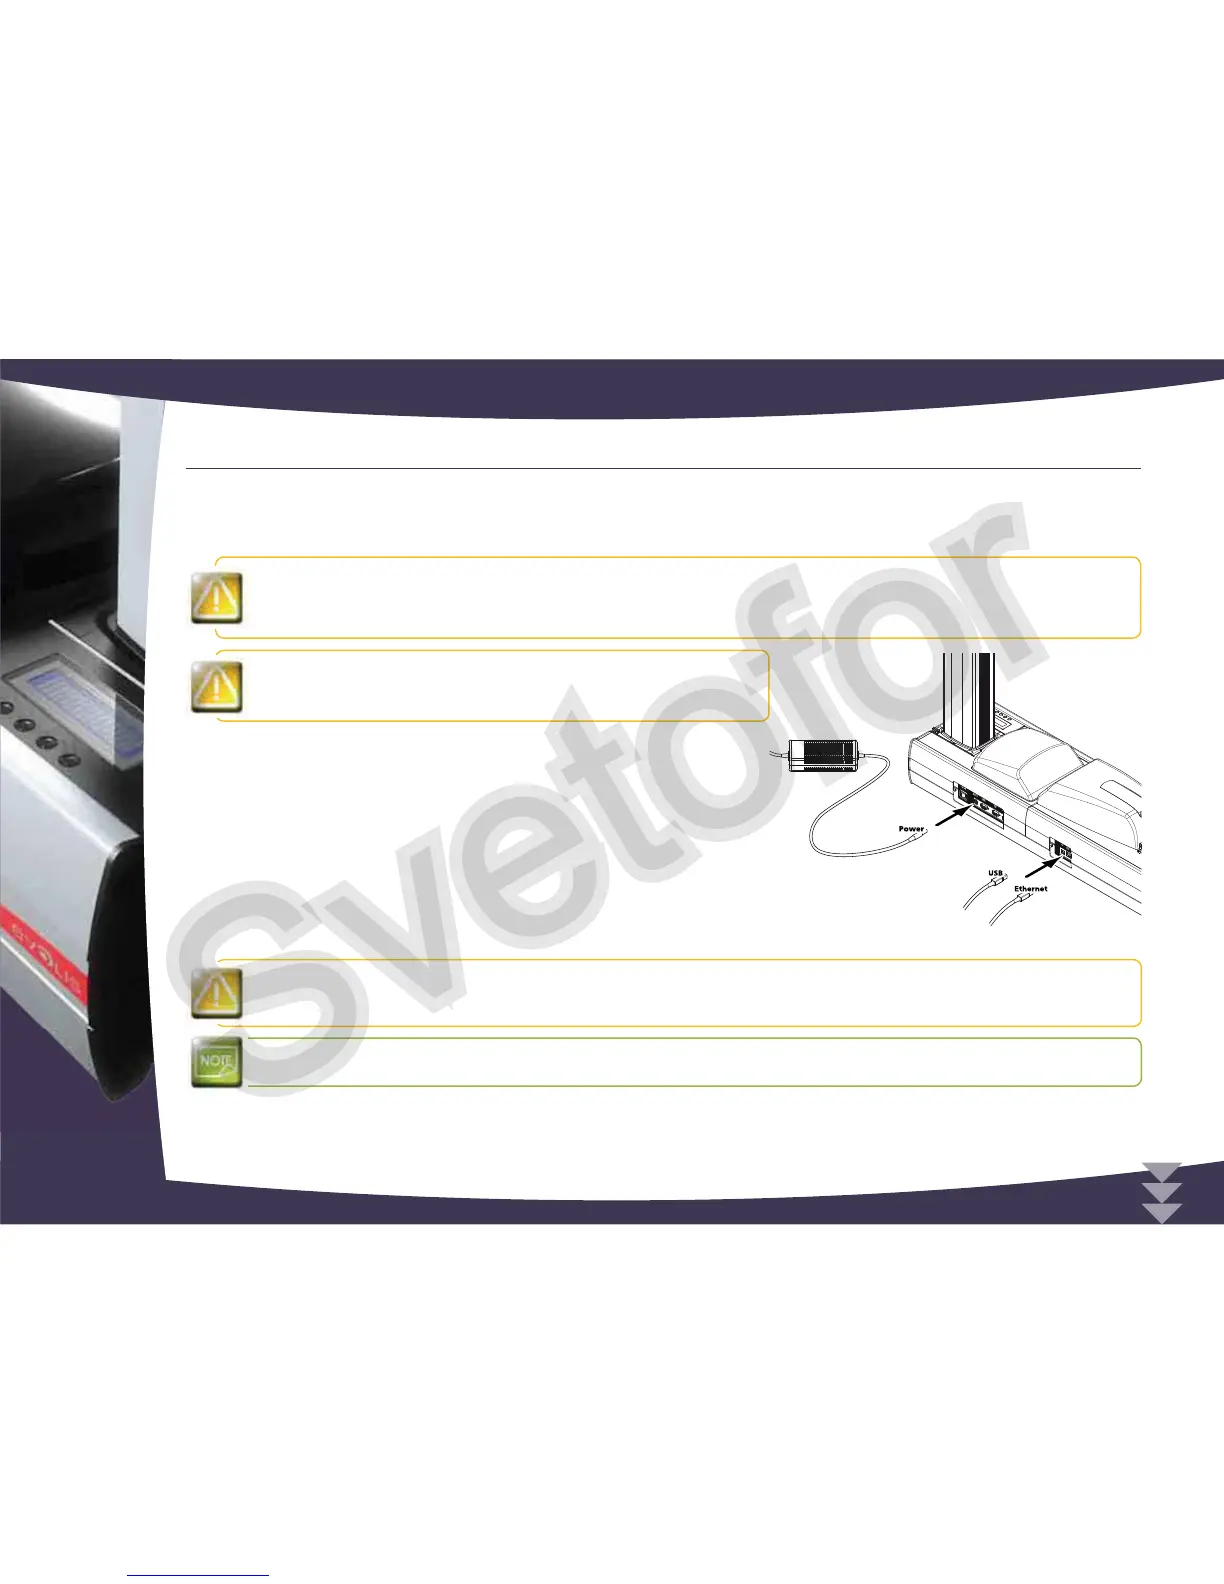
Connect the power cable to the power supply unit, then plug
the power cable connector into the printer.
Next, plug the end of the power cable into an earthed power
socket.
Power up the printer by switching the switch to ON.
The display on the control panel lights up and the message
_ INITIALISATION _ is displayed. Once the start-up sequence has
_ READY _ and the LED is a steady
green light. Should this not be the case, the installation has not
been carried out correctly.Check the installation.
Before attempting any maintenance, always ensure that the power switch is in the OFF position and that the
power cable is unplugged. For your personal safety, ensure that both remain easy to access, especially in the
event of an emergency.
To save energy, the printer will automatically switch itself to standby mode after 10 minutes of inactivity.
1
6