25
Unscrew
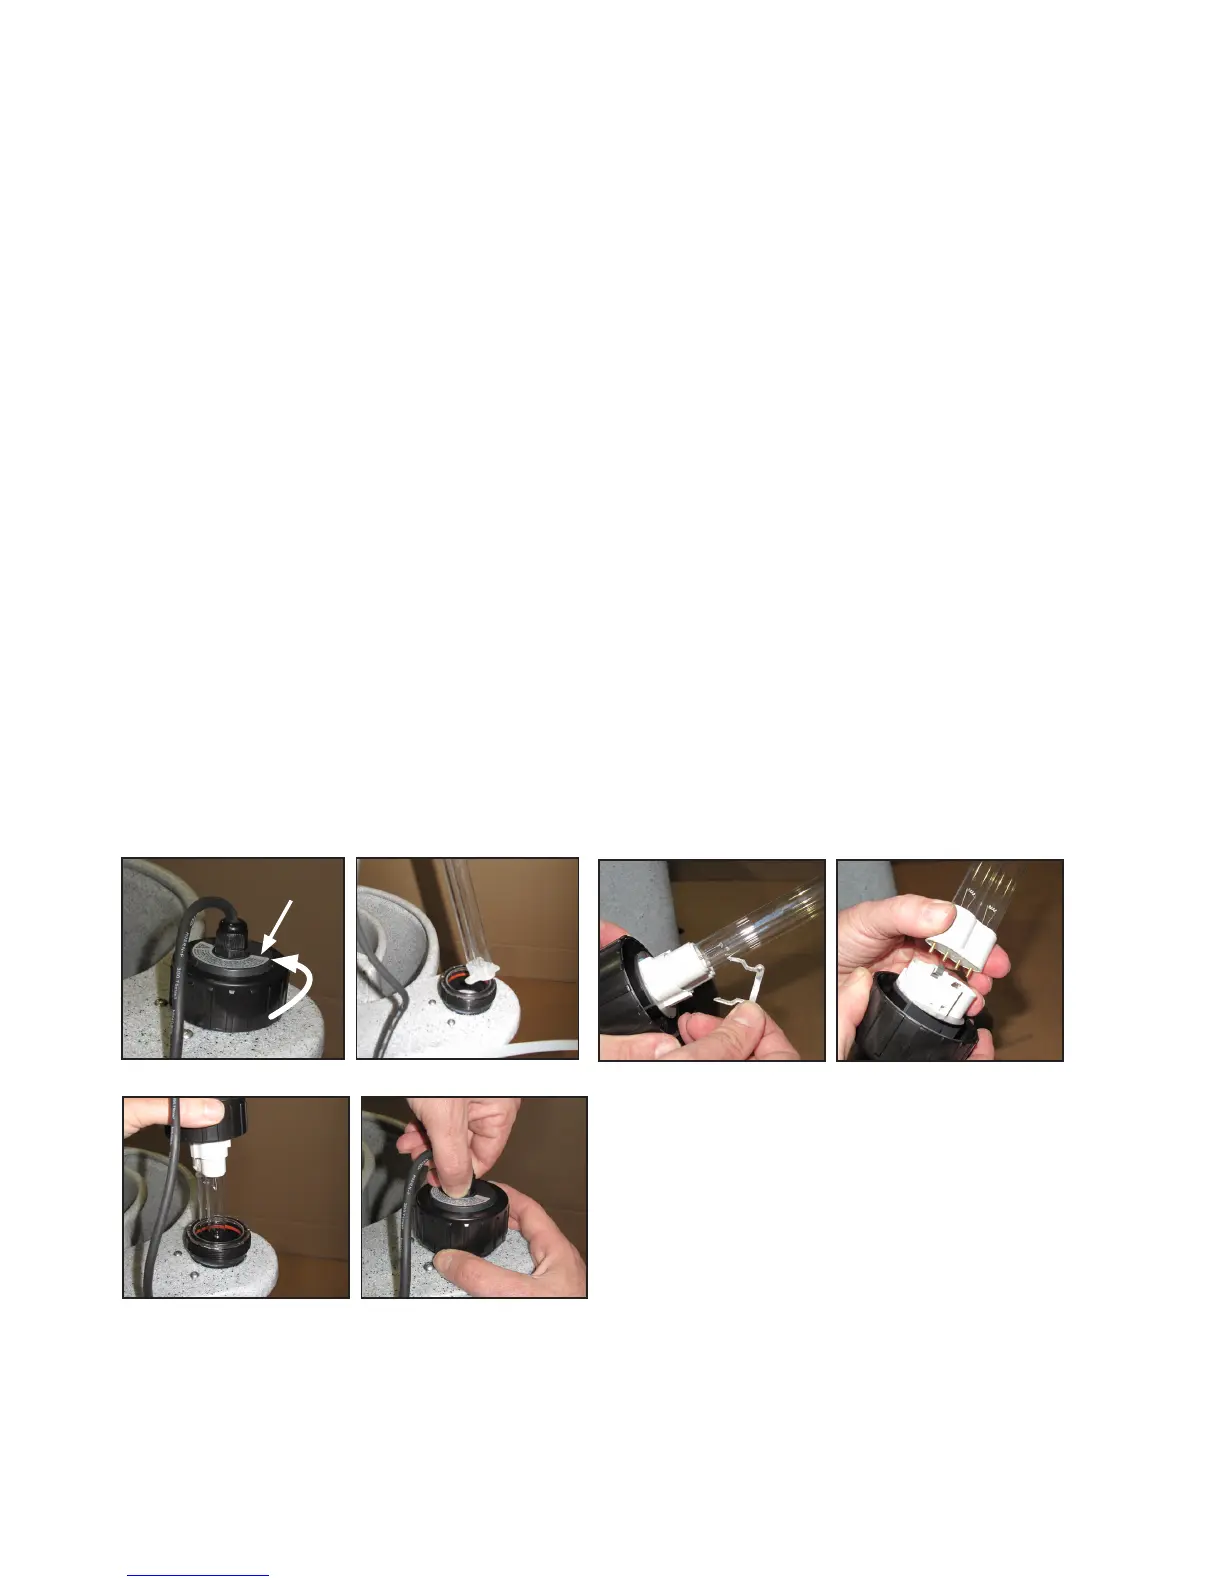
REPLACING THE UV BULB (EAZYPOD UV AUTOMATIC MODELS)
ALWAYS ISOLATE THE UNIT FROM ANY ELECTRICITY AND WATER SUPPLIES
BEFORE CARRYING OUT MAINTENANCE ON THE UNIT.
If you notice an increase in algae formation and/or see that limescale is forming,
you will need to check that the UV bulb is working properly. To ensure
peak efficiency, the UV bulb must be replaced every 8000 hours of operation.
To Replace the UV Bulb: (You will to purchase a replacement 18 Watt PL-L UV Bulb)
1. Unplug the light’s power plug.
2. Switch off the water pump.
3. Unscrew the black UV retaining collar and carefully pull out the device head along with the UV
bulb (please do not touch the UV bulb with your hands) (FIG. 17.1 - 17.2)
4. When removing the UV bulb it is better to use a dry cloth to hold the UV bulb.
5. When replacing the tube, please remove the bulb transit clip. (FIG. 17.3)
6. Now you can remove the 18 Watt PL-L UV bulb. (FIG. 17.4)
7. Put a new 18 W PL-L UV bulb in the four pin socket. You do not need to replace the transit clip
as it is no longer needed. (FIG. 17.4)
8. Check that the black O-ring is in the groove of the quartz sleeve.
9. Put the device head back in the Quartz sleeve and screw it tight. (FIG. 17.5 - 17.6)
10. Switch on the water pump and check for any leaks.
11. Now you can switch on UV.
As already mentioned, it is essential that the unit is protected from frost during the winter months,
or disconnected from water and electricity supplies and stored indoors. During the spring and
summer season, the quartz sleeve, which separates the UV bulb from the water passing through
the unit, will need to be cleaned two or three times. This is essential, as dirt or limescale building
up on the quartz sleeve will inhibit the penetration of the ultraviolet light into the water and affect
the efficient working of the unit.
FIGURE 17.1
FIGURE 17.5
FIGURE 17.2
FIGURE 17.6
FIGURE 17.3 FIGURE 17.4