This document describes the FB530/630 Indicator, a high-performance weighing scale manufactured by EXCELL PRECISION CO., LTD.
Function Description
The FB530/630 Indicator is designed for accurate weight readings and offers various operational modes and settings. It features an A/D converter with high sensitivity and sampling speed, supporting both ordinary and high-resolution models with different linearity calibration procedures. The device includes a check weighing function for high limit, low limit, and OK range, as well as five HOLD functions, including an animal scale HOLD. It can be powered by a battery or plug-in mains and has an automatic power-off function to ensure stability and accuracy when battery voltage is low.
The indicator supports multiple weighing units (kg, lb, tael, viss) and includes essential functions such as zeroing, tare, preset tare, and totalization. For counting, it offers sampling and check weighing features. The device can be configured through a general function setting mode, allowing adjustments for check weighing, RS232 and mini printer output (optional), internal value display, weight hold mode, ID code, print key function, and customized header settings.
Optional accessories include an RS232 card and/or a relay card. The FB530 model specifically supports EPSON (M-150II)16L mini printer output as an option, though a relay card is not optional for this model.
Important Technical Specifications
A/D Converter:
- Sensitivity: 0.3 µV/D high sensitivity
- Sampling Speed: 15 times/second
- Non-linear Scale: 0.01% full scale
- Zero Point Adjustable Range: -2mV to +5mV
- Use Range: -4mV to +30mV
- Load Cell Stimulate Power Source: 5V DC ±2% 100mA
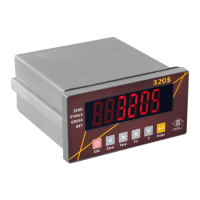
Display:
- LCD display with LED backlight.
- Display indications include: HI (High limit value), OK (OK range), LO (Low limit value), kg, lb, Pcs (Counting mode), % (Percent indication), →0← (Zero indication), Net (Net weight indication), ▼1 ("Stable" indication), ▼2 ("Pre-tare mode" indication), ▼3 ((M+) "Accumulation mode" indication), ▼5 ((+) "Samples insufficient" indication), ▼6 (() "Unit weight insufficient" indication), ▼7 ("Viss" unit (Burma unit)). For Dual Range Models, indicators 5 and 6 have specific definitions.
- "Low battery power" indication (flashing + symbol).
Power:
- Battery: 6V 4Ah Rechargeable battery
- AC Power: 110V/220V AC
- Power Consumption (with 1x350Ω load cell):
- No backlight: 26 mA
- Single display with backlight: 32 mA
- Dual display with backlight: 40 mA
- When not in printing (with printer): 20mA
- While in printing (with printer): 40mA
- Battery Charging: 8-10 hours, battery temperature below 45℃. Recharging every 3 months is recommended to prevent failure.
- Memory Power Supply (FB530): RTC IC data can be maintained for 24 hours if AC battery is cut off and Lead acid battery voltage is lower than 3V.
Appearance Size:
- Without back display: 276 x 172 x 153mm (L x W x H)
- With back display: 276 x 202 x 153mm (L x W x H)
Operating Temperature: -10℃ to +40℃
RS232 Interface Format:
- Mode: UART Signal of EIA-RS0232 C
- Baud Rate: 1200, 2400, 4800, 9600 bits/second
- Data Bits: 8 bits
- Parity Bit: None
- Stop Bits: 1 bit
- Code: ASCII (Exchange code of American standard)
Mini Printer (Optional):
- Default Settings: 9600, N, 8, 1
- Printing Languages: Iran font (solar calendar), English font, Traditional Chinese font, Simplified Chinese font.
- Date Printing Order: YY MM DD, MM DD YY, DD MM YY.
- Paper: Width 44.5 ± 0.5 mm, internal diameter 50 mm.
- Ribbon: ERC-05.
Usage Features
Preparation:
- Locate on a firm, level surface free from vibrations.
- Adjust leveling feet to center the bubble.
- Avoid direct sunlight or proximity to ventilating system exhaust.
- Use a separate power source plug.
- Ensure no weight is on the scale when powered on.
- Place commodity at the center of the platter, not exceeding its dimensions.
- Warm up the scale for 15-20 minutes before use.
Keypad Functions:
- UNITS: Loop select from preset units.
- Pcs: Go into counting mode, press to sample.
- Check Weighing Key: Preset weight and quantity for check.
- +: Accumulate weight or quantity.
- T: Tare to deduct container weight.
- PT: Set preset tare.
- R: Recall totalization value, preset value, and pre-tare value.
- CE: Clear totalization value, preset value, and pre-tare value.
- Backlight Key: Enable/disable backlight.
- Print Key: Print.
- Number Keys (0-9): Input numbers.
- Feed: Feed paper (for printer).
- -O-: Zero the scale.
- Arrow Keys (Up/Down): Upward/downward key in settings.
- Enter Key: Confirm selection in settings.
Weighing Mode:
- Units Selection: Select kg, lb, tael, or viss. The selected unit is memorized.
- Zero Function: Re-zero the display with no load. The (→0←) symbol appears.
- Tare Function:
- Unknown Container Weight: Place container, press T. Net indication (Net) is on. Place goods, indicator shows net weight. Remove container and goods, press T to clear tare.
- Known Container Weight: Press PT, use arrow keys to input weight. Net and pretare indications are on. Place goods, indicator shows net weight. Press CE to clear pretare value.
- Recall Tare/Pretare: Press R to display tare/pretare value.
- Multiple Tare: Continuously increase/decrease tare value. Total tare can equal full capacity.
- Dual Range Indicators: Cannot preset tare value larger than the first weighing range.
Check Weighing Mode:
- Preset "High limit," "Low limit," and "Beeper value" using arrow keys.
- Beeper/LCD Settings: Configure beep and LCD behavior based on weight status (stable, unstable, within/outside limits).
- Warning Device Setting: Set HI value and beep/LCD mode.
- Clear Warning Accumulation: Press R then CE. Accumulated data clears automatically when changing modes, units, or turning off.
- Recall Check-weighing Values: Press Check Weighing key then R to cycle through Low limit, High limit, and Beeper values.
- Clearing Check-weighing Values: Press Check Weighing key then R, then CE to clear Low limit, High limit, and Beeper values. Press Check Weighing key then R six times to clear all values.
Totalizing:
- Weight Totalizing: Place goods, press + to save weight. Display shows total additions and totalized weight. (M+) flashes.
- Clear Totalized Weight Values: Press R then CE. Clears automatically when changing modes, units, or turning off.
- Recall Totalized Weight Values: Press R to display total additions and totalized weight. (M+) flashes.
Counting Function:
- Sampling: Press Pcs to select sample quantity (10, 20, 50, 100). Place samples, press Pcs. Display shows sample quantity.
- Sample Too Small: (+) indicates sample is less than 20 divisions.
General Function Setting (accessed by holding →0← during countdown):
- F4 Check Weighing Configurations: Set LO value, HI value, and Beeper value.
- F5 RS232 and Mini Printer Output Setting: Configure transmission mode, baud rate, printer language, date printing order, and input year/month/day/hour/minute/second.
- F6 Exit Function: Exit settings.
- F7 Internal Value Display Mode: Display internal value.
- F8 Weight Hold Mode Setting: Configure hold functions (No hold, Max value hold, Stable value hold, Animal scale hold).
- F11 ID Code Setting: Set machine ID code (01-99). "00" means no ID transmission.
- F12 Print Key Function Setting: Configure print key behavior (print totalized weight, current weight, or current weight within OK range).
- F14 Customized Header Setting: Configure printing header elements (TICKET NO., G, T, PT, N, P/N, S/N, DATE, TIME).
Maintenance Features
Battery Maintenance:
- The storage battery is free-maintaining; no electrolyte replenishment needed.
- Recharge every 3 months for 8-10 hours to prevent failure.
- Battery temperature should be below 45℃.
- Avoid over-current discharge.
- Disconnect battery if not used for a long time.
- Do not short battery terminals.
- Battery replacement should be done by specialized personnel, ensuring correct anode/cathode connections (red cable to anode, brown/black cable to cathode) to prevent damage.
General Care:
- Operate/charge in an open area.
- Do not squeeze power cord.
- Keep scale in a cool, dry place, away from high temperatures and insect infestation.
- Avoid impacting or overloading the scale.
- For long-term storage, clean and store in a plastic bag with a desiccant sachet.
Error Messages:
- oL: Weight exceeds 9 divisions of maximum capacity.
- E1: Zero value after power on is over +10% FS.
- E2: Zero value after power on is less than -10% FS.
- E4: Unstable zero return, unstable over 10 sec. Press →0← to leave.
- E6: Zero is too high when calibrating (over internal value 350,000).
- E7: Zero is too low when calibrating (under internal value 80,000).
- E10: Scale is not level (with level detector equipment) or weight < -20d without tare/pretare.
Firmware Version Check:
- Turn on scale, hold -O- during countdown to display firmware version (e.g., 02018).
- Turn off scale, turn on, hold backlight key during countdown to display maintenance number (10X).
Low Power Alarm:
- Flashing + symbol indicates batteries need recharging.
- Scale automatically turns off after 5-10 hours (without backlight) or 1-2 hours (with backlight) after the low battery warning symbol appears. Recharge fully before operating.
- Recharge immediately when the symbol appears to maintain weight accuracy.
Printer Installation (Appendix 3):
- Roll Paper: Use designated paper (44.5 ± 0.5 mm width, 50 mm internal diameter). Fix into paper entrance, cut edge, install parallel to printing location using Feed key. Avoid folding/breaking paper.
- Uninstall Roll Paper: Cut paper at entrance, pull out from exit.
- Paper Jam Solutions: Uninstall paper, use nippers to clear wastepaper.
- Ribbon Installation: Use designated ribbon (ERC-05). Uninstall roll paper first. Turn and tighten ribbon. Sway ribbon to proper location. Reinstall if loosened during transportation.
Load Hook Installation (Appendix 4):
- For FB-630 only, install the load hook according to the provided sequence.