30
G-10
R
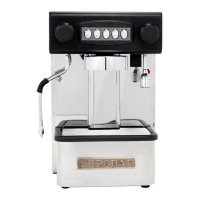
PROGRAMMING USING THE DISPLAY
Setting the clock: hours, minutes and day
To set the clock, press the 2 Short Espressos button whilst the "Set clock"
message is displayed.
The hours values will start flashing. Increase/decrease the values by pressing the 1
Short Espresso
and 1 Long Espresso buttons (see fig. 08).
With the desired value is reached, accept it the pressing the 2 Short Espressos
button
.
The minutes digits will now start flashing. Increase/decrease the values by pressing
the 1 Short Espresso
and 1 Long Espresso buttons.
With the desired value is reached, accept it the pressing the 2 Short Espressos
button
.
Set the day of the week in the same way ( , and ).
After setting the values, pressing the 2 Short Espressos button
accesses the
Auto On/Off menu.
Clock adjust
hh:mm Day
Fig. 08
Accessing the second menu level
Doses setting
Select within 30s
Fig. 06
With the machine ON, press the Continuous Dispensing button on the
left-hand Drink buttons and hold it down (for over 8 seconds) until the dose-
programming menu is displayed. All the Drink buttons lights will be turned on and
the Continuous Dispensing button light will ash. The display will be as shown in g. 06.
Hold down the Continuous Dispensing button until the menu displays the
"Set clock" option (see g. 07).
This provides access to the second menu level.
Set clock
Fig. 07