EN
X
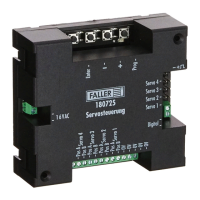
Press the »Prog« key.
»Prog« LED lights up. The programming mode is activated.
X
Press the »-« key.
The digital programming path is activated.
»Servo 1« and »Servo 2« LEDs are flashing.
X
Using the »+« and »-« keys, select the required data format.
When »Servo 1« and »Servo 2« LEDs are flashing , the DCC data for-
mat has been selected.
When »Servo 3« and »Servo 4« LEDs are flashing, the Motorola data
format is selected.
X
Press the »Enter« key.
»Servo 1« LED lights up.
X
Using the »+« and »-« keys, select the port of the servo that you want
to preset.
X
Press the »Enter« key.
ADVICE: If the servo does not move after the next step, this means that polar-
ity is reversed at the connector. In such a case simply rotate the plug by 180°.
X
On the digital control unit press one of the two keys of a coil item address
that is intended to move the servo later on.
The servo briefly moves.
You have specified the control keys on the digital control unit.
ADVICE: The keys that have to serve as temporary »+« and »-« keys during
the programming procedure may not under any circumstances be identical
with the control keys you have selected previously. Select for each tempo-
rary »+« and »-« key a particular coil item address.
X
On the digital control unit press the key that will have to serve as tem-
porary »+« key during the programming procedure.
The servo briefly moves.
X
On the digital control unit press the key that will have to serve as tem-
porary »-« key during the programming procedure.
The servo briefly moves.
X
Using a control key on the digital control unit, set the servo to its first
hold position (hold position “red” for instance).
X
Using the temporary »+« and »-« keys on the digital control unit, pre-
set the first hold position of the servo (hold position “red”).