How to Install the Light Bulbs
1. Remove the preassembled screws and take off
the 4 light caps in the motor assembly. Retain the
screws and light caps for later. (Figure 1)
3. Put the light caps back and securely tighten the
previously removed screws of light caps. (Figure 3)
Light Cap
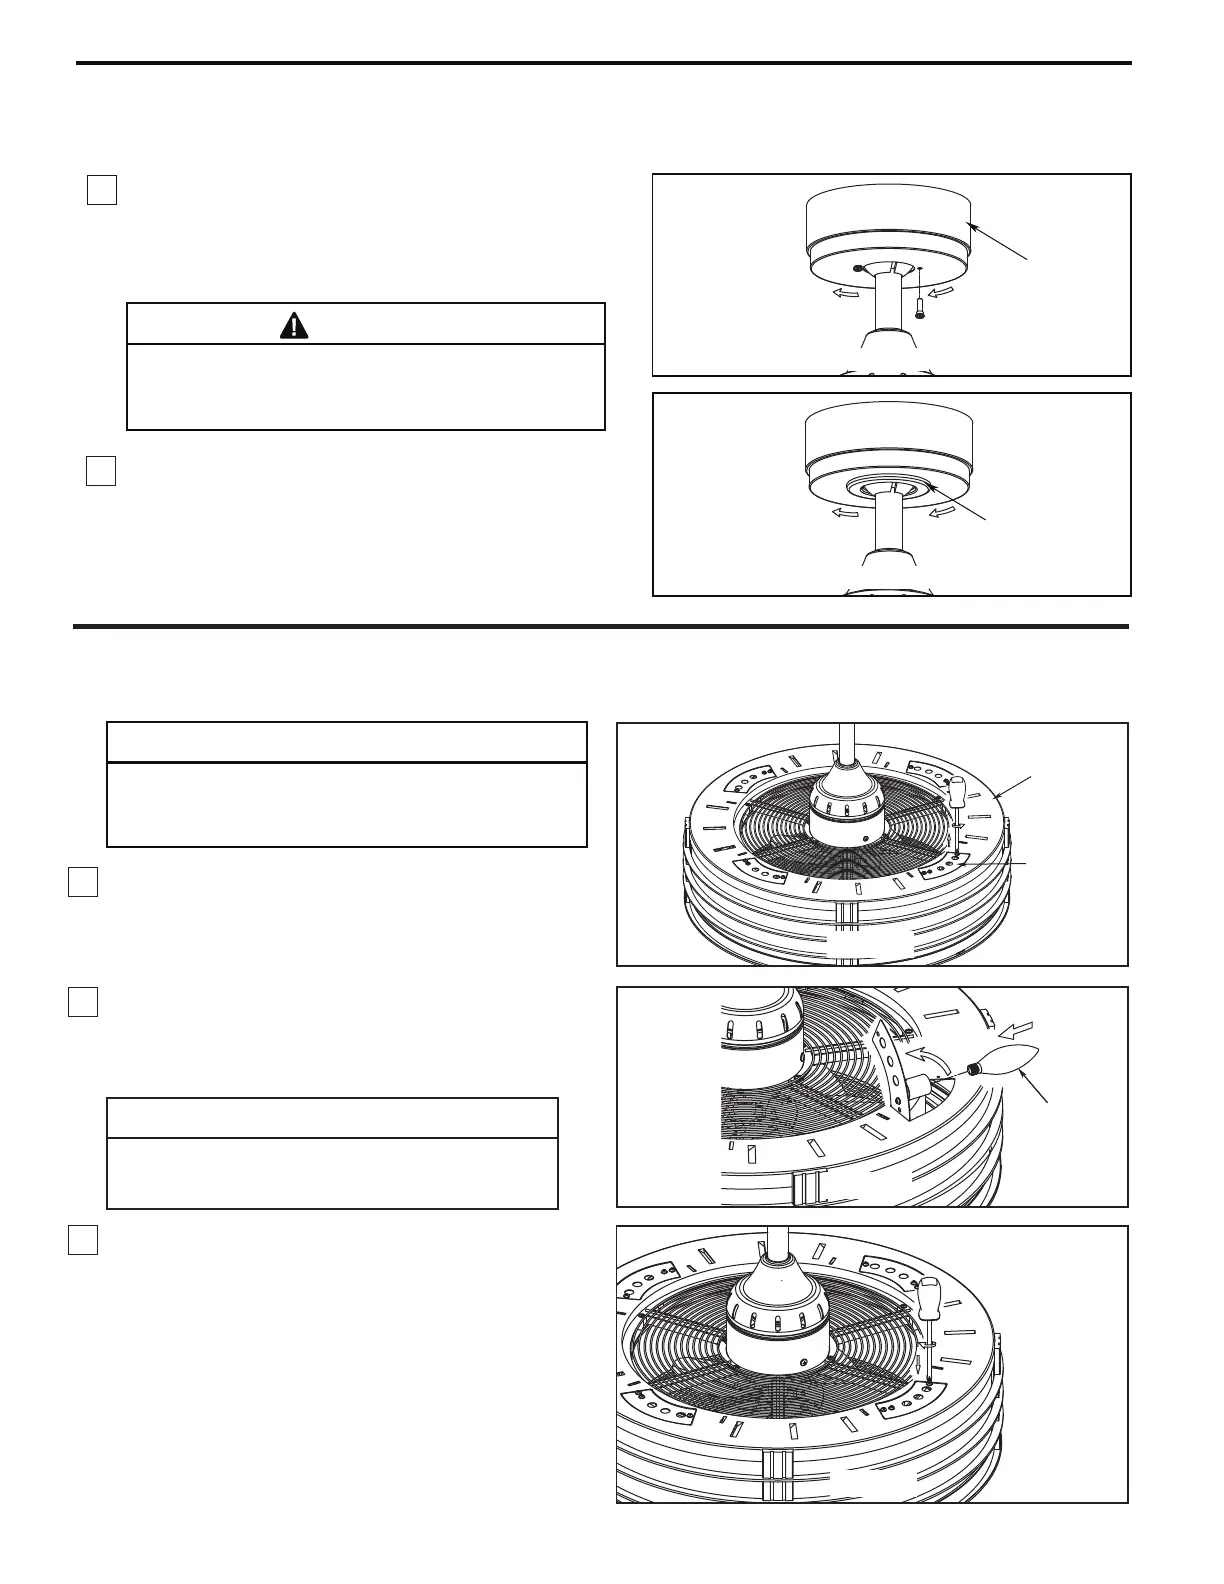
How to Install Your Canopy Housing
2. Securely attach and tighten the canopy screw cover
over the shoulder screws in the hanger bracket utilizing
the keyslot twist-lock feature. (Figrue 2)
WARNING
To avoid possible fire or shock, make sure that the
electrical wires are completely inside the canopy
housing and not pinched between the housing and the
ceiling.
NOTE: This step is applicable after the neccessary wiring is completed.
Canopy Screw
Cover
Figure 2
Ceiling Canopy
Figure 1
Motor
Assembly
Bulb
Figure 3
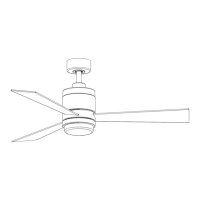
Figure 1
Figure 2
Bulb
12
1. Assemble canopy by rotating key slot in canopy over
shoulder screw in hanger bracket and care not to pinch
the wires.
Tighten shoulder screw. Fully assemble and
tighten second shoulder screw that was previously
removed. (Figure 1)
2. Install bulbs. (Figure 2)
NOTE: When relamping is required, USE ONLY
MAX 4W, TYPE E12 DIMMABLE LISTED LED
(LIGHT) BULB.
RISK OF FIRE. USE ONLY LED LAMPS IN THIS
LIGHT KIT. INCANDESCENT AND HALOGEN LAMPS
MAY CAUSE SEVERE THERMAL DAMAGE.
CAUTION
CAUTION
To reduce the risk of electric shock, disconnect the
electrical supply circuit to the fan before installing
your light kit.

 Loading...