11
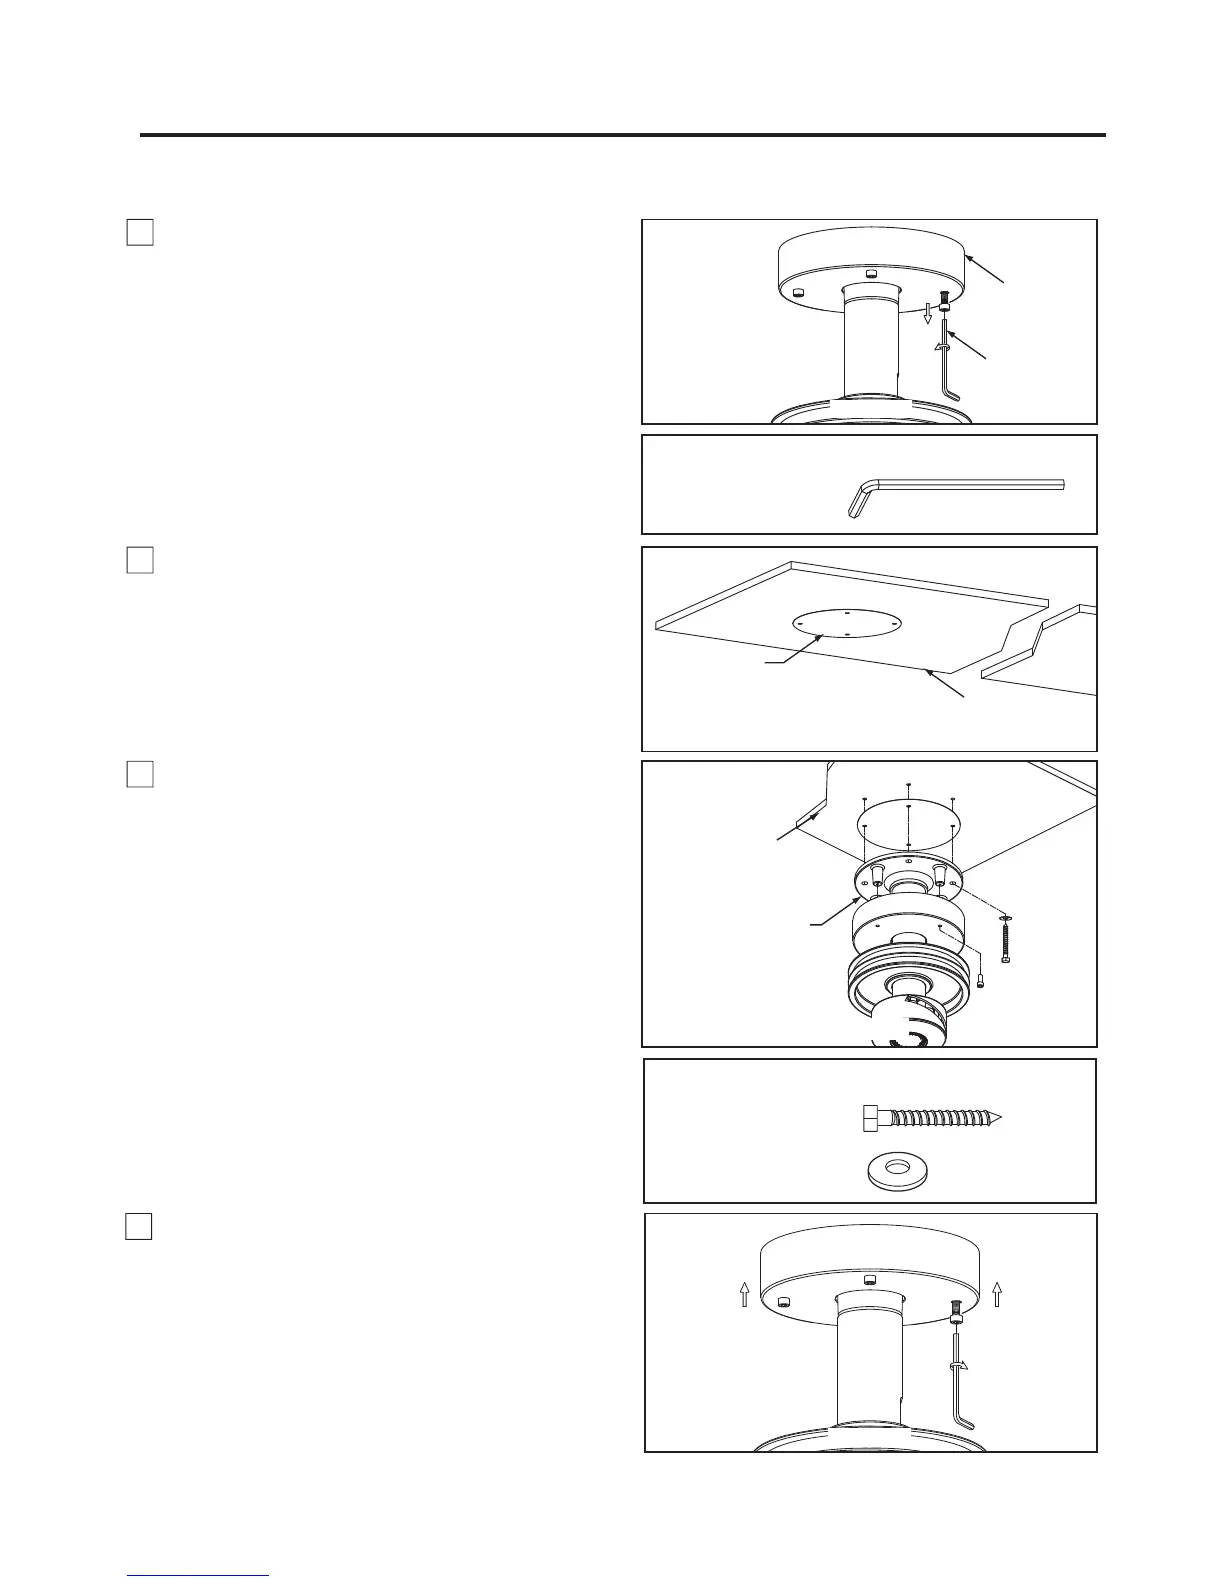
How to Hang Your Head Assembly
1. Remove the four screws from the pulley assembly
mounting cover by using the supplied allen wrench.
Retain the screws for reinstallation in Step 4. (Figure 1)
2. Paste the pilot hole paper onto the plywood. (Figure 2)
3. )LUVWGULOOÝSLORWKROHVLQWRWKHSO\ZRRGEDVHRU
supporting member to prevent splitting or cracking.
0RXQWWKHSXOOH\DVVHPEO\RQWKHFHLOLQJZLWKÝ[Ý
lag bolts and flat washers. The lag bolt will pass through
the flat washer and into the building structure. (Figure 3)
Pulley Assembly
Mounting Cover
Allen Wrench
Plywood
Pilot Hole Paper
ALLEN
WRENCH
1/8Ŋ x 60 x 20 mm
HARDWARE USED:
x 4
x 4
FLAT WASHER
LAG BOLT
HARDWARE USED:
ŊZŊ
4. Assemble the pulley assembly mounting cover using
the previously removed screws and securely tighten all
screws. (Figure 4)
Figure 4
Figure 1
Figure 2
Pulley Assembly
Figure 3
Plywood (¾Ý thick min.)
Backing Secured to
Structural Member