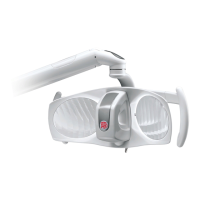
ALYA INSTALLATION AND USER’S MANUAL - EN
Edition 2.0 Sept 2018 Pag. 21 di 32
4.2 SWITCHING ON/ OFF AND ADJUST THE LIGHT INTENSITY
Make reference to 1.1 for the symbols for switching and adjustment.
4.2.1 Light / Head with Joystick
4.2.1.1 Switching on Dental Light
To switch on and off the light, press and release the joystick lever using the right or left side.
The light intensity on switch on will always be the last used before switch off.
4.2.1.2 Switching on Dental Light with Theia Tech
With the same procedure used for the Dentl Light, the intensity of the light on the rear arm will change in
syncro-mode with the light of the head.
The light on the fixed arm can be switched on/off using the button on the arm also.
If the light on the arm is switched on after the light on the head, it will be automatically synchronized.
If the light on the arm is switched on with the light of the head switched off, it will be automaticall setted at
the maximum intensity.
4.2.1.3 Adjustment:
a) to reduce light intensity keep the lever pressed on the joystick on the left side (light rear view) until the
desired intensity is reached.
On reaching the minimum intensity, you will hear an acoustic signal (1 beep).
a) to increase light intensity keep the lever pressed on the joystick on the right side (light rear view) until the
desired intensity is reached.
On reaching the maximum intensity, you will hear an acoustic signal (1 beep).
c) to skip to maximum intensity, press and release the joystick lever using the front or rear side. On
subsequent pressing on the front or rear side, the light intensity will return to the previous one.
The light on the fixed arm is adjusted in syncro mode with head, it cannot be adjusted independently.
4.2.2 Dental Light / Dental Light Head Head WITH PROXIMITY
4.2.2.1 Switch on/off Complete Light:
To switch on or off, approach the sensor once up to a maximum distance of 3 cm.
4.2.2.2 Switch on/off Complete light with Theia Tech:
same operations of the complete light plus the light on the fixed arm switch on and/or off in sync with that
of the head.
4.2.2.3 Adjustment of the light for Complete light:
To adjust light intensity, you need to stay still near the sensor until the desired intensity is obtained.
Adjustment enables passage from the maximum value to the minimum value again to the maximum. On
reaching the maximum intensity, you will hear an acoustic signal (2 beeps). On reaching the minimum
intensity, you will hear an acoustic signal (1 beep).
4.2.2.4 Adjustment of the light for Complete light with Theia Tech
same operations of the complete light plus the light on the fixed arm will adjust in sync with that of the head.
4.2.3 Light / Complete light with Theia Tech / “ALYA” head WITH REMOTE CONTROL
4.2.3.1 Switch on / Switch off / Adjustment
- To switch on and/off press and release button “A”.
4.2.3.2 - Adjustment:
a) to reduce the light intensity keep button “A” pressed until reaching the desired intensity.
On reaching the minimum intensity, you will hear an acoustic signal (1 beep).
b) to increase the light intensity keep button “A” pressed until reaching the desired intensity.
On reaching the maximum intensity, you will hear an acoustic signal (2 beeps).
c) to immediately reach the minimum light intensity, press button “B”.
On reaching the minimum intensity, you will hear an acoustic signal (1 beep).
Subsequent push of the button will bring the light back to the previous light intensity selected.
4.2.4 “ALYA” with Syncro command for “pairing” with Room Light
Where provided, Alya can be connected by wireless connection to the Faro Room Light, in order to create a
synchronized lighting system, called "Syncro". The procedure to create this connection is called “pairing”.
If more than one Room Lights is installed in the cabinet, ensure that the other Room Lights are turned off or
have been on for more than 60 seconds.
To carry out the “Pairing”, proceed as follows:
1. Switch on the Faro Room Light you wish to pair.
The Room Light sets itself for a Pairing connection, waiting for an input from the dental light for a maximum
time of 60 seconds.
2. Within the 60 seconds, press the “synchro” button on the dental lamp for at least 3 seconds, but not for
more than 6 seconds, otherwise the procedure will be cancelled.
On receipt of the “Pairing” request by the dental lamp, the Room Light activates the blue LED on the
aluminium body. If the blue LED does not switches on, it is possible (within 60 seconds from switching on) to