ALYA INSTALLATION AND USER’S MANUAL - EN
Edition 2.0 Sept 2018 Pag. 8 di 32
The “Theia Tech” light version also has a local command intended only to provide on/off on the fixed arm.
Once the local command is switched on, the light automatically synchronises with the level of intensity. If
the light of the head is switched off, the light on the rear arm switches on to maximum intensity.
On switching on the light on the head, the light on the arm will synchronise automatically within 3 seconds.
Maintenance is facilitated thanks to application of the new technologies which take into consideration the
various needs for safety, ergonomics and hygiene.
The handles can be removed and sterilised. Follow the procedures defined in the specific section.
For the electrical connections, comply with the instructions supplied in the installation paragraph.
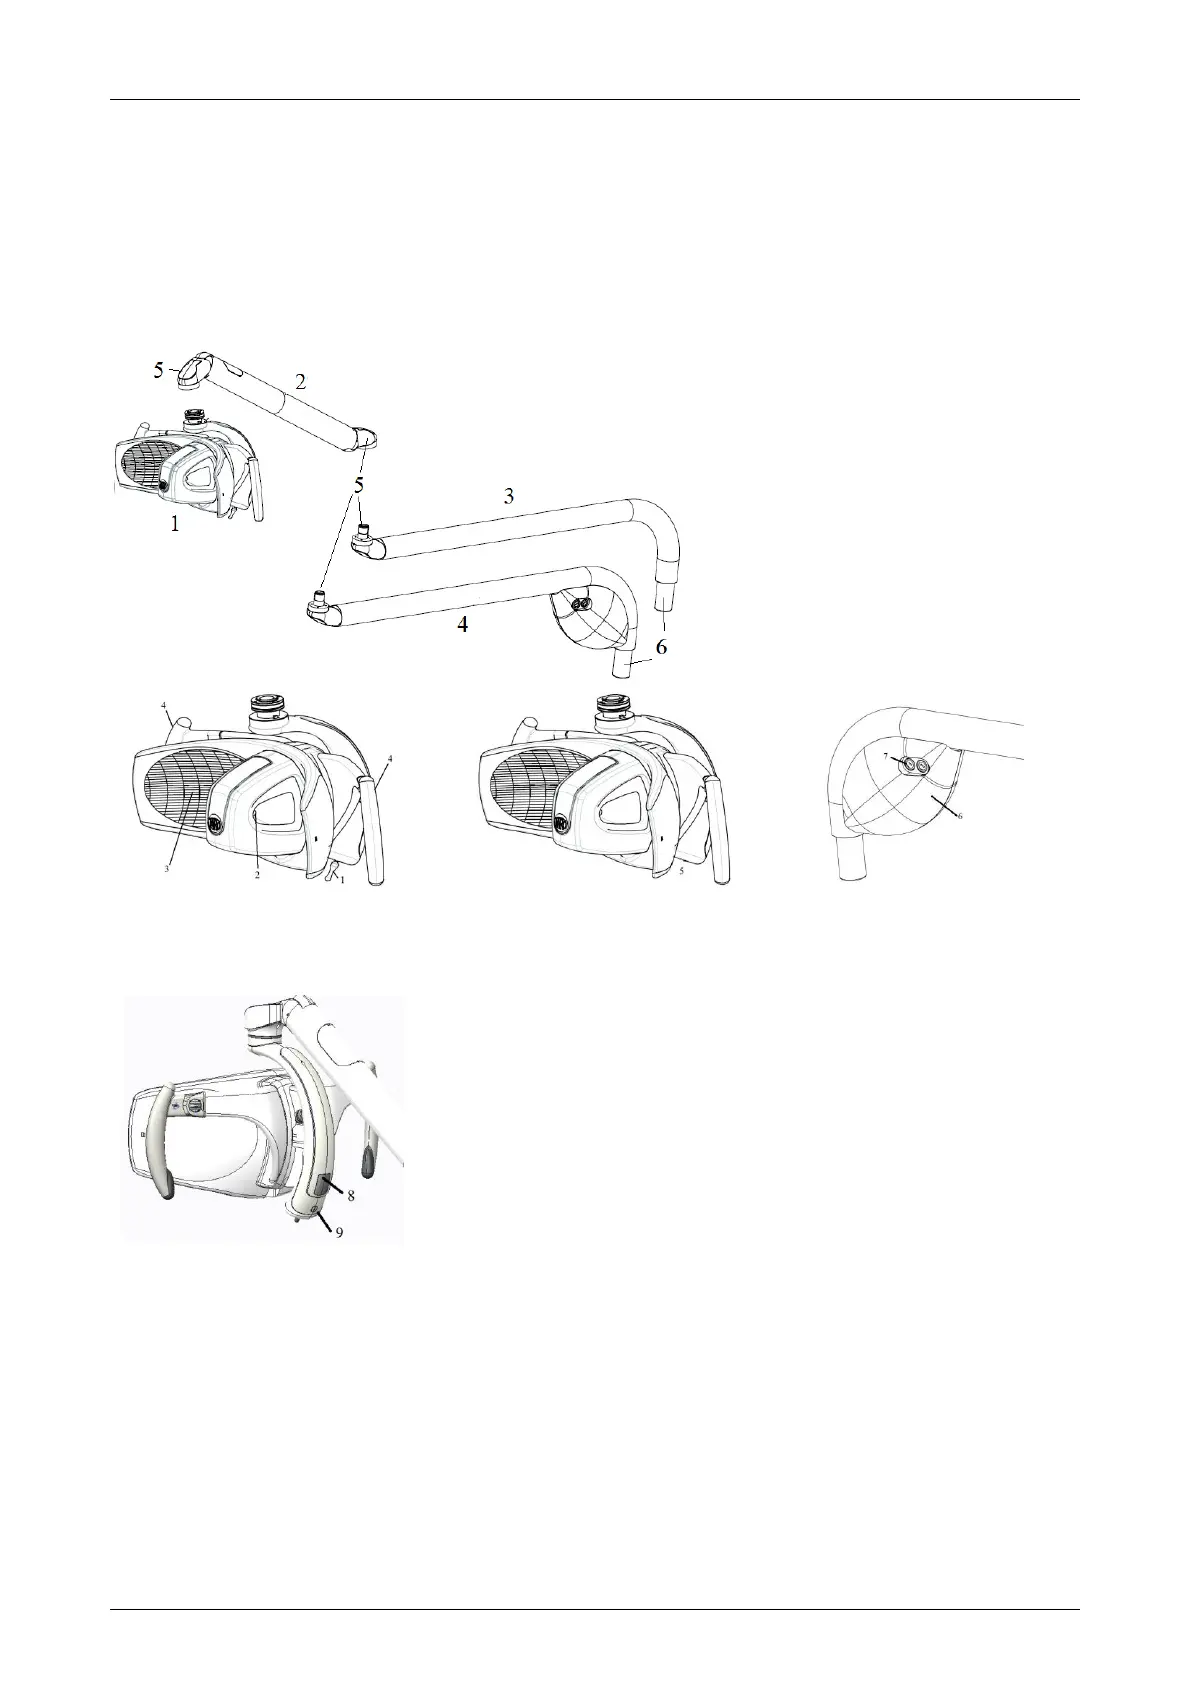
2.2 DESCRIPTION OF THE PARTS
1- Head light
2- Spring Arm (central arm)
3- Rear arm o trafo (optional
Theia Tech).
4- Rear arm with trafo
5- Joints
6- Pin of connection to dental
unit or applications
1 – Joystick
2 – Secundary Lens
3 – Reflecting Parabola
4 – Handles
6 – Trafo group
7 – Fuses
8 – Electronic Board cover
9 – Symbols for switch and adjustment
2.3 DEVICE IDENTIFICATION
The variants on the market are differentiated by:
- Type of device (complete light, complete light with Theia Tech or head)
- Switch on and adjustment interface (Joystick or proximity sensor, for complete lights and head)
- Combined control mode (on-off function, remote control; for complete light and head)
- Type of mounting (combined, ceiling; for complete light only)
- Arms length (for complete light only)
- Power supply (with or without transformer, for complete light only)